Tokyo Disney is magical. Planning it from abroad is the stressful part.

Hotel rooms that can sell out within minutes of the drop. Four different pass systems to learn before you land. Headliners with 100-minute queues, and one wrong call that can unravel the whole day. We live in Tokyo, and we will plan your day around your family, your mobility and your diet, so the hard part is finished before you arrive.

We will plan your day with youRides, passes, meals and breaks, in the order we would do them ourselves. Sorted before you land, so the day itself feels easy.

We will walk you through the 11:00 dropIt is our morning, not your 3am. Step by step, with a backup plan if your room goes.

We check everything ourselvesWe are Aaron and Maya, we live in Tokyo, and we read Disney's Japanese announcements the day they land. Nothing here is second-hand.

Popular guides and help

The pages visitors reach for most: the big guides and the quick ways to get in touch. Jump straight to the one you need.

Planning

The full playbook: booking order, arrival strategy and your first ten minutes inside the gate, for both parks. An hour-by-hour plan for your own day is the $149 checked plan.

Disney hotels

The 11:00 booking drop, how rooms come back after they sell out, and Vacation Packages decoded.

Buying tickets

The 14:00 sale moment, which ticket to buy, and what to do when your card fails, in order.

Pass systems

Premier Access (the paid pass), Entry Request (the free show lottery), Standby Pass (free, for shops) and Happy Entry (early entry for Disney hotel guests) compared on one page.

Premier Access

Current prices, the re-purchase rule and how Fantasy Springs entry works now.

Accessibility

Wheelchair boarding and DAS on one page: how the transfer and evacuation rules work, the ride-by-ride boarding answer for every headliner, free, a one direction route for each park, where to build in rest breaks, and the DAS paperwork playbook for overseas guests: what to show, where, and when.

Dietary restrictions

Allergies, halal, vegan and coeliac: the rules that decide what you can eat, plus maps of every restaurant serving the Special Dietary Menu. What to order, dish by dish, is part of the eating plan we build in our $149 checked plan.

Sensory planning

When a park day feels like a lot: rest rhythms, queue options and a planned exit, without a full day plan.

Disney shopping

Four channels, four catalogues: which shop sells what, and what is exclusive where.

Full FAQ

Straight answers to the questions everyone asks, kept in one place.

About

Who Aaron and Maya are, how delivery works, and the terms in plain language.

Contact

Questions, and the way to start the $799 park day. The $39 guide and the $149 checked plan are bought on the pricing page.

Tell us the tricky part, and we will help

We meet the same three kinds of visitors again and again, and the usual advice skips exactly the parts they worry about most. If one of these sounds like your family, start on its page. Every page is free, and we are here if you want more help after that.

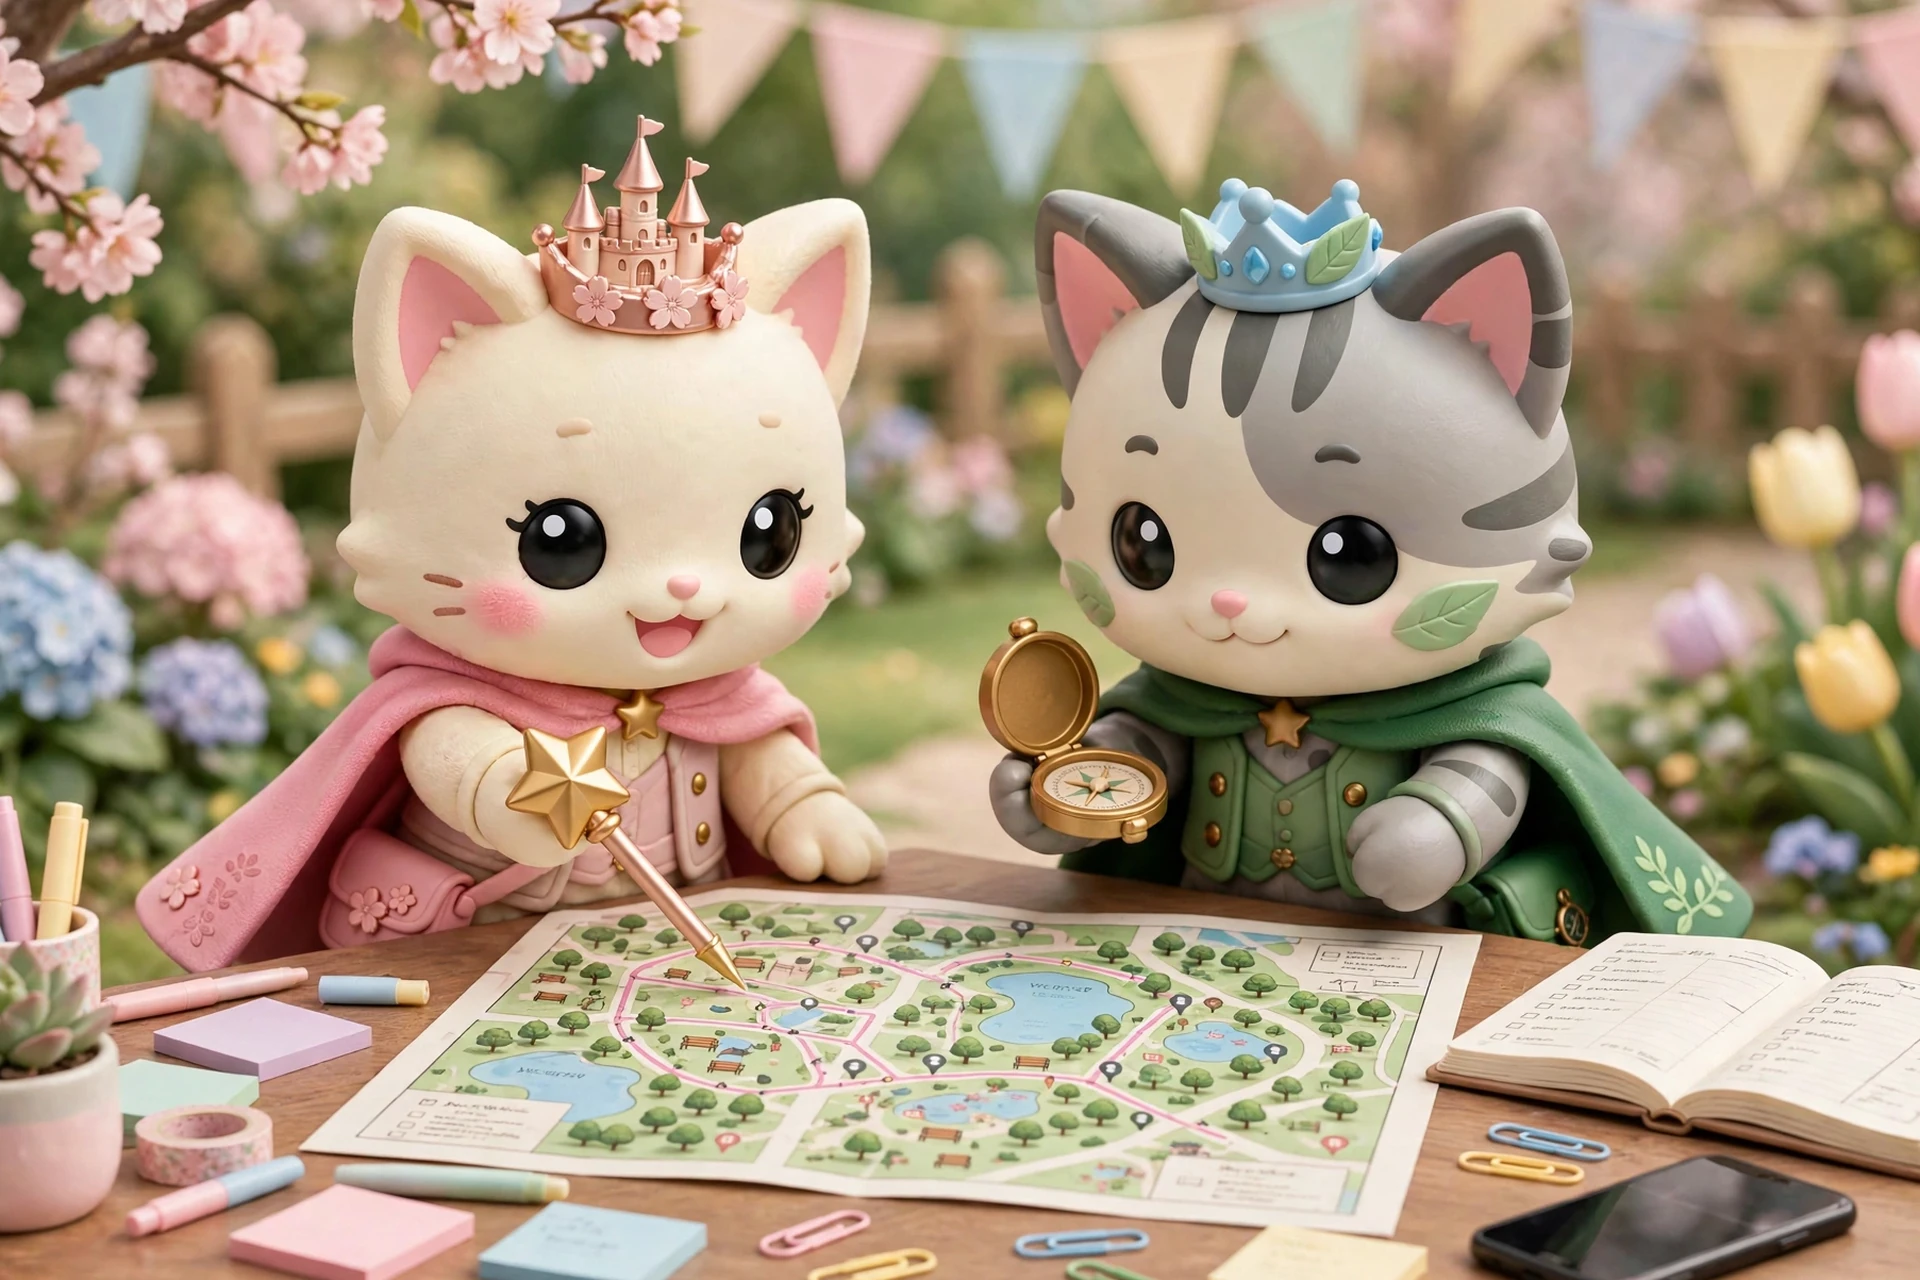
The two Happily Ever Tokyo guide cats in soft 3D at a planning table covered with a park map, an open notebook, a phone and pastel sticky notes

The Overwhelmed Planner

Forty tabs open, blogs arguing with each other, and the feeling that one wrong call could spoil the whole day. We know that feeling, and we will sort it with you: your day planned hour by hour, the booking order, and how to walk in on the morning.

Plan my day
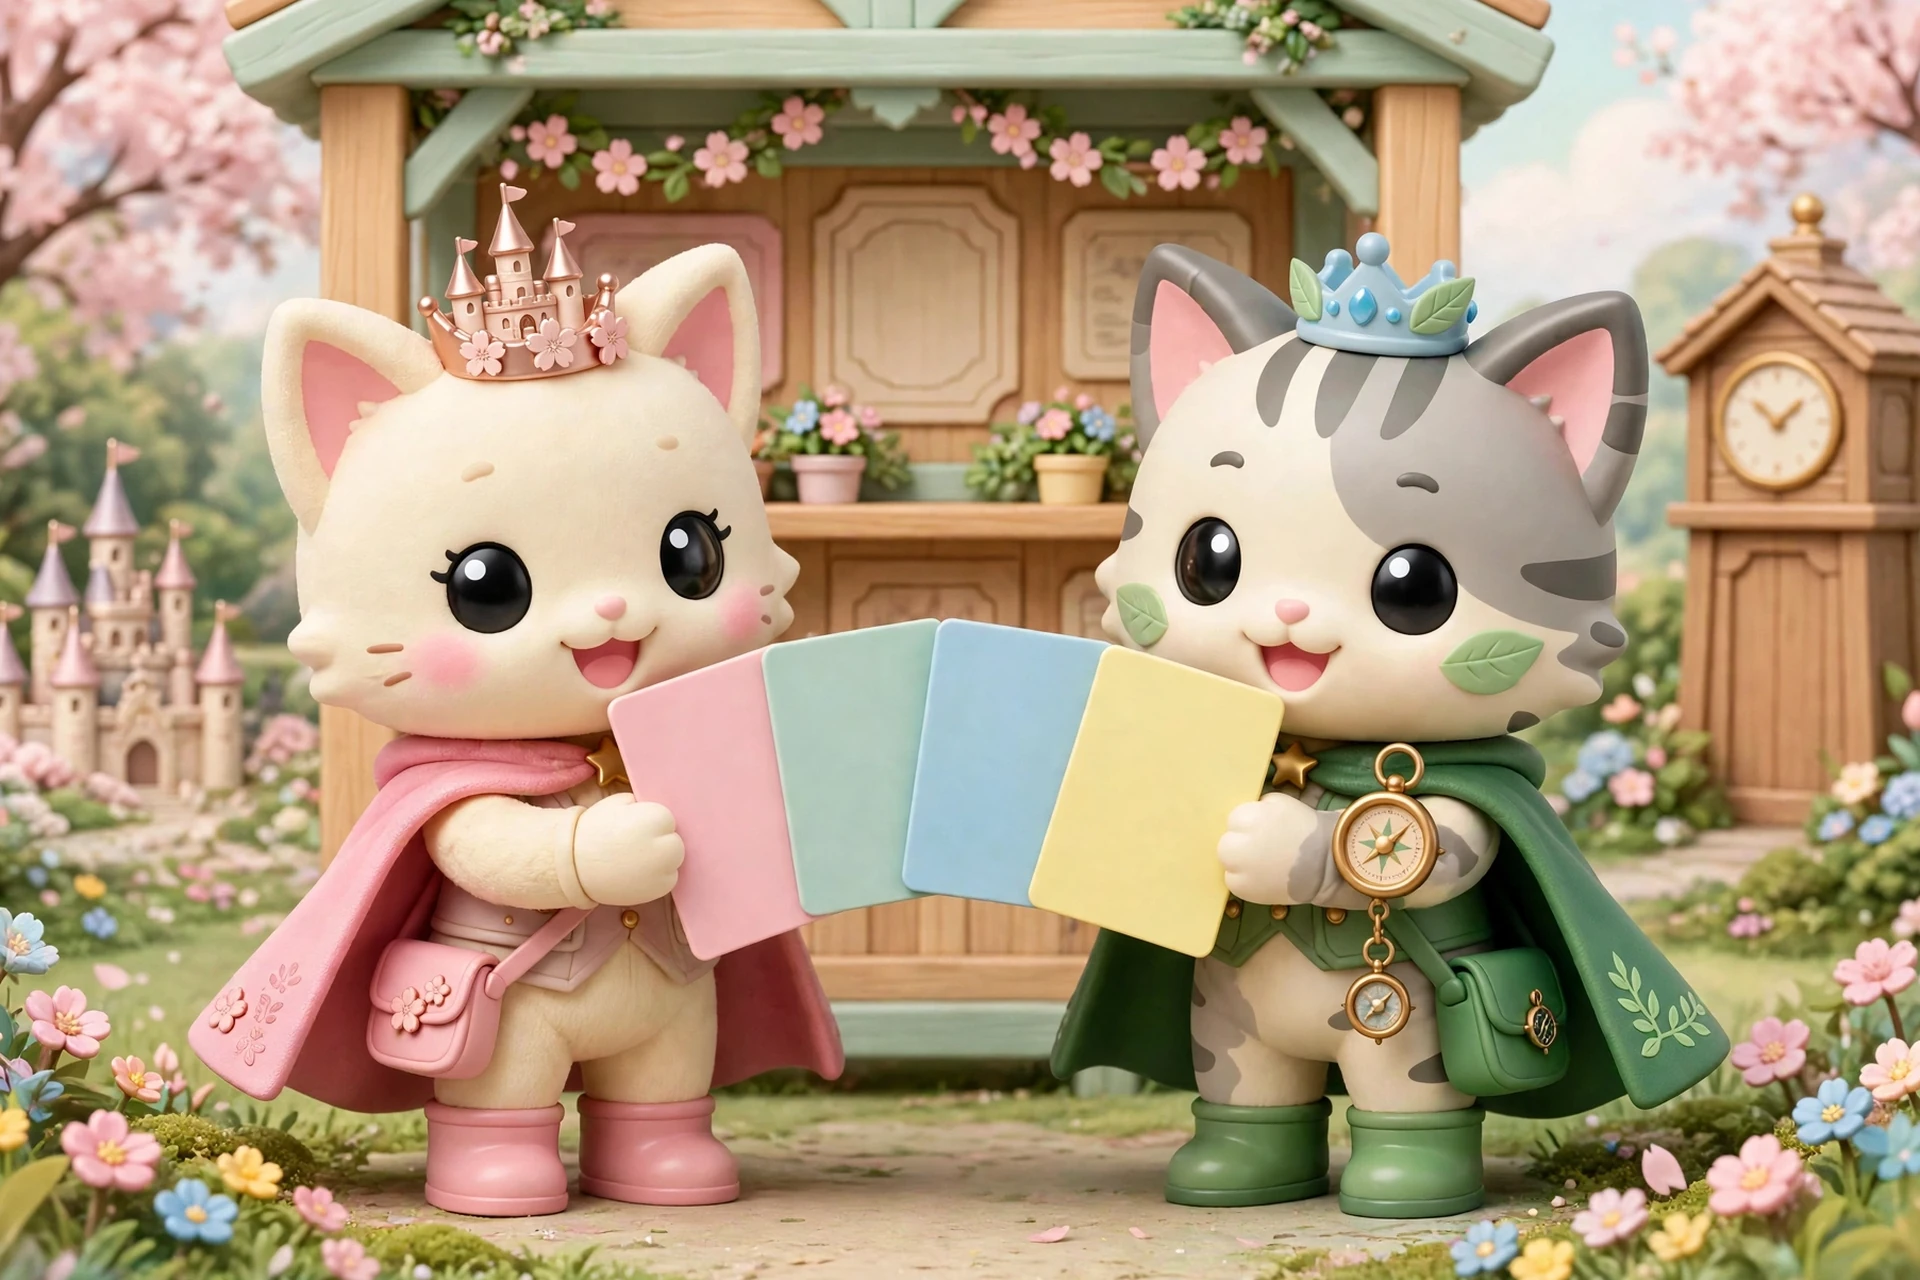
The two Happily Ever Tokyo guide cats in soft 3D on a curved step-free park path with a handrail and flower beds, one holding a folder of paperwork, the other pointing the way with a compass

Wheelchair & mobility

You should never have to guess whether a ride will work for you. We will show you which rides you can do, how the transfers work, the step-free routes and the good rest spots, and we will walk you through the DAS paperwork before you fly.

Accessibility guide
The two Happily Ever Tokyo guide cats in soft 3D standing at a restaurant food display case, one holding up a dietary card

Dietary restrictions

Allergies, halal, vegan, coeliac, diabetes, or a family where everyone at the table needs something different. We will help you find the meals where you can all sit down together and actually relax.

Eating guide

Free tools for your trip

The tools we built for friends who kept texting us their dates at midnight. All free, all running in your browser, nothing collected: pick your days, build your booking timeline, and add up what the paid passes would cost.

Booking timeline builder

Every booking window for your trip on one line, in the order the windows open, in Japan time and yours.

Build my timeline

Premier Access calculator

What the paid passes would cost your group, per person and for the whole trip, in buying order.

Add up my passes

See all the free tools, including the day planner and the DAS document checker.

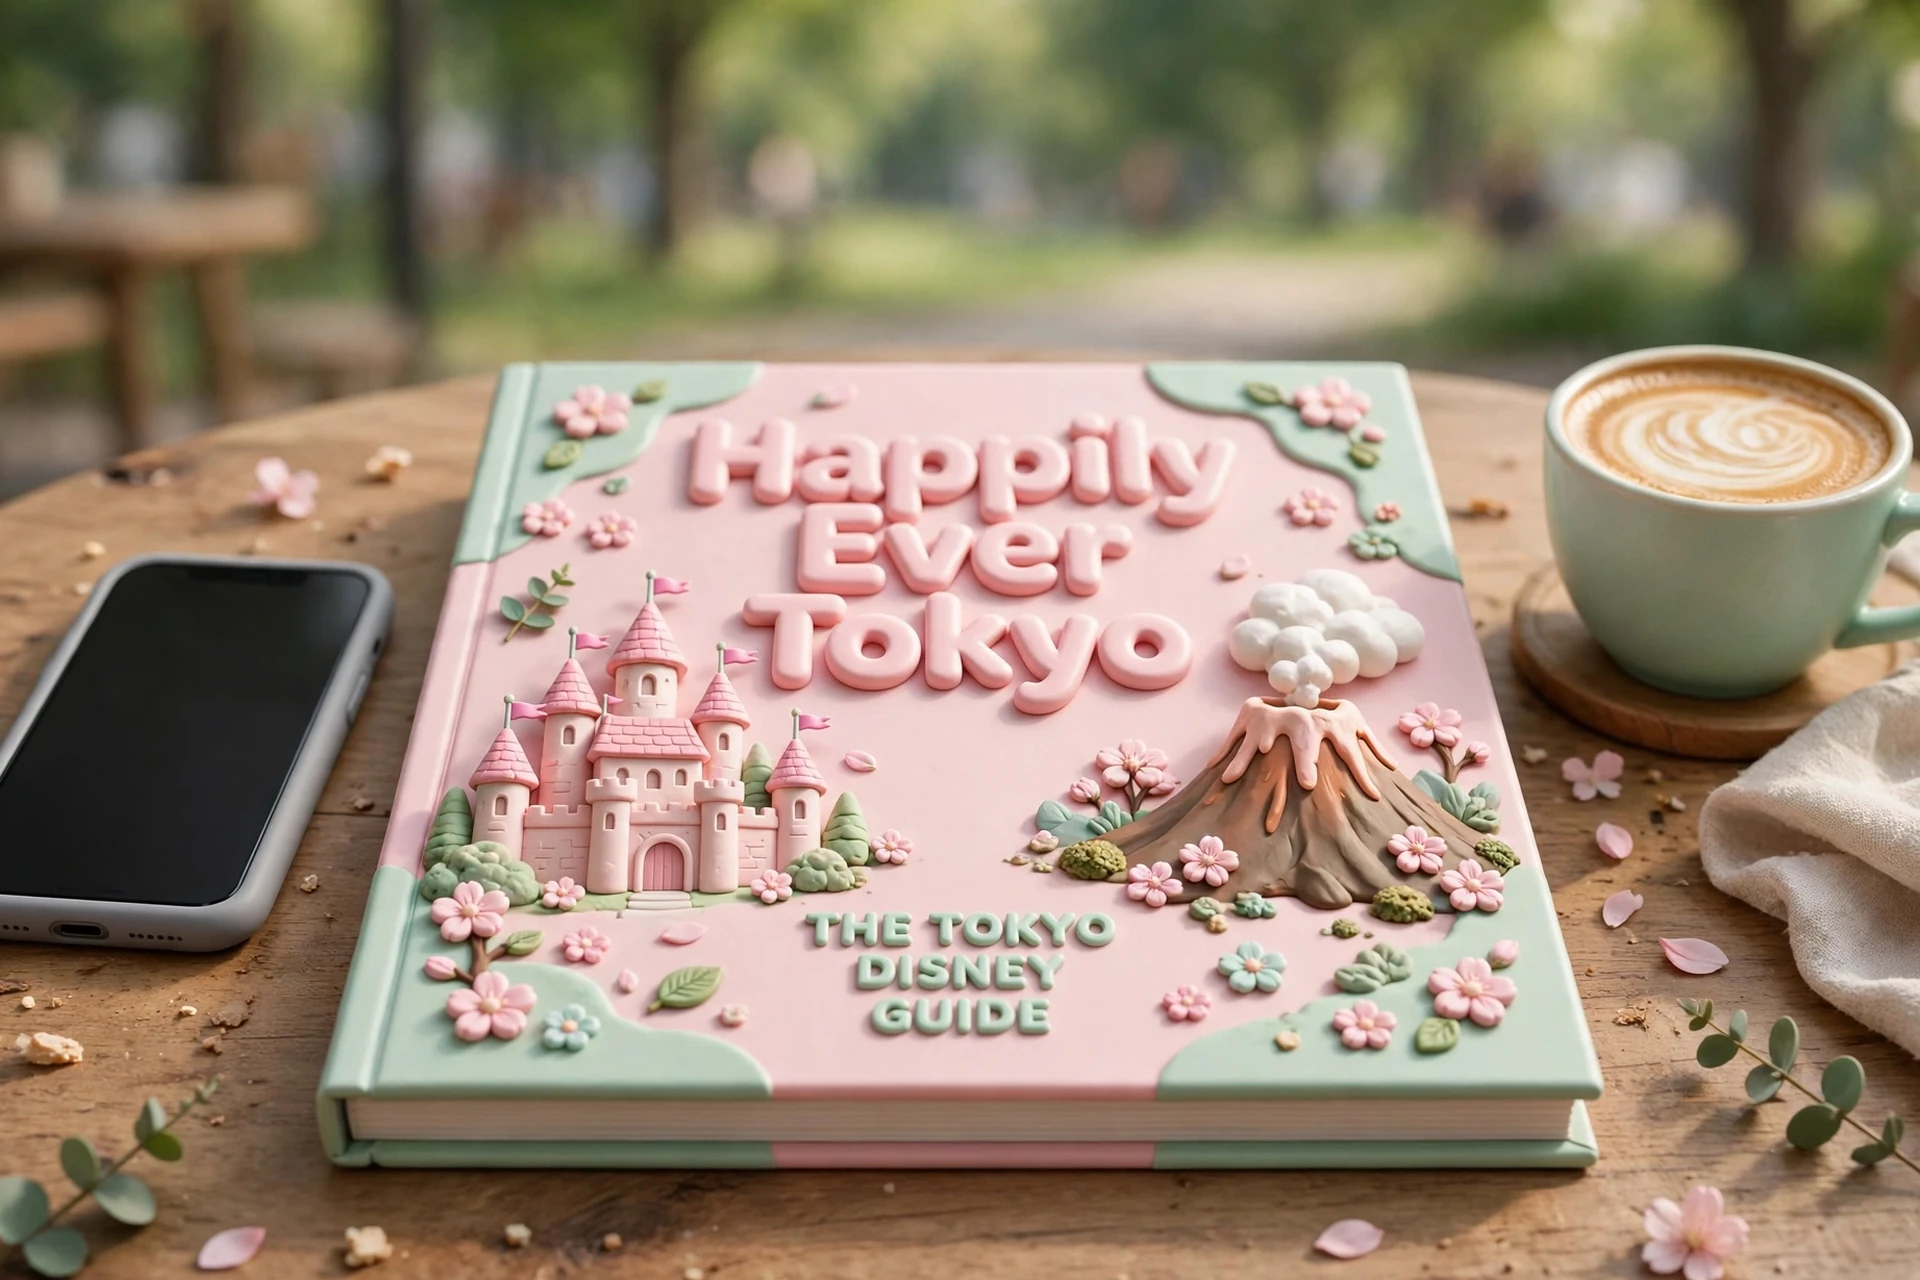
The printed Free Tokyo Disney Guide on a cafe table, its cover reading Happily Ever Tokyo and The Tokyo Disney Guide, beside a phone and a cup of coffee

The free Tokyo Disney guide

4 sheets, both parks, one PDF. No spam, and we never sell your address.

The same sheets we hand to friends flying in, covering the trip in the order you will live it. Inside:

  • Before you go: the rules, explained in plain order, and the booking windows for tickets and hotels
  • How the pass systems work, and what each one is for
  • Park day basics: getting there from the airports, lockers, and where to find show and parade times
  • Both park maps, with the places that matter marked
  • The setup to finish before you fly: the app, your payment card, money and phone battery

A complete flow made for your own party is not part of the free guide. That is personalised work, and it lives in the paid plans. The free guide stays generous on the knowledge: the rules, the booking windows, the pass systems and both park maps are all in there in full.

One tip that lives here on the website rather than in the sheets: rooms that sell out at the 11:00 hotel drop often reappear around 11:40, when abandoned and timed out bookings are released. It is a reported pattern, not a guarantee, and the hotels guide shows you how to be ready for both. Read the hotel playbook.

Check your inbox to confirm, and your free guide follows.

The confirmation email arrives straight away, and confirming takes you straight to the guide, so you can start reading right away.

Pay for the level of help your trip actually needs

Run by Aaron and Maya. We live in Tokyo, visit both parks ourselves, and one of us personally checks every itinerary before your trip.

Launch prices, live now. The $39 Guide Pack and the $149 Checked Plan can be bought now through Stripe. The $799 Park Day Together starts with a call and is invoiced after it.

Pick your level: do it yourself with the Guide Pack · do it with our check with the Checked Plan · do it with us there with Park Day Together.

The Guide Pack

$39

Plus tax at checkout: US$42.90 total in the US

Plan it yourself, with our guide. The complete digital pack, for confident self-planners.

  • The full guide to both parks, written by us, updated whenever the parks change their systems
  • The food companion: the park menus with prices, and a date check so you can see what is on during your visit
  • The full coloring book, print-ready, for kids and grown-ups: for the plane and the queues
  • Magic Japanese Words, our word book for kids: 20 park words with pictures and romaji
  • Delivered by email straight after checkout

One less thing to hold in your head: the whole trip in one pack, in your inbox straight after checkout.

Buy the Guide Pack, $39

One thing to know before you pay: $39 is the price before tax. Stripe adds the tax for your country at checkout and always shows the full total before you confirm: US$42.90 in total for buyers in the United States, and the same total converted to yen at the day's rate for buyers in Japan. The $149 Checked Plan is a flat $149, with no tax added on top. Checkout shows the merchant name Happily Ever Tokyo.

Park Day Together

$799

A local friend for your park day. Exploring the resort together, with one of us beside you.

For one park day.

  • Everything in the Checked Plan, including Hotel Help if you are booking one of the Disney hotels
  • We meet you at the park and explore the day together: the app, the passes, the queues and the Japanese, handled beside you
  • Japanese translation is included all day: menus, signs, announcements and conversations with cast members
  • The price includes the local friend's own park ticket (Aaron's or Maya's). Your own tickets, food and other expenses are yours. One park, one day, one party, and super limited: it is just the two of us, so ask early

No checkout and no commitment: tell us your dates and we will talk it through together first.

Start with a call

Clear notes, before you ask: your own park tickets are not included in any tier; on the $799 park day, the local friend's own park ticket (Aaron's or Maya's) is included. Premier Access availability can never be guaranteed, it depends on the day. We never book hotels or park tickets on your behalf, so you always book in your own accounts. The $39 and $149 tiers are planning and advice; the $799 tier adds a day exploring the park together, with one of us beside you. Delivery and refunds: the pack is delivered by email as digital files, straight after checkout. Your finished plan arrives as a printable PDF within three days, ahead of your planning call. Refunds, in plain language: if your pack does not arrive, or a file will not open and we cannot fix it, we refund you in full. For The Checked Plan, if you change your mind before you send us your intake answers, we refund you in full; once we have started checking your plan, write to us and we will find a fair answer. Park Day Together is arranged on a call and invoiced only after it, so nothing is charged before we have agreed the day together. See the About page for who runs this and the full terms.

Home · Guides · Planning

Plan the whole trip, in the order you will live it

This is the page we wish someone had handed us before our first trips, and it is the exact order we plan in now, for our own family days and for the families who book us. We live in Tokyo, we are in these parks in every season, and we read Disney's Japanese announcements the morning they land, so this page is the official rules translated into the order you will actually live them: five phases, from choosing your dates to the train home. Work through it in order and nothing lands on you before its turn. It is free, start to finish. And if you would rather hand the whole thing over, that is our $149 checked plan: send us your draft and one of us will check it line by line and hand it back as a finished plan for your days.

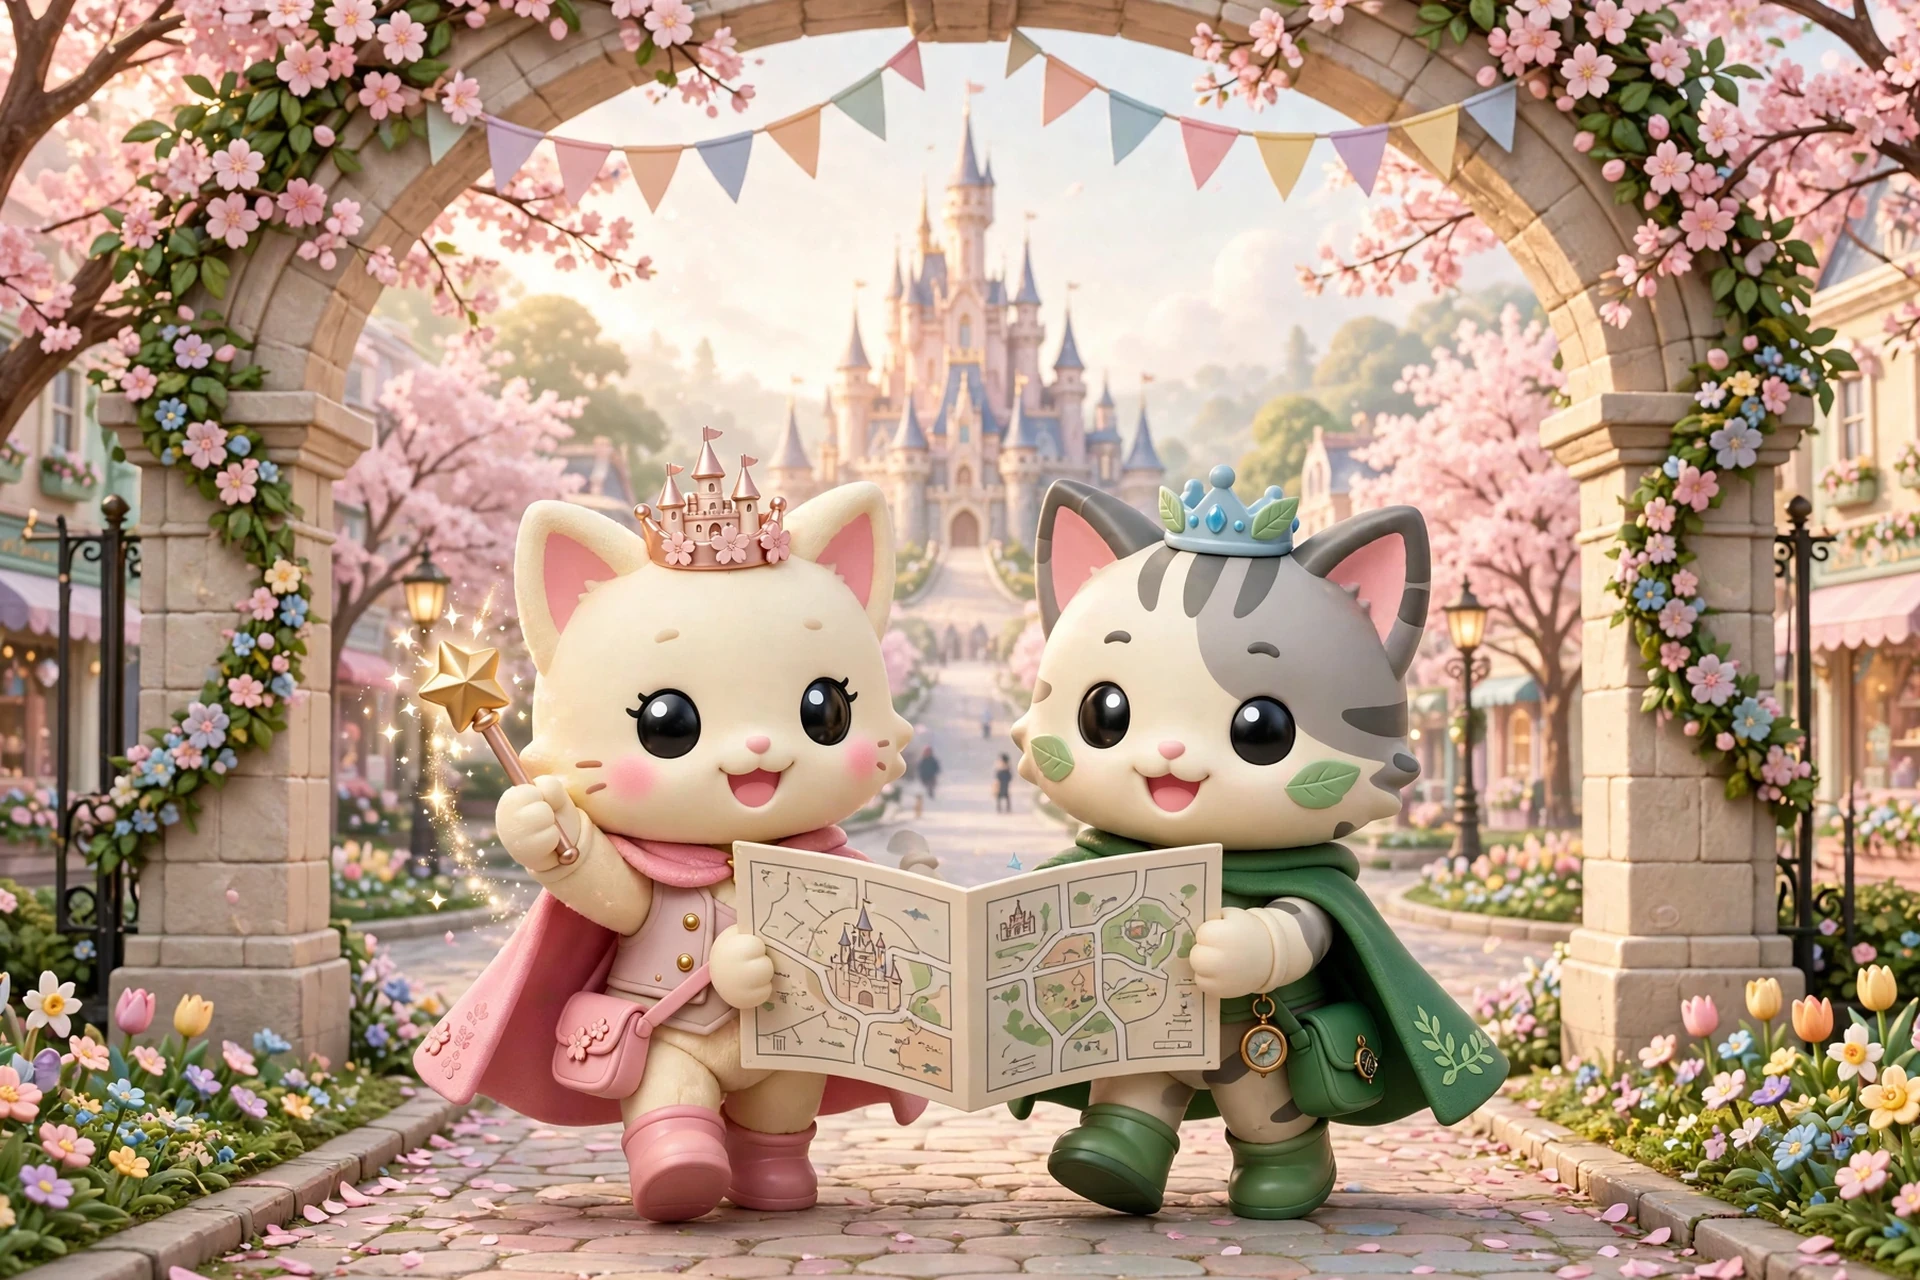
The Happily Ever Tokyo guide cats walking through the park entrance with a map, castle ahead
  1. Before you book

    Dates, parks and where to stay: the decisions everything else is built on.

  2. Book, then set up

    Then book as each window opens, hotels, tickets and restaurants, and set up the app, food, money and phones, and the trip to Maihama.

  3. The week before

    Then, a week out, check park hours, closures and show times, watch the weather, and finish packing.

  4. On the day

    Then the day itself: arrive well, use your first ten minutes inside the gate, and end it well.

  5. If it goes wrong

    And if anything goes wrong along the way, sold-out hotels, passes gone, rain or lost things: what to do first.

Before you book

The decisions that decide everything else, made while you can still change them.

Decision 1

Pick your dates

We start with the Japanese calendar, not the flight sales. The waves that fill these parks have names: Golden Week at the end of April into May, Obon in mid-August, the school summer holidays from late July through August, and the year-end break: local families are off at exactly those times, and the parks feel it. Weekdays outside those waves are usually quieter, Tuesdays to Thursdays most of all, and no day is ever guaranteed quiet.

In summer, heat and humidity shape the whole day here, not just the afternoon: we plan the indoor attractions, the shows and a real seated rest into the middle of it from the start, rather than collapsing into them by 2pm.

Decision 2

Pick your parks and days

If you only remember one thing from us, make it this: Tokyo DisneySea exists nowhere else on earth. It is the park we take our own visitors to first: bigger thrills, the harbour, and Fantasy Springs. Tokyo Disneyland is the classic castle park, gentler and easier with younger kids, and the better first park if this is a small child's first-ever Disney day.

Tickets are for one park per day, and no park hopper is on sale, so the choice is real. With two days, we do one park each day and we do not look back. With one day and older kids or adults, we choose Sea every time; with one day and a four-year-old, we choose Land and we choose it happily.

Decision 3

Where to stay

  • Disney hotels: the six official Disney hotels are Disney Ambassador Hotel, Tokyo DisneySea Hotel MiraCosta, Tokyo Disneyland Hotel, Tokyo DisneySea Fantasy Springs Hotel, Tokyo Disney Resort Toy Story Hotel, and Tokyo Disney Celebration Hotel. Happy Entry into the parks, and rooms that go on sale at the 11:00 booking drop, exactly four months before check in.
  • Official Hotels: the six Official Hotels by Bayside Station: not Disney hotels, no Happy Entry, kinder on price. All six are ranked on the Hotels page.
  • Partner and good neighbour hotels: at Shin-Urayasu and across Tokyo and Chiba: a free shuttle to the parks, no Happy Entry, and often kinder on price. All thirteen are ranked on the Hotels page.
  • Easy off site areas: the Tokyo Station side is simple for trains, and the honest trade is travel time, so count the full door to gate trip, not just the train ride.

Our honest pecking order at the 11:00 drop: MiraCosta and Fantasy Springs go first, in minutes, because they sit inside DisneySea itself. Disneyland Hotel is the grand one across from the Land gate. Toy Story is the playful family pick at Bayside. And know this about Celebration before the price tempts you: it is the budget Disney hotel, it has Happy Entry, but it sits out in Shin-Urayasu, not on the monorail loop: you ride its free shuttle about 15 to 20 minutes each way, so your mornings start earlier than everyone else's.

One change coming that is worth knowing before you book for spring 2027: the Fantasy Springs Entrance, the gate that opens straight into Fantasy Springs beside the Fantasy Springs Hotel, stops being hotel-only on 1 April 2027. From that day, Fantasy Springs Hotel guests still use it all day, Toy Story Hotel guests can come in from 10:00, and everyone with a DisneySea ticket can use it from 11:00. It does not replace Happy Entry, and it will not shorten a single queue, but if you are arriving late morning from April 2027, it is the calmest way we know to walk into DisneySea, straight into Fantasy Springs instead of across the whole park.

The Official six are the locals' open secret: Bayside Station is one monorail stop from DisneySea, the rooms are bigger than most Tokyo hotel rooms, and on sold-out Disney-hotel weekends this is where we point friends first. What you give up is Happy Entry and the Disney theming inside the room; what you keep is your budget.

Decision 4

Buying the tickets

Buy in the official app or on the official website. Tickets are date specific and park specific, and tickets are sold daily from 14:00 Japan time for admissions on the same date two months later.

That means your date opens on its own day, two months before you visit, so choose your date first and be ready at 14:00 on that day. If that date does not exist in the month two months before, tickets are available from 14:00 Japan time on the first day of the following month. Our booking timeline will turn the moment into your own time zone.

Be careful with unofficial resellers. The forums report tickets failing at the gate again and again, a reported pattern we hear often, and it is why we stick to official routes.

Decision 5

Vacation Packages, yes or no

A package bundles the hotel, the tickets and some passes into one booking, and it can cost more than booking the same pieces yourself, so we price it both ways, every time, and so should you. Sometimes the package wins, usually when it is the only way left into a hotel you have your heart set on. Packages open roughly five to six months ahead, in monthly batches: an announced watch window, never a promised date. Treat a package as one option to check, never the default, and never the first thing you buy.

Decision 6

Start the slow homework now

Some homework cannot be rushed at the last minute. DAS paperwork needs lead time, and dietary research means checking restaurants and dishes one by one.

If either applies to your party, start now, while there is still time to get it right. The same head start helps if your party plans around sensory needs, so give that page an early read too.

Book, then set up

Your dates are set, and now the trip starts taking shape in a strict order. We will walk you through booking as each window opens, then the app, the food, the money and the journey in, so nothing lands on you at the last minute.

Step 1

The booking windows, in the order they open

Use our Booking timeline builder: we built it for exactly this step

You do not have to work these windows out by hand, or convert them from Japan time yourself.

  1. Put in your first park date and your hotel check-in date, how many park days you are planning, and where you are staying.
  2. Tap Build my timeline.
  3. The builder lines up every window for your trip in the order the windows open, hotels, tickets and restaurants, each one in Japan time and in your own time zone, with a live countdown, and a calendar file you can save for each one.

It runs entirely in your browser: nothing is collected, stored or sent.

Build my timeline

  1. ~5–6 months before

    Vacation Packages: an announced watch window, never a promised date.

  2. 4 months before, 11:00 JST

    Disney hotels: every room for your check-in date drops at once.

  3. 2 months before, 14:00 JST

    Park tickets: sold daily, for the same date two months later.

  4. 1 month before, 10:00 JST

    Priority Seating restaurants: one booking per meal.

  5. On the day, 09:00 JST

    Same-day restaurant bookings: and your in-app passes once you scan in.

  1. Disney hotels: 11:00 Japan time, exactly four months before check in. Every room for your check in date is released at that one moment, for a stay of up to 5 nights, and the most wanted hotels can sell out within minutes of the drop.
  2. Park tickets: tickets are sold daily at 14:00 Japan time for admissions on the same date two months later. Your date opens on its own day, two months before you visit, so be ready then, not that morning. If that date does not exist in the month two months before, tickets are available at 14:00 Japan time on the first day of the following month.
  3. Priority Seating restaurants: 10:00 Japan time, one month before the day you want to eat. Advance booking runs until 20:59 Japan time the day before, the show restaurants are prepaid in advance, and one booking per meal, breakfast, lunch and dinner, can be held in advance. If a table is gone, same day bookings open at 09:00 Japan time on the day itself.

One second chance to write down now: guests report that hotel rooms gone at the drop often come back roughly 40 minutes later, around 11:40 Japan time, when abandoned and timed out bookings are released. It is a reported pattern, not a guarantee, so treat it as a moment to be ready for, never a promise.

Step 2

Set up the app at home, while nobody is waiting

Why we stress this: be ready to buy the moment you are through the gate

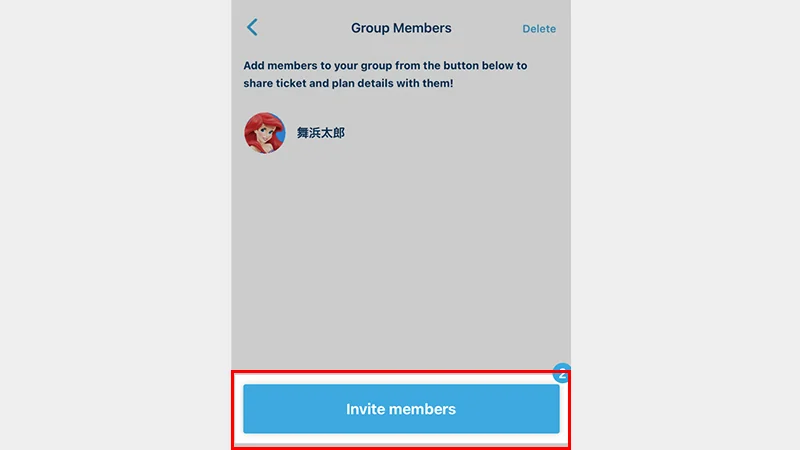
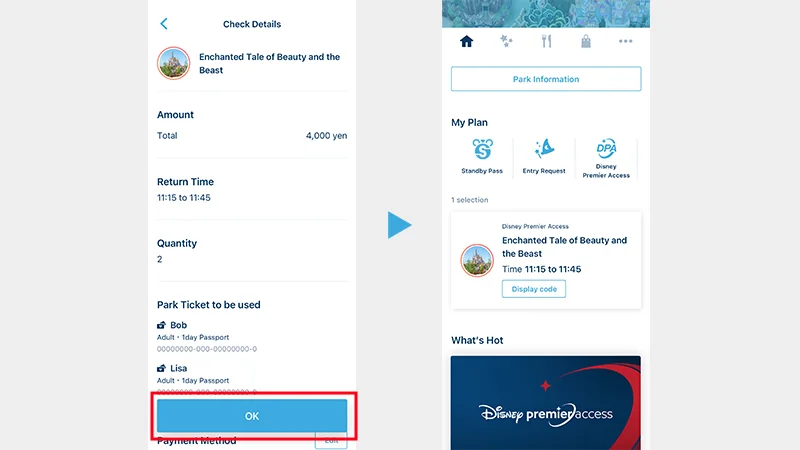
Almost everything worth grabbing opens the second you scan in: your first Premier Access, the Entry Request lotteries, Standby Passes, and the best times go in the first minutes. If you are still typing a card number, or fighting a bank approval, while you stand in the hub, those minutes are gone. Set the app and your card up at home, so buying your tickets is a few taps, and your bank has already seen a Tokyo Disney transaction before the gate.

Get your card into the app before you travel. Start buying a park ticket in the app: tap through to buy a ticket and you will reach the page where you enter your card number. Enter your card details there. If you are not ready to buy, stop before you confirm the purchase: do not confirm it. When we tested this ourselves, the details were still there when we came back to the ticket purchase. Be ready to type the card once more for your first purchase inside the park, though: Disney's own FAQ says a card for Premier Access and Mobile Order is registered only when a payment in the park completes, and the card used for park tickets dated on or after 1 April 2023 does not carry over to those services. One exception: if you have already bought a Disney hotel, a Vacation Package, a Guided Tour or Bibbidi Bobbidi Boutique online, that card may already be displayed when you next pay in the app.

Better still, if you still need your tickets, buy them through the app for real. Some banks flag a Tokyo Disney transaction as suspicious, so tell your bank in advance that you will be making this purchase, That way your card is one your bank has already let through once, not one it stops at the gate.

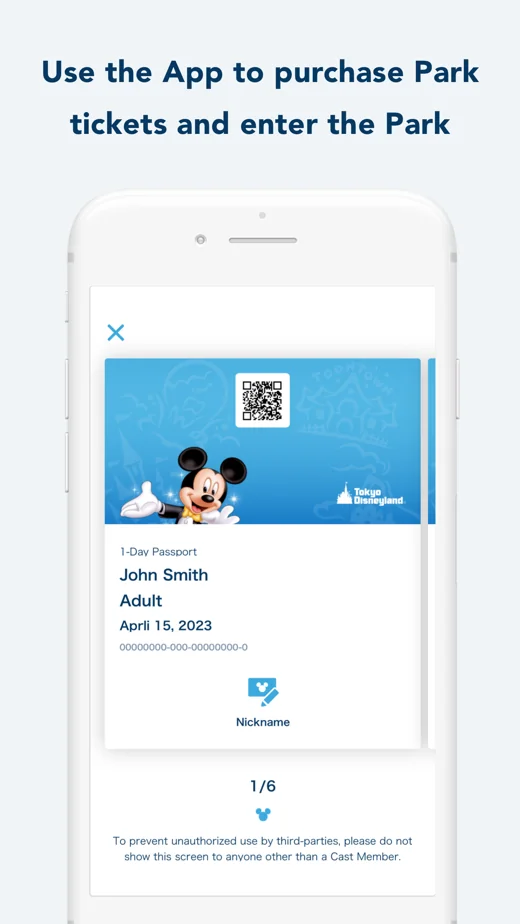
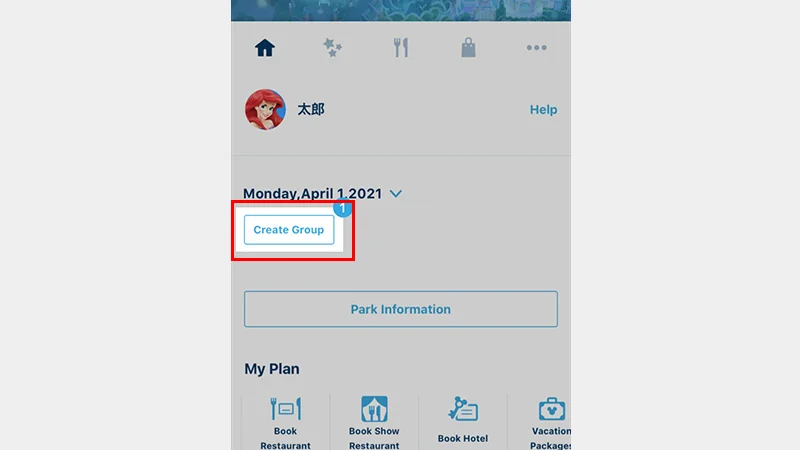
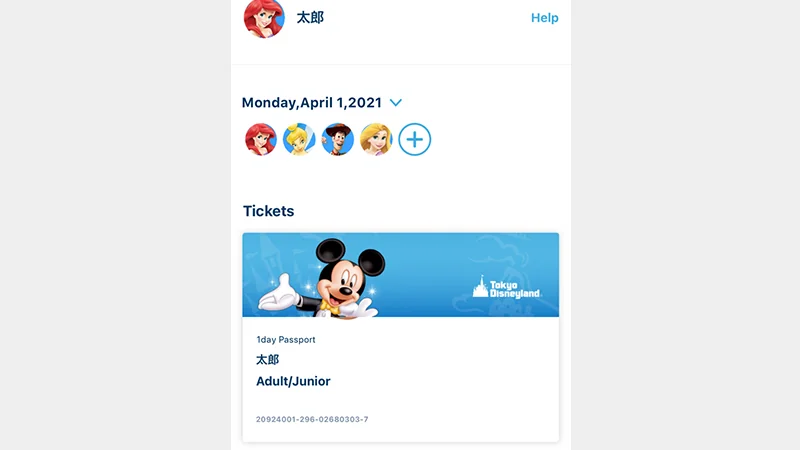
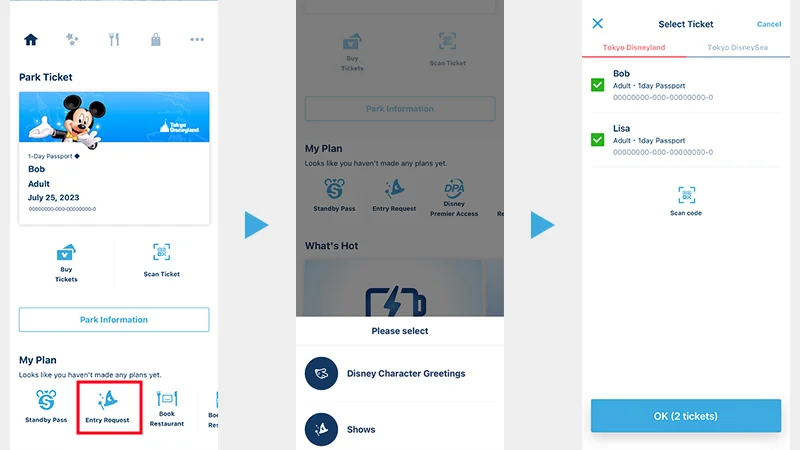
This is the homework we nag everyone about, because it is so much kinder done at your kitchen table. Set up the app at home: one MyDisney account for each adult, every ticket on the right phone, and one Create Group for the whole party. Passes are booked per group in the app, and the group features let one person handle the passes and the Entry Request lotteries for the whole party.

Doing this at the gate, on hotel Wi-Fi, with a queue behind you, is how days start badly. At home, with tea, it takes minutes, and on the day you will thank yourselves for it.

Step 3

What to eat: decide the shape of it now

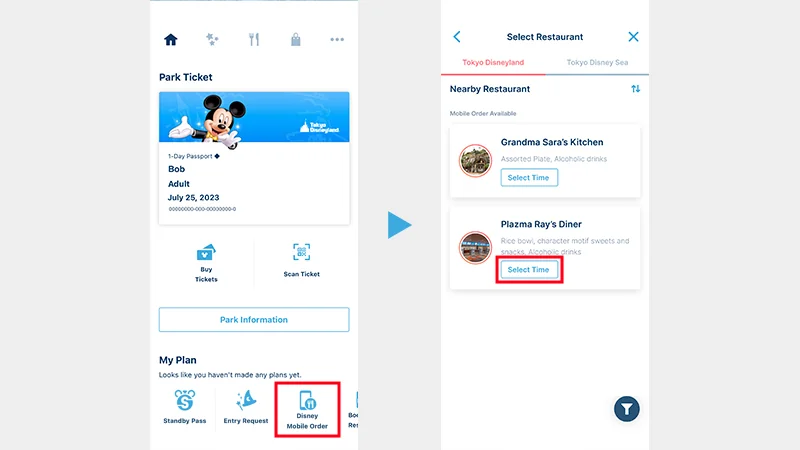
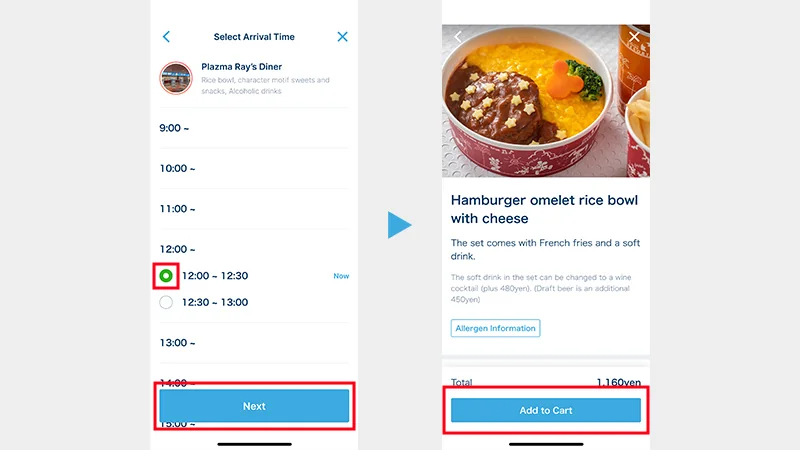
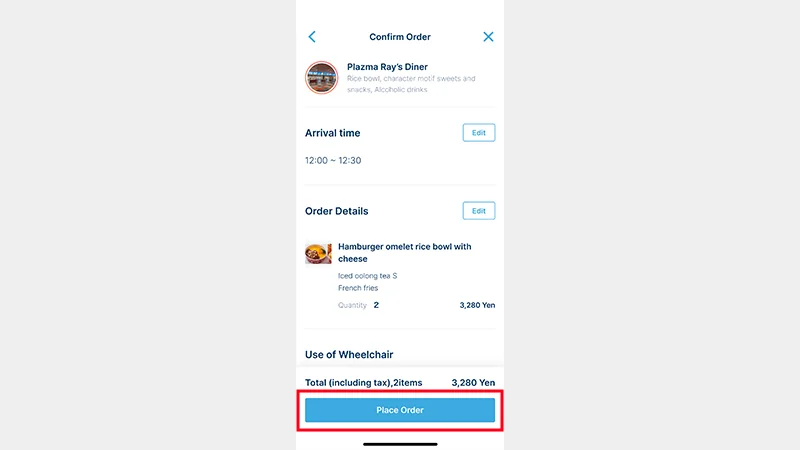
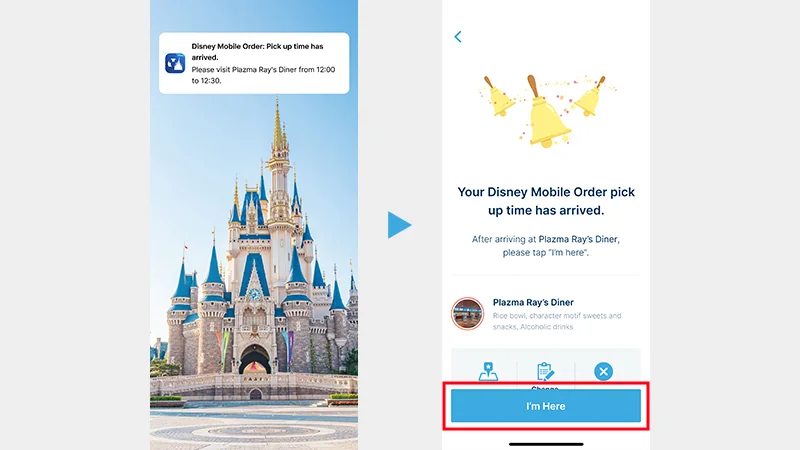
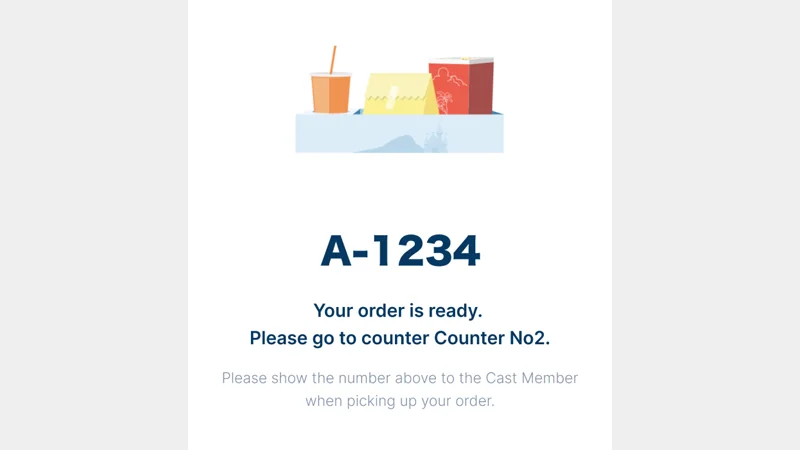
Table service meals are the Priority Seating bookings in Step 1, and for everything else, build one small habit now: order lunch by mobile order around 10:30, before the noon rush. Better still, place the order soon after you enter the park to hold the pickup window you want, because the slot is the scarce thing, not the menu.

Nothing is locked in until you tap "I'm Here": items, quantities and the arrival time can all be changed before that point, and you can order from another restaurant afterwards. Not locked in is not the same as not paid, though: with a debit or prepaid card, or with Alipay, you are charged when the order is submitted. Mobile Order reserves your food, not a table, so on a crowded day we send someone ahead to find seats while the order is being prepared.

If anyone in your party eats with a restriction, this is where the real planning happens, restaurant by restaurant and dish by dish, because kitchens cannot modify dishes. Start on our dietary page, not in a queue when you are already hungry.

Step 4

Money and phones, sorted before you fly

Almost everything in the parks runs through the official app, so a working phone with data is not a nice extra here, it is the plan. Before you travel, choose between an eSIM and a pocket Wi-Fi, set it up at home, and make sure everyone who needs the app has a way to stay connected through a long park day.

For the trains, a Suica on your phone makes the ride to Maihama simple: add it before you arrive, top it up as you go, and tap in and out without queueing for tickets. And carry some yen in cash as well. Cards and phones cover most of a park day, but cash is the backup that still works when a battery dies, and it is handy for small purchases along the way.

For the park days themselves, budget with the real numbers in front of you: an adult 1-Day Passport costs 8,900 to 12,400 yen depending on the date, and Disney Premier Access costs 1,000 to 2,500 yen per ride, per person. Prices change, and no price is guaranteed.

Add up the Premier Access part with our calculator: we built it for this

Disney publishes every Premier Access price one ride at a time, and never adds them up for you. Our Premier Access calculator does the adding up: tick the rides, shows and parades you would actually buy, tell it how many of you are paying and how many days you have in each park, and it gives you the total for the whole trip, split by park, and lines your picks up in the order we would buy them in the park, because the popular passes sell out and the order matters.

It runs entirely in your browser: nothing is collected, stored or sent.

Add up my passes

Step 5

Getting to the resort

Both parks sit beside Maihama Station on the JR Keiyo and Musashino lines, about 15 minutes from Tokyo Station. Build the transfer inside Tokyo Station into that time: the Keiyo Line platforms sit at the far end of the station, a 5 to 10 minute underground walk from the Shinkansen and Yamanote side, which catches out anyone with luggage, children or a tight connection. From central Tokyo, we allow about an hour door to gate.

The Ikspiari shopping and dining complex is right beside the station, handy for a meal before or after the park. Inside the resort, the Disney Resort Line monorail loops the parks and the Disney hotels, with stations at Tokyo Disneyland, Tokyo DisneySea and Bayside for most Disney hotels.

Coming straight from the airport? From Narita, allow about 60 to 90 minutes to the resort by direct airport bus, traffic depending; the train route runs via Tokyo Station and the Keiyo Line walk above. From Haneda, allow about 45 to 60 minutes by direct bus, or by train via Tokyo Station. And if the bags are the problem, the luggage delivery counters at both airports can send them on to your hotel, usually arriving the next day, so your first hours in Tokyo do not have to be spent dragging suitcases.

Step 6

First packing thoughts, and the height check

Start a packing list now, while it is still a gentle list and not a midnight scramble. The basics never really change: comfortable shoes, a portable battery and charging cable, a rain layer, and in summer a hat and sunscreen, in winter a warm layer for the harbour wind.

But here is the part a generic list cannot do for you: the right list depends on your dates, your parks and your children, and one small check here can quietly change your whole day.

Measure your children at home, and check their heights against the ride requirements now, not at the gate. A child who is too small for a headliner is a disappointment you can soften at home. Finding out in front of the Cast Member, with the ride right there and the rest of the party ready to board, is the hard version of the same news, and by then you may already have built your morning, and your Premier Access money, around a ride they cannot do.

That is exactly the check we do for you in our $149 checked plan. Send us your must-do list and your children's heights, and we go through it ride by ride: what each child can and cannot ride, where Rider Switch (next step) saves the day instead of splitting the party, what to ride instead at that moment so nobody is standing watching, and which passes are not worth your money for your family. We build the packing list for your dates, too: the weather you are actually travelling into, not a list written for somebody else's trip.

You can do all of that yourselves, ride by ride and forecast by forecast. It is the job most families tell us they wish they had handed over.

Step 7

Rider Switch and strollers: the family basics

And if the height check in Step 6 says your child is too small for a ride you love, you are not done: you just need this.

Two systems save family days, and both surprise people by existing.

Rider Switch lets the adults take turns. If your child does not meet a ride's boarding requirements, and there are at least two adults in your party, neither of you has to miss it. Before anyone joins the queue, have your park tickets ready and tell the Cast Member at the entrance that you want to use Rider Switch. One adult queues and rides as usual, while the other stays with your child. The Cast Member sets a return time on the second adult's ticket; when that time comes, you swap places, tell the Cast Member at the entrance, show your ticket, and you are guided in with a much shorter wait, instead of queueing from the start again. It works at every attraction with boarding requirements. Using Premier Access for the ride? Buy it for everyone who will ride, arrive together at your time, and tell the Cast Member the same thing.

Strollers are easy, too. You can rent one inside the park for ¥1,000 a day, with no reservation: a reclining stroller with a sunshade, for a child who can sit up on their own, from 7 months old, up to 100 cm and 15 kg. And both parks have Baby Centers, with space to change and feed your baby in peace. Their locations are on the official park maps linked at the foot of this page.

The week before

This is the week the trip stops being an idea. A few checks now, done in the right order, mean the day itself can just be enjoyed, and we will take you through them the way we do our own.

Check 1

Park hours and temporary closures

Look up the opening hours for your exact dates, and read the temporary closure list alongside them. Rides close for maintenance in every season, and the closure that matters is always the one on your must do list, so find it this week, while there is still time to rearrange the day around it and choose a backup your party is happy with.

Some closures to plan around, from Disney's official list, in the order they land. Every one of these is at Tokyo DisneySea:

RideClosedWhat it means
Tower of TerrorUntil 5 Nov 2026A headliner is simply out of your day if your trip is in the next few weeks.
Journey to the Center of the Earth8 Jan – 8 Mar 2027The volcano ride is down for two months of winter.
DisneySea Electric Railway8 Jan – 10 Feb 2027Transport, not a ride out: you will walk more of the park.
Peter Pan's Never Land Adventure9 – 16 Mar 2027A short, sharp Fantasy Springs gap.
Raging Spirits17 Mar – 10 Apr 2027The looping coaster sits out most of March: one less thrill ride, so lean on Journey and Tower of Terror instead.
Sindbad's Storybook Voyage17 Mar – 16 Apr 2027Our favourite gentle boat ride is dark for a month: take your Arabian Coast breather somewhere else.
Anna and Elsa's Frozen Journey7 – 30 Apr 2027The big one: do not build an April DisneySea day around it.
Soaring: Fantastic Flight10 – 11 Apr 2027A two-day gap inside the Frozen Journey window.

We read this list the way we read it for our own days out: one headliner down is a reshuffle, two down on the same day is a reason to move the day. If your trip lands on any of these, build the DisneySea day so it does not lean on the closed ride, and pick your backup while you are still at home choosing calmly.

Check 2

The show and parade schedule

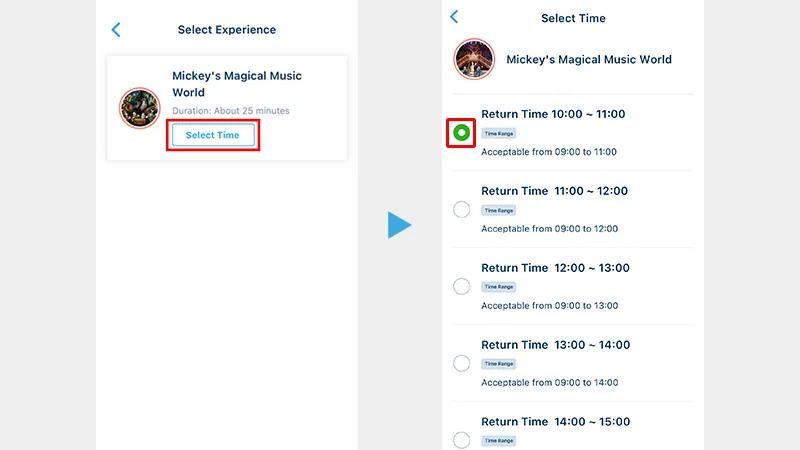
Shows and parades run to a schedule that is set for your date, and it shapes the whole day around it. Check the times for your day, pick the one or two your party really wants, and note them where your plan lives. Remember that the big shows are reached through the Entry Request lotteries once you are inside the park, so the schedule tells you what to enter for, and the result on the day tells you where it fits.

Use Tokyo Disney's official calendar for your exact date, not a blog post or a screenshot from somebody else's trip. Pick your date on the calendar and it gives you that day's park hours, every parade and show time, and character greetings, and it marks which shows need Entry Request and which offer Premier Access, so you know before you arrive what you will be entering for. One timing note: the schedule for a month is published around the 8th of the month before, so this check belongs here, in the last week, when your date's real times exist.

Check 3

The weather check, and what to change if rain is coming

Check the forecast for your park days, and check it again the day before, because Tokyo weather loves to change its mind. If rain is coming, we move the middle of the day indoors: indoor attractions, shows and a real rest in the worst of it, rather than queueing through it. Pack the rain layers where you can reach them, swap any must do outdoor ride earlier into the day while it is dry, and lower nobody's expectations at the gate, because you will have already done it together at home.

And if heat is the forecast instead, give it the same seriousness: Tokyo summer heat shapes a day as firmly as rain does. We move the outdoor must-dos to the morning and the last hours, anchor the middle of the day indoors, and schedule water, shade and a real seated rest as stops in the plan, not as rewards for finishing it.

Check that forecast on Yahoo! Weather Japan, for Urayasu: Maihama, where both parks sit, is in Urayasu, Chiba, so Urayasu is the pinpoint forecast that actually covers your park day, not a general Tokyo one. Look at the hourly rain, not just the day's symbol: an hour of heavy rain at midday is a very different day from rain at closing time.

And work out your rainy-day swaps from Tokyo Disney's official attraction lists before you need them. Each attraction's own page says whether it is OK on rainy days, so you can mark your indoor swaps now, while you are choosing calmly at home.

Check 4

Charging and printing

The night before a park day in our house is mostly cables. Charge the phones, the portable battery and the camera, and put the cables in the bag you will actually carry. Then save your bookings where you can find them without a signal: screenshot the tickets and the confirmations, and print a copy of the ones you cannot bear to lose. A flat phone should never be the thing standing between you and your own park day.

And know your backup before you need it. If a phone still runs flat in the park, ChargeSPOT rental stands sit inside both parks, and all over Japan: rent a mobile battery at one stand, and return it to any other. Download the ChargeSPOT app at home and set it up with the rest of your app homework: you need a phone with some charge left to scan the stand and rent, so borrow while you still have battery, not at zero. Use our invitation code when you set the app up: FRDF4CA0A69, you get an hour free, and so do we.

Check 5

The final packing list

  • Tickets and booking confirmations, saved on the phone and printed as a backup.
  • Phone, portable battery and charging cable, all fully charged.
  • Suica ready on the phone, and some yen in cash.
  • Rain layer or poncho, and in summer a hat and sunscreen, in winter a warm layer.
  • Medicines and anything your party needs through a long day, in the bag you carry, not the suitcase you leave behind.
  • Spare clothes for small children, because water rides and spilt drinks do not ask permission.

Pack it the night before, by the door. Morning you has a train to catch, and morning you deserves an easy start.

On the day

This is the day all of the above was for. How early to arrive, what happens at the gate, your first ten minutes inside, and how to bring the day home well at the end of it.

Part 1

How early should you line up?

It depends on what you are chasing. If headliners and Fantasy Springs are the point of your trip, arriving early matters a lot: the first Premier Access slots, the Entry Request lotteries and short opening queues are all claimed in the first half hour, and keen guests queue well before the gates open.

If your day is about shows, parades, atmosphere and a handful of rides, arriving after the entry crush, around 9:30, is genuinely fine, quieter, and much kinder to children and anyone who finds the pre-opening crowd stressful. Neither answer is wrong; the mistake is choosing by accident.

Part 2

Happy Entry, stated exactly

This is the perk that gets us out of bed smiling. Disney hotel guests get Happy Entry through a dedicated entrance: 15 minutes early at Tokyo Disneyland, and 5 to 15 minutes at Tokyo DisneySea. Fifteen minutes does not sound like much at your kitchen table. On the plaza, with the Frozen Journey Premier Access slots draining away on everyone else's phones, it is the whole morning.

One limit to know before you count on it: at Tokyo DisneySea, since September 2025, Happy Entry is only for Fantasy Springs Hotel and Hotel MiraCosta guests.

Happy Entry does not apply on your check-in day, but it does apply on your checkout day, so please plan your early mornings for the days after your first night, checkout morning included.

Separate from Happy Entry, and easy to mix up with it: the Fantasy Springs Entrance. Until 31 March 2027 it is for Fantasy Springs Hotel and Toy Story Hotel guests only. From 1 April 2027 it opens to everyone with a DisneySea ticket from 11:00 (Toy Story Hotel guests from 10:00, Fantasy Springs Hotel guests all day). Think of it as a late-morning side door into Fantasy Springs, not an early start: the headliners will already have their queues by 11:00, so we would use it for a gentle arrival and a Fantasy Springs lunch, not as a rope-drop plan.

Part 2b

The first ten minutes: same day reservations and Premier Access timing

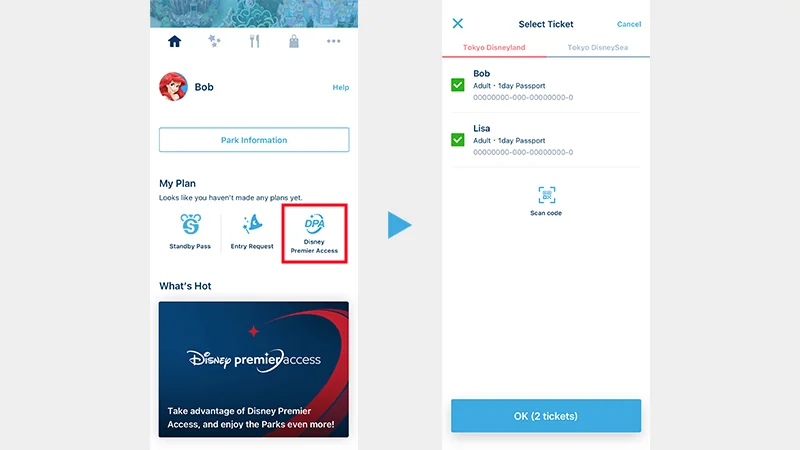
Almost everything at Tokyo Disney is a same-day, in-app reservation, and it can only be booked after you have scanned into the park. The order matters:

  1. Paid

    Disney Premier Access

    Your headliner first: the best times go in minutes.

  2. Free

    Entry Request lotteries

    Shows and greetings: a draw, not a queue.

  3. Free

    Standby Pass

    For shops, and sometimes the only way in.

All of this while walking toward your first ride: never standing in the hub doing admin.

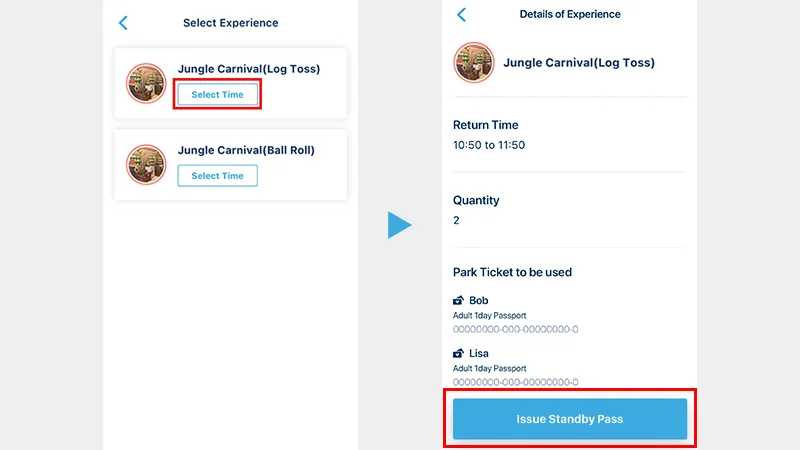
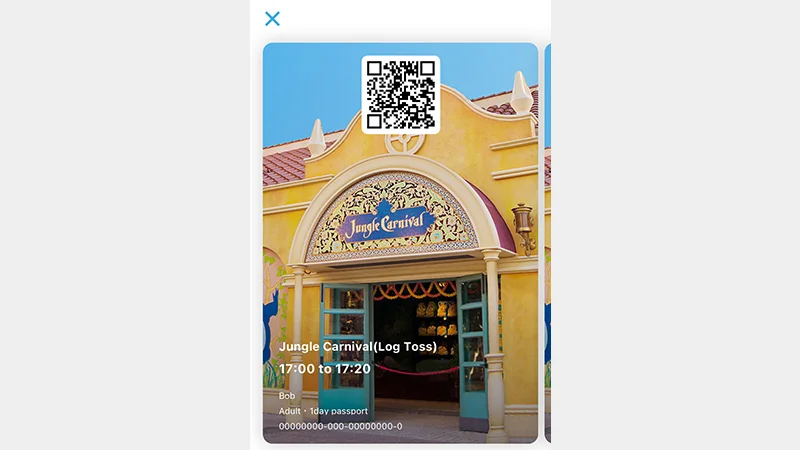
Two details worth holding on to. A Standby Pass covers shops, capsule-toy corners and, from 10 November 2026, the Jungle Carnival games at Disneyland: within one type of venue you hold one pass at a time, and a pass for a different venue of the same type opens 120 minutes after you took the first, or at its return time, whichever is earlier. And an Entry Request is one request per experience, per day, a draw, never first come, first served.

There is no free pass that skips a ride queue: skipping a headliner means paid Premier Access, so budget for it on the headliners you care about.

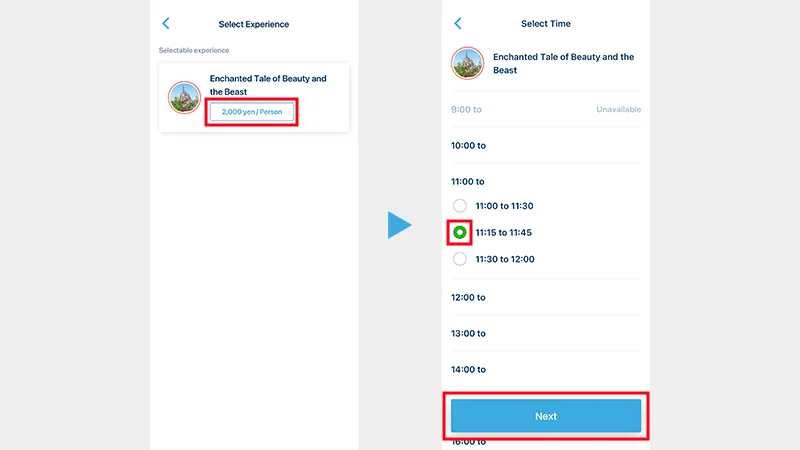
Premier Access prices: attractions cost 1,000 to 2,500 yen per person. Beauty and the Beast, Frozen Journey and Soaring are 2,500 yen each, Journey to the Center of the Earth is 2,000 yen, and Raging Spirits and The Happy Ride with Baymax are 1,500 yen. Shows cost 2,500 yen and seasonal parades 3,500 yen. Indiana Jones Adventure joins Premier Access from 30 November 2026, when it reopens.

Once that first pass is bought, the next question is when you are allowed to buy another one. The short version: a different attraction unlocks on a timed wait from your purchase, the same attraction again only once you have ridden it or its window has passed, and shows run on a separate track. The full rule is set out on the pass systems page. After each purchase, the app itself shows the exact time you can buy again, and that time is the one that counts. For the whole picture on one page, our Pass systems comparison sets Premier Access against Entry Request and Standby Pass, and for Premier Access itself, read our Premier Access page.

Part 3

Eating and resting through the day

Mobile order is covered in full back in Phase 2 of this page: the short version is to order lunch around 10:30, or just after you enter, and eat before the noon rush. If you still need a table service seat, same day Priority Seating bookings opened at 09:00 Japan time this morning.

And please give the middle of the day a real rest, especially in summer heat or rain: indoor shows, indoor attractions and sitting down properly. A rested party enjoys the evening. A party that queued through the worst hour of the day usually remembers that hour, not the fireworks.

Part 4

Single Rider: the quiet extra option

Single Rider lets solo guests, and groups willing to be split up, fill empty seats on five attractions, usually with a much shorter wait than the standby line. Cast Members load single riders from a separate entrance to fill the gaps in each vehicle, so your party will not sit together: that is the trade off.

It currently runs on Enchanted Tale of Beauty and the Beast at Disneyland, and on Indiana Jones Adventure (closed until it reopens on 30 November 2026), Raging Spirits, Anna and Elsa's Frozen Journey and Peter Pan's Never Land Adventure at DisneySea. It can be suspended depending on operations, so ask a Cast Member at the attraction entrance on the day.

Part 5

Ending the day well

The last hour has its own rush, and you get to choose how you meet it. We either leave a little before the final rush, while the trains are still easy, or we sit down somewhere warm, let the rush go without us, and leave after it. What we try not to do is join the whole park at the exit at the same minute and then wonder why the station feels hard.

Your station is Maihama, the same one you arrived at, and if you are heading through Tokyo Station, remember the Keiyo Line platforms and that 5 to 10 minute underground walk at the far end. If nobody is falling asleep on their feet, a meal at Ikspiari, right beside the station, is a gentle way to land the day before the train home.

If it goes wrong

Most park days have one wobbly moment. Ours do too. These are the ones we hear about most, each with the first thing we would do, because a wobble with a first step is just a problem, not a ruined day.

Recovery 1

The hotel sold out

Take it from two people who have watched rooms vanish at 11:00 and come back at 11:40: a sold-out screen at the drop is chapter one, not the ending. First thing to do: stop refreshing, and write down the two moments that matter. Rooms gone at the 11:00 drop often come back roughly 40 minutes later, when abandoned bookings are released, a reported pattern, not a guarantee, and one we set our own alarms for, and again around 15 days before check-in, when cancellations gather. Try checking through a different hotel's listing too, and keep an honest fallback in mind. The Hotels page covers the same moments in full in its If it sells out chapter.

Recovery 2

Premier Access is gone for your headliner

It stings, we know: the pass you had planned the morning around is the one thing the app cannot give you. First thing to do: check what the app is actually telling you, because the next purchase time shown in the app is the one that counts, and a later window may still open. If it has truly gone, the day is not over: standby is a real option, Single Rider may cover that very ride, and the shows, the snacks and the corners of the park nobody queues for are still all yours. Buy the headliner you can get, and put the phone away for a while.

Recovery 3

Heavy rain

Rain over Maihama has a sound we know well, and it does not have to cost you the day. First thing to do: rebuild the middle of the day indoors, the way you rehearsed in Phase 3. Indoor attractions and shows carry a rainy day further than you would think, the rain layers go on before anyone is soaked, and the must do outdoor rides move to any dry window that opens. Check the app for schedule changes as you go, and let a warm sit down meal do the job it is good at.

Recovery 4

Someone feels unwell, or it all feels like too much

Every family has this moment, ours included, and the kind thing is to stop before it becomes the day's memory. First thing to do: stop, sit down, and get out of the flow of the crowd. Then speak to the nearest Cast Member, who can point you to the right help in the park. If overwhelm is the problem rather than illness, a quieter corner, a seated show and a slower hour are a plan, not a failure, and our accessibility page covers the support that exists for days like this, including the Separate Wait Service and how to get around each park in one direction.

Recovery 5

You have lost something

That sinking feeling in front of a locker or a stroller park is one we have had ourselves. First thing to do: tell a Cast Member as soon as you notice, while you are still in the park and the day is still warm. Retrace your last stop together, and leave your details through the official Lost and Found route. If you only notice after you have left, use that same official Lost and Found route through the official site, with the best description you can give of the item and where you last had it.

Recovery 6

The show lottery did not come through

Most people in the park today lost the same draw, so you are in large and good company. First thing to do: check the app for that venue anyway. Entry is never guaranteed, and a lost draw is the normal outcome on a busy day, but a few venues may offer standby seating if capacity allows. If yours does not, spend the time on the parade, a snack and a ride with a short line, and let it go. One lost lottery has never yet ruined a day that had a plan B.

Recovery 7

Your park date is sold out

A sold-out date looks final from your kitchen table; from ours, here in Tokyo, it usually is not. First thing to do: keep checking the official app and website, because sold out dates can reappear without notice as other parties change their plans. If you are staying at a Disney hotel, there is a second route: hotel guests can buy park tickets at the hotel, even for days that have sold out in the general sale, so ask at your hotel before you give up on the date. And if the date itself can move, swap the days around: a sold out Saturday at one park often sits next to an open day at the other, and a weekday later in the trip may still be on sale.

Recovery 8

Heat and humidity

Tokyo heat is not weather you push through, it is weather you plan around, and we say that as people who live in it. First thing to do: cut the middle of the day, not the day. Move the outdoor rides to the morning and the last hours, anchor the middle with indoor attractions, shows and a long seated lunch, and set a water and shade stop every hour whether anyone asks for one or not. Heat ends more Tokyo Disney days than rain does; the plan bends so the day does not break.

Home · Guides · Accessibility

Accessibility at Tokyo Disney

We’re Aaron and Maya. We live in Tokyo, we spend our days at these two parks, and this is the page we wish every wheelchair guest and every guest who cannot queue was handed before they flew. Tokyo is stricter about transfers and evacuation than many visitors expect, and its disability paperwork is where overseas guests get caught out — and both are miserable things to learn at a ride entrance. So here they are together, in one place, in the order you will meet them, and mostly as charts and flows rather than long reads: which system you need, whether you can ride, the paperwork, what happens at the ride, getting around, and rest and rentals.

The four systems, side by side

Almost everyone who finds this page arrives asking about ‘the wheelchair policy’. There isn’t one — Tokyo Disney runs four separate systems, and each one solves a different problem. Getting one of them does not give you the others. This table is the whole map, and if you read nothing else on this page, read it: everything below is one row of this table, opened up.

SystemWhat it solvesPaperwork neededArranged whereShortens the wait?The catch
Ride boarding rulesWhether you can board each ride at allNone: the rules are set by the ride itselfSet ride by ride: stay in your chair, transfer, or evacuate in an emergencyNoNo pass overrides an evacuation rule
Disability Access Service (DAS)Waiting outside the physical queue, then returning at your timeYour original disability certificate (a home-country certificate for overseas guests), or a doctor’s letter if yours is not recognisedAt each attraction, holder present, original certificate and the group’s ticketsNo — same wait, different placeStaff decide eligibility on the day, at their discretion
Separate Wait ServiceSplitting the wait within your groupNo certificate neededAsk a Cast Member at the attraction; part of the party waits, you wait elsewhere with a companionNoStaff confirm what applies to your party on the day
Discounted disability passportA reduced-price park ticketAn accepted disability certificate, or an equivalent that staff judge to be equivalentBought as a ticket product, with its own document checkNoFor the qualifying guest plus one companion only — see the warning under this table
Discounted disability passportA warning about the discounted disability ticket: never buy it relying on a doctor’s letter alone. That ticket requires an accepted certificate or an equivalent that staff judge to be equivalent. If your letter is judged not equivalent at the park, entry with that ticket can be refused. If you are travelling on a letter alone, standard tickets are the safer buy unless you hold an accepted certificate or equivalent.

Ride boarding rules

Can I ride? Boarding, ride by ride

Start with the rides you came for. Here are the big headliners, grouped exactly as the official Tokyo Disney Resort wheelchair page groups them, so you can see at home how boarding works for each one instead of finding out in front of the ride, with the queue watching. Read this one at home, where you can take your time over it — not at the ride entrance, with a queue forming behind you.

The guide cats on a step-free park path with handrails and flower beds

Designated boarding area: you transfer from your wheelchair at a set place, and extra time is allowed for that transfer — a planned transfer, with the clock on your side.

Designated wheelchair: the park provides a wheelchair for the ride, or you ride seated in one.

No arrangement published: the official wheelchair page names no special boarding for that ride, so the standard transfer to the ride seat is the official position and the ride’s own restrictions apply.

How boarding works for the headliner rides

Grouped exactly as the official Tokyo Disney Resort wheelchair page groups them.

How boarding worksHeadliners
Transfer at a designated boarding area, extra time allowedEnchanted Tale of Beauty and the Beast, Pooh's Hunny Hunt and Monsters, Inc. Ride & Go Seek! (Tokyo Disneyland)
Ride seated in a designated wheelchairToy Story Mania! (Tokyo DisneySea)
Park-provided designated wheelchair (guests using motorized or personal wheelchairs transfer)Rapunzel's Lantern Festival (Tokyo DisneySea)
Transfer to a designated wheelchair provided by the parkWestern River Railroad (Tokyo Disneyland) and Sindbad's Storybook Voyage (Tokyo DisneySea)
Stay in your own wheelchair for the whole rideCaravan Carousel (Tokyo DisneySea)
Board by ramp, staying in your wheelchairTom Sawyer Island Rafts and Mark Twain Riverboat (Tokyo Disneyland)
Shows with a designated wheelchair viewing spaceThe Enchanted Tiki Room, Country Bear Theater, Mickey's PhilharMagic, Stitch Encounter, Turtle Talk, Magic Lamp Theater and Mermaid Lagoon Theater

The other headliners, ride by ride

These ten headliners appear on none of the official wheelchair-boarding lists. That is itself the answer the official page gives: no special boarding arrangement is published for them. What the official sources do say, ride by ride, is the ride's own restrictions, gathered here from the official attraction information.

HeadlinerWhat the official sources say
Splash Mountain (Tokyo Disneyland)No wheelchair boarding arrangement is published. The official position is a standard transfer to the ride seat. Height 90 cm, and you must fit in the seat with the safety bar secured.
Big Thunder Mountain (Tokyo Disneyland)No wheelchair boarding arrangement is published. Standard transfer to the ride seat. Height 102 cm, and you must be able to sit unaided.
Haunted Mansion (Tokyo Disneyland)No wheelchair boarding arrangement is published, and no ride restrictions are listed. A child may ride on a lap.
Anna and Elsa's Frozen Journey (Tokyo DisneySea)No wheelchair boarding arrangement is published. Standard transfer to the ride seat. You must be able to sit unaided, and a child may ride on a lap.
Soaring: Fantastic Flight (Tokyo DisneySea)No wheelchair boarding arrangement is published. Standard transfer to the ride seat. Height 102 cm, and you must be able to sit unaided.
Peter Pan's Never Land Adventure (Tokyo DisneySea)No wheelchair boarding arrangement is published. Standard transfer to the ride seat. Height 102 cm, sit unaided, and children may not ride on a lap here.
Journey to the Center of the Earth (Tokyo DisneySea)No wheelchair boarding arrangement is published. Standard transfer to the ride seat. Height 117 cm, and you must be able to sit unaided.
Tower of Terror (Tokyo DisneySea)No wheelchair boarding arrangement is published. Standard transfer to the ride seat. Height 102 cm, and you must be able to sit unaided.
Indiana Jones Adventure (Tokyo DisneySea)No wheelchair boarding arrangement is published. Standard transfer to the ride seat. Height 117 cm, and you must be able to sit unaided. The ride reopens on 30 November 2026.
Raging Spirits (Tokyo DisneySea)No wheelchair boarding arrangement is published. Standard transfer to the ride seat. Height 117 cm minimum and 195 cm maximum, and you must fit in the seat with the shoulder bar secured.
The rule underneath all of it: evacuation.

One general rule applies everywhere: evacuation may require walking distances, stairs or narrow walkways, being assisted or carried, or waiting in the vehicle, and guests who cannot evacuate even with assistance may not be able to ride some attractions. It applies on all ten of these headliners:

  • Splash Mountain
  • Big Thunder Mountain
  • Haunted Mansion
  • Anna and Elsa's Frozen Journey
  • Soaring: Fantastic Flight
  • Peter Pan's Never Land Adventure
  • Journey to the Center of the Earth
  • Tower of Terror
  • Indiana Jones Adventure
  • Raging Spirits

Where evacuation is not possible for you, the ride is off the table no matter what pass you hold: some attractions are effectively closed to guests who cannot walk at all. Disney sets that requirement ride by ride and does not publish a single count of them, so check your must-do rides one by one before you count on them.

For any ride not named here, the shape is the same: the official barrier-free page names an arrangement only where one exists, and for the rest the park's Information Book and the Cast Members at the attraction entrance hold the detail for your chair and your transfer, so ask before you queue.

Disability Access Service (DAS)

The paperwork, sorted before you fly

Of everything on this page, this is the part we go through most carefully with the guests we help, because it is the one part you can completely finish before you fly. This is the part overseas guests get wrong most often, and it is the part you can fully sort at home, at your own pace. Follow the flow from the top: it ends at the document you should carry. If you have used disability access at the US parks, set that picture aside: Tokyo runs its own system, in person, attraction by attraction.

The guide cats with a DAS certificate folder and return time card at an attraction entrance

Start here

Do you hold a disability certificate from your home country?

The official Tokyo Disney Resort guidance names the certificates that qualify a guest for this service: a Physical Disability Certificate, a Mental Disability Certificate, a Medical Rehabilitation Handbook, or a Recipient Certificate for Welfare Services and Supports for Persons with Disabilities. Guests visiting from outside Japan are asked to bring a certificate issued under the laws of their home country instead.

Yes

Bring the original

Your original home-country disability certificate. Photocopies and photos may not be accepted, so the original travels with you, every day, to every attraction. Then go straight to how DAS runs at the ride.

No, or not recognised

A doctor’s letter, on official letterhead

If your country does not issue a certificate, or yours is not recognised, a doctor’s letter on official letterhead is commonly brought by overseas guests. It should be from your doctor, identify you, and state plainly that you cannot wait in a standing or physical queue and why, in functional terms. The letter overseas guests commonly bring is written in English, and an English letter is the route that is reported to work; bringing a Japanese translation alongside the signed English letter can help the Cast Member who has to read and judge it at the attraction entrance. That is a practical tip from guest experience, not a Disney rule. Acceptance is not guaranteed; staff decide on the day.

Only a card? Stop

A card alone has been refused

A disability or benefits card alone does not work reliably: guests have been refused when a card was all they had. Treat a card as a backup to a certificate or a letter, never as the whole plan.

Some guests must be accompanied. Guests with visual, mental, intellectual or developmental disabilities, and guests with mobility disabilities who need transport assistance, must be accompanied by an able-bodied member of their party when using this service.
Injuries and pregnancy sit outside DAS. Injuries such as fractures or sprains, and pregnancy, are not treated as a physical disability for DAS. Ask a Cast Member on the day about the Separate Wait Service instead.

Keep the originals with you. You arrange DAS at each attraction on the day, so keep your documents and your group’s tickets with you, every day, at both parks.

Check your documents before you fly, free

We built this checker because this is the exact conversation we kept having with overseas guests. Our DAS document checker asks four questions about your situation, builds your personal document list, and drafts a doctor's letter you can take to your own doctor. It runs entirely in your browser; nothing you enter is collected, stored or sent anywhere.

Run the free DAS document checker

Disability Access Service (DAS)

At the ride: how DAS runs, step by step

There is no DAS desk, and nothing to book ahead: registration happens at the first attraction you want to ride, and then again at each one after it. This loop is the exact sequence, just as it happens on the day, and it repeats all day, at both parks. It feels like a lot the first time. By the third ride it is just what you do — every Cast Member runs the same loop, and so will you.

The guide cats at an attraction entrance, one holding up a return-time card beside the queue ropes, with a coaster behind them
  1. Arrive at the attractionGo to the first attraction you want to use DAS for.
  2. Holder present, documents outSpeak to a Cast Member, with the DAS holder present. Show your original certificate (or doctor’s letter) and the park tickets for everyone in your group. If more than one person in your party needs assistance, each of them registers separately, with their own documents.
  3. Photo takenThe Cast Member takes your photo at registration, so Cast Members at attractions can recognise the registered guest.
  4. Return time setStaff set a return time for that attraction, based on the current wait.
  5. Wait anywhere comfortableYou do not stay at the attraction.
  6. Return and boardCome back at your time and board via the entrance staff direct you to.
  7. Repeat at the next rideThe same loop, at the next attraction, the next day and at the other park.

And repeat — the loop starts again at step 1, at the next ride.

One return time at a time. Use or pass that return time before arranging the next one.

Up to six at an attraction, ten at greetings. DAS covers up to six people in total at an attraction; at character greetings, up to ten. That is why staff ask to see the whole group’s tickets.

Stacks with Premier Access. DAS can be combined with paid Premier Access. The two do different jobs, and holding one does not cancel the other.

If the answer is no

It happens, and it does not have to end the day. We plan every access day as if the answer might be no, because a good day should never depend on a single yes at a single attraction.

Ask about Separate WaitIf a Cast Member cannot accept your documents for DAS, ask them about the Separate Wait Service: part of your group waits in the queue while you wait somewhere more comfortable, and it does not depend on a certificate.
Fall back on the planBuild every park day so that it also works without DAS, with the headliners early, shows and parades as natural rests, and proper breaks in between.
Sort it at home, not at the gateRun the document checker while there is still time, get the doctor’s letter written if you need one, and pack the originals. A park morning is the wrong moment to discover the document in your bag is a photocopy.

Getting around each park

Think of the park like a walking route, not a ride list. These parks are bigger than they look on the map, and DisneySea in particular is all slopes and harbour edges — the route matters as much as the rides. We sequence attractions land by land, in one direction, so you are never crossing the park and back. Here is the route we plan around in each park, as a schematic — follow it top to bottom — with the in-park transport that saves the longest pushes.

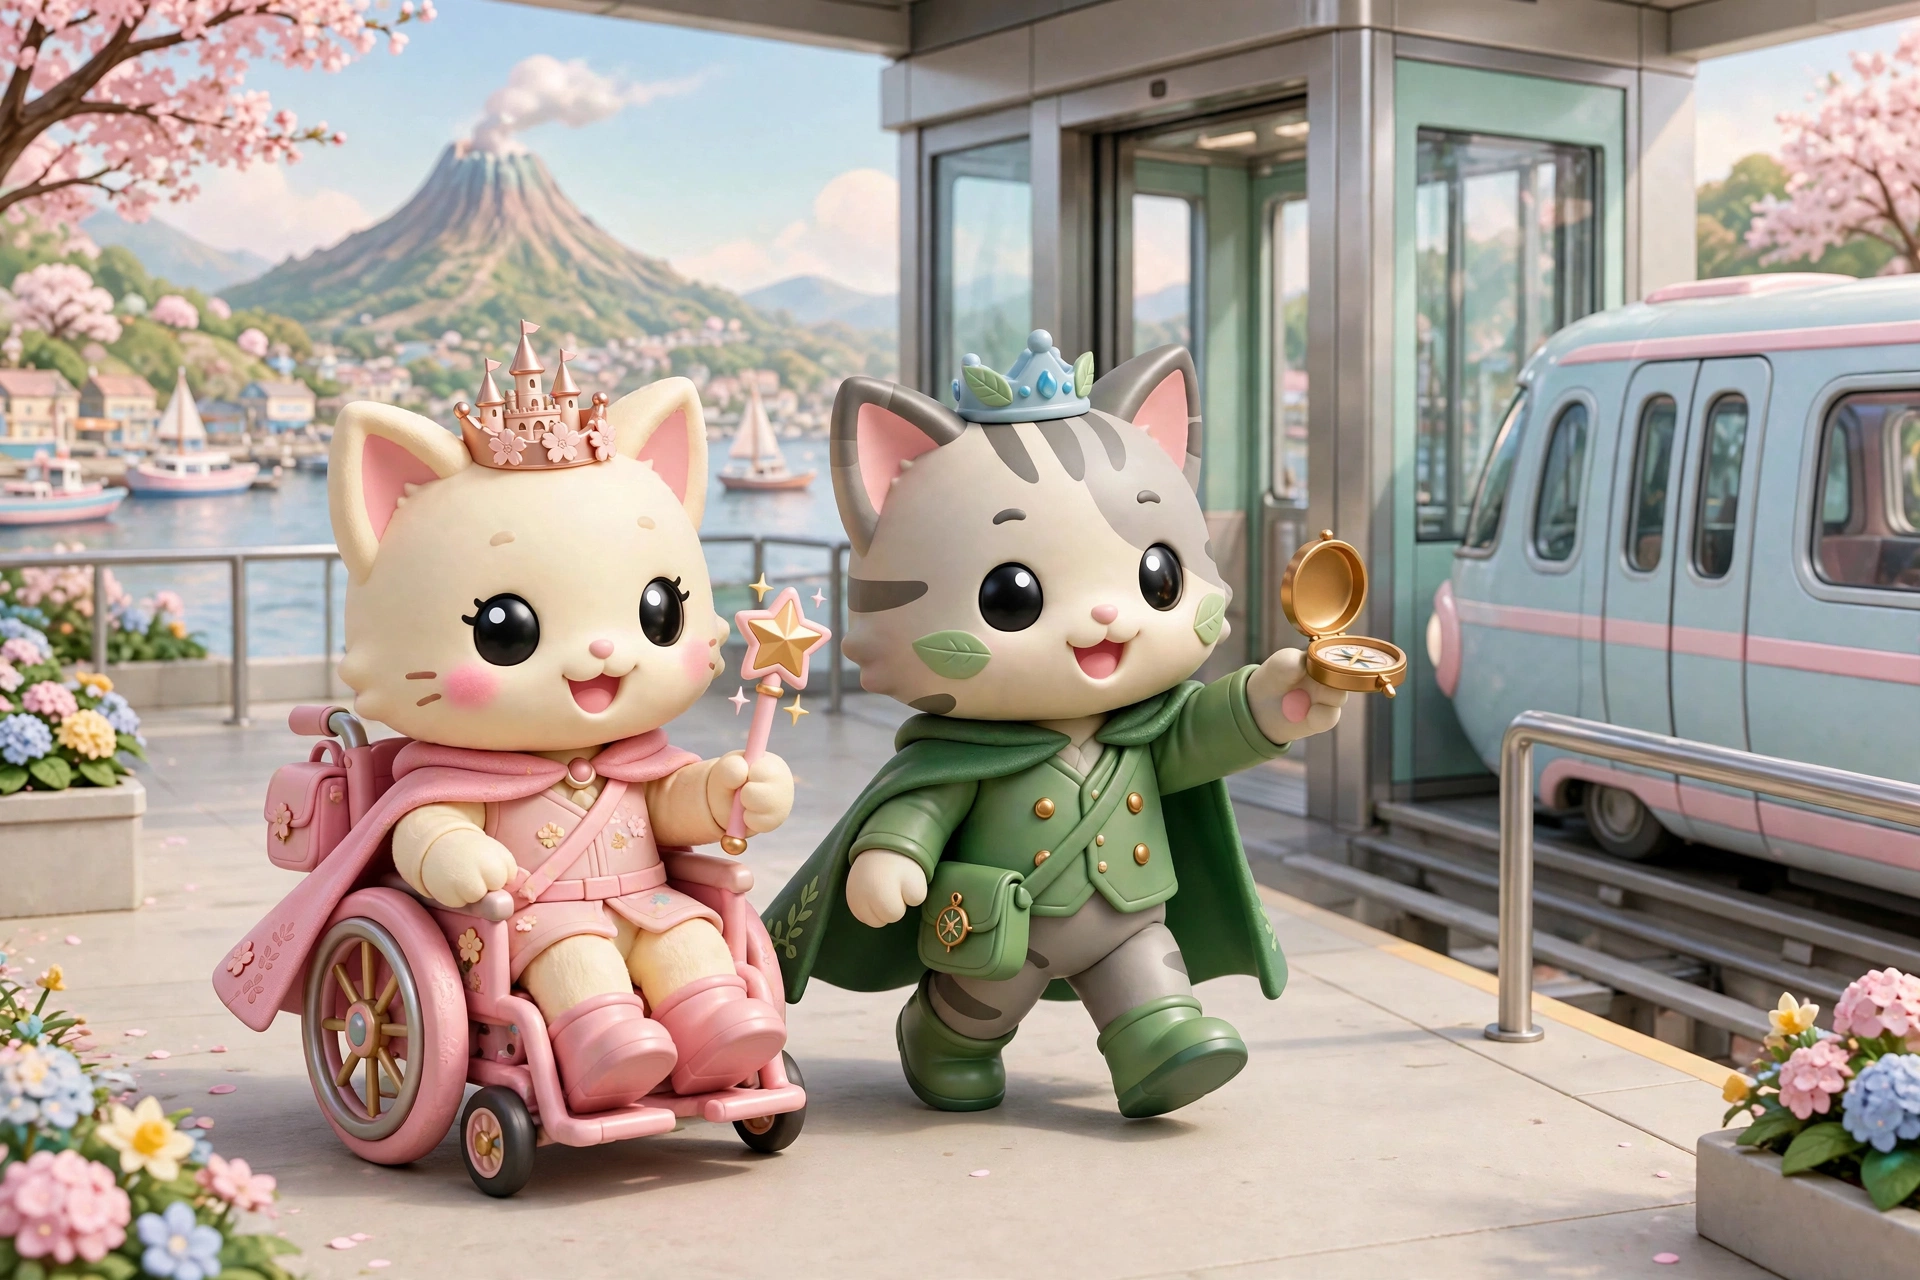
The guide cats on a Disney Resort Line station platform, one in a wheelchair, the monorail beside them and the harbour behind

The Disney Resort Line, step free

Most guests reach the parks on the Disney Resort Line monorail. Disney’s official barrier-free information states:

Elevators are available at each station.

Portable slope: a Cast Member can set one up for boarding.

Wheelchair spaces are in the 3rd and 4th cars.

Gap of about 5 cm, height difference of about 3 cm between the platform and the train, so let the Cast Member help you across it.

Tokyo DisneySea: one direction around the harbor

Start in Mediterranean Harbor and work one way round Mount Prometheus. One direction, no crossing the park and back.

  1. Mediterranean HarborStart here.
  2. American WaterfrontFrom here, the DisneySea Electric Railway runs to Port Discovery: an elevated electric trolley, about two and a half minutes, turning the longest push at the front of the park into a short ride. Ask a Cast Member at the station how boarding works for your chair before you rely on it.
  3. Port Discovery
  4. Mysterious IslandNeeds care: it sits inside Mount Prometheus, where the ground rises and narrows, and it is the link between Port Discovery and Lost River Delta. Plan it as a pass through, not a place you cross back and forth; the step-free detail for it sits in the honesty note under these routes.
  5. Lost River Delta
  6. Fantasy Springs
  7. Arabian Coast
  8. Mermaid Lagoon
  9. Back to Mediterranean HarborThe DisneySea Transit Steamer Line also links the harbors, but it stops running while harbor shows are on, so never build the day around a sailing you have not checked on the day.

Tokyo Disneyland: one direction, land by land

Start in World Bazaar and work one way round, then back to World Bazaar.

  1. World BazaarStart here.
  2. Adventureland
  3. WesternlandThree boats-and-trains notes sit on this land. Western River Railroad: transfer to a designated wheelchair provided for the attraction; you may not use your own wheelchair on the train. Mark Twain Riverboat: remain in your wheelchair and use the wheelchair access ramp between the boarding area and the boat, with a Cast Member conducting you onto the boat. Tom Sawyer Island Rafts: board by ramp, staying in your wheelchair, with a Cast Member conducting you onto the raft — but the island’s own trails are not step free.
  4. Critter Country
  5. Fantasyland
  6. Toontown
  7. Tomorrowland
  8. Back to World Bazaar
What Disney publishes, and what it does not: Disney publishes the boarding rules ride by ride, the restroom locations and the Resort Line access above. It does not publish a lift-by-lift step-free route through either park in English: that detail sits in the park’s Information Book and with Cast Members on the day — for Mysterious Island, Cast Members at Guest Relations will talk you through the step-free way. So the loops above are a planning aid built from the official pieces, not an official route. Check the official app each morning for closures, and let the app and the Cast Members have the last word on lifts and ramps on the day.

Restrooms: multi-function restrooms (wheelchair accessible, with ostomate facilities at some) are located throughout the parks; exact spots are on the official park map and in the app, and every loop we build notes the closest accessible restroom to each stop, so a break is never a search. Every restroom in the parks has a diaper-changing station, except the one at Fort Sam Clemens on Tom Sawyer Island.

Rest spots and rentals

Rest is part of the route, not whatever is left when the route runs out. Distances are long, benches disappear at peak times, and fatigue ends days early, so we schedule breaks before anyone needs one: a break roughly every 60 to 90 minutes at quieter seating areas, scheduled before fatigue hits, not after, and timed to parades and shows where sitting is built in. These are the stops the plan uses, park by park. The stops below are the ones we actually use — several of them are restaurants our other guides send people to anyway, so a rest can double as a meal worth having.

The guide cats resting on a shaded park bench with a cold drink and the park map, a fountain behind them

Our rest stops, park by park

ParkStopTypeWhere on the loop
Tokyo DisneySeaAmerican Waterfront back streetsQuieter back-street seatingA planned pause on the loop
Tokyo DisneySeaRestaurant SakuraTable service Japanese set meals, including the Special Dietary Steamboat SetAmerican Waterfront
Tokyo DisneySeaSebastian's Calypso KitchenSeated counter serviceMermaid Lagoon, in the back half of the park, on the loop between Arabian Coast and Mediterranean Harbor
Tokyo DisneySeaCasbah Food CourtSeated food courtArabian Coast: the middle of the back half
Tokyo DisneySeaMiguel's El Dorado CantinaSeated counter serviceLost River Delta, before the run into Fantasy Springs
Tokyo DisneylandTom Sawyer Island landing, on the mainlandSeating by the raft dockWesternland, on the mainland side of the river. This stop is the dock area on the mainland; it is not the island itself, and we do not use the island or its trails as a rest stop
Tokyo DisneylandEastside CaféSeated table serviceWorld Bazaar, near the entrance: an early or late break without crossing the park
Tokyo DisneylandHungry Bear RestaurantSeated counter serviceWesternland, on the western loop, close to the raft dock stop above
Tokyo DisneylandQueen of Hearts Banquet HallSeated counter serviceFantasyland, in the middle of the park, halfway round the one-direction loop
Tokyo DisneylandGrandma Sara's KitchenSeated counter serviceCritter Country, at the back of the park: the planned break the back half of a Disneyland day needs

For parades and shows, Disney also provides designated viewing areas for guests using wheelchairs: ask a nearby Cast Member, who will point you to the area for that performance.

For sensory and neurodivergent guests, and for anyone who finds a full park day a lot: the rhythm method in full, and the quiet spots that make it work in each park, are on our sensory planning page. It is written for sensory load, and it works for every kind of tired.

What you can rent in the parks

Collect a rental at the Stroller and Wheelchair Rentals counter inside the park: at Disneyland, in World Bazaar, the window on the far right after entering the main entrance; at DisneySea, the rental counters at the Park Entrance and at the Fantasy Springs Entrance.

RentalWho / numbersReservation
Manual wheelchairRented in-parkNo reservation needed
Motorized wheelchairGuests age 18 and over, in limited numbers—
Battery-assisted push wheelchairListed among the park rentals; powered rental numbers are limited—

Powered rentals are not available in the rain.

There is no scooter (ECV) rental inside the parks, and a powered rental is not a scooter, so do not plan the day around one being free when you arrive.

A nominal fee — Disney’s English pages describe the rental fee only as a nominal fee, so check the price at the counter on the day rather than budgeting from a number we cannot verify.

If your day depends on your own setup, bring it — or arrange one outside the resort. A rental chair is a chair; your own setup is the one fitted to you, and a full park day is a long day.

From us, before you fly

We wrote this page because ‘just ask on the day’ is not a plan, and you deserve better than finding out at a ride entrance. Sort the paperwork at home, learn your boarding answers from the matrix, and the parks get to be what they should be: the easy part of the trip.— Aaron and Maya, Tokyo

Sources: transfer and evacuation requirements above are taken from the official Tokyo Disney Resort accessibility and attraction information, and the DAS wording follows official Tokyo Disney Resort guidance and overseas guests’ experience. Attraction rules change when rides open, close or are refurbished, so confirm your rides in the official app before you travel.
Please note: this is planning information gathered from official Tokyo Disney Resort guidance and overseas guests' experience, not a guarantee. Park staff decide eligibility on the day, at their discretion, and policies change. Always confirm the current position in the official Tokyo Disney Resort app and with staff on arrival. We prepare your paperwork and your plan, we never promise eligibility, and you should be wary of anyone who does.

Home · Tools · DAS document checker

Your DAS documents, worked out question by question

Sorting your DAS paperwork before you fly is much easier with the right documents in hand, and this is our free document checker for overseas guests using DAS, the Disability Access Service. Answer four questions and it builds your personal document checklist, then helps you draft a letter for the guest's doctor to review and sign. Everything happens in your browser: nothing you type is collected, stored or sent. Cast Members decide eligibility at the park, and no document guarantees acceptance, which is exactly why the documents you do carry are worth getting right.

Short answer: for most overseas guests it comes down to two documents. Bring your original home-country disability certificate if you have one, and a doctor's letter on official letterhead stating in functional terms that the guest cannot wait in a conventional line; overseas guests report that the letter is the most reliable document when a certificate is missing or not recognised. You also need every party member's park ticket. Bring photo ID as well, a passport is the usual choice for overseas guests, so staff can match the documents to the guest if they ask.

Your privacy, plainly: this tool works entirely in your browser. Nothing you type or tap here is collected, stored or sent anywhere. There is no account, no sign-up and no email field. When you leave this page, everything you entered is gone.

First, your personal document checklist

Four questions, one at a time, and your checklist appears at the end, built from your answers. It prepares your paperwork before you fly. It does not register you for DAS, and it cannot predict what staff decide on the day, because that decision belongs to the park, not to us.

Question 1 of 4

Which document does the guest have from their home country?

A certificate and a card are not the same thing at Tokyo Disney, and the difference matters, so choose the one that matches what the guest actually holds.

Could the guest's doctor provide a letter before the trip?

A short letter on the doctor's official letterhead. Part 2 of this page helps you draft one to take to them.

What best describes the difficulty?

Choose the closest fit. This changes the advice in your checklist, not just the documents.

Your party and your park tickets

Registration at each attraction needs the whole party's tickets, so the tickets question matters as much as the medical documents.

Does everyone in the party have their own park ticket?

Then, draft a letter for the guest's doctor

If your checklist leans on a doctor's letter, this is where you draft it. Fill in the details and this tool writes a clean draft letter in formal, plain English. English is the language overseas guests commonly bring their letter in. If you can, also bring a Japanese translation alongside the signed English letter: it can help the Cast Member who reads it on the day. That is a practical tip from guest experience, not a Disney rule. Print the draft and take it to the doctor: the letter only counts once the doctor has reviewed it, edited it, and reproduced it on their official letterhead with their own signature. Like everything on this page, the drafting happens in your browser and nothing is sent anywhere.

Write this line in your own words. It is added to the letter exactly as written, for the doctor to edit.

What to do next, now the paperwork is ready

The checklist and the letter are the paperwork half. The other half is how DAS actually runs on the day: the DAS sections of our accessibility guide walk through registering at each attraction, return times, and the Separate Wait Service. And if you would like the whole day planned around your access needs, that is what Your plan, checked by us, our $149 checked plan, does: your park days planned and checked line by line, talked through on a call. Questions before any of that? Send us a message.

That is the whole tool: a checklist that is yours, and a draft your doctor can make official. Do it here, at home, and you will arrive at the park with your paperwork ready to show. Two last things from us before you go, because they matter more than anything above.

Please note: this tool prepares documents only. It does not register you for DAS, and the wording here follows official Tokyo Disney Resort disability services information and reports from overseas guests. Park staff decide eligibility on the day, at their discretion, and policies change. Confirm the current position in the official Tokyo Disney Resort app and with staff on arrival.
Independent, not affiliated: Happily Ever Tokyo is an independent planning service run by Aaron and Maya. It is not affiliated with, endorsed by, or connected to The Walt Disney Company, Tokyo Disney Resort, or Oriental Land Co., Ltd.

Home · Guides · Dietary restrictions

What you can actually eat at Tokyo Disney

If you eat with an allergy, if you eat halal, vegan or vegetarian, if you are coeliac or avoiding gluten, if you manage diabetes, or if your family's table holds a mix of needs all at once, this page is for you. Eating well here is genuinely possible, but it is planned, not improvised. We are Aaron and Maya, we live in Tokyo, and this is the page we would send a friend: start with your need, then the restaurants and dishes that answer it, then the rules underneath, in that order.

The guide cats at a restaurant food display case, one holding a dietary card

Start with your need

Follow your situation down the chart. Every path ends at the same restaurant routine, and each need has its full card in the chapter below.

Start here: what does your table need?

An allergy to a labelled allergen?

Run it through Disney's official search by allergen, screenshot the shortlist, and build the day on the Special Dietary Menu at an anchor restaurant. Read the full card

Coeliac, or avoiding gluten?

The hard one. Wheat is labelled, but barley is not in the 28 and soy sauce is everywhere: low-allergen menu, dish-by-dish checks, and your own food at the table if nothing is safe. Read the full card

Halal?

There is no halal-certified restaurant in either park. In the park, seafood or plant-based dishes; certified halal meals are planned outside the parks. Read the full card

Vegan or vegetarian?

Choose the dishes Disney marks plant-based, and ask about dashi, the fish-based stock, every single time. Read the full card

Pescatarian?

The easy one: seafood is everywhere, DisneySea especially. Base the day on the harbor restaurants and order before the noon rush. Read the full card

Diabetes?

Disney publishes no carb counts, so fix your meal times first and mobile-order to them. Read the full card

Every path ends the same way at the restaurant: phrase card first, ask for the Special Dietary Menu by name, and confirm ingredients with staff on the day.
The short answers: kitchens cannot modify dishes · there is no halal-certified restaurant in either park · a low-allergen menu exists, at a named list of restaurants in each park. And our two habits, before anything else: choose an anchor restaurant, and a backup, for each park day, and use the 10:30 mobile-order habit, eating off peak when the seating is quieter and staff have time to help.

Eating for your need, one by one

Every need meets a different park, so here is each one this page covers, with the traps we would warn a friend about. If your table holds more than one of these, read the ones that apply and then the On the day chapter, which is written for exactly your table.

Allergy and low allergen

Build the day on the Special Dietary Menu

This is the menu we build every allergy day on: the Special Dietary Menu, the parks' low-allergen menu, served at the named restaurants in the next chapter. Before you go, run your allergens through the official 28-allergen information search: search by allergen, tick yours, and screenshot the shortlist it gives you. That shortlist, plus an anchor restaurant for each park day, is the allergy day.

Halal

No halal-certified restaurant, and the honest way round it

There is no halal-certified restaurant inside either park, and anyone who tells you otherwise is guessing; we will tell you straight. Here is the way round it, as our Muslim guests do it: choose seafood or plant-based dishes according to your own practice, and use the allergen information to help avoid pork, which is one of the 28 items it covers. Alcohol is different: the allergen system does not cover alcohol at all, so the search cannot filter it out. Alcohol-based ingredients, such as sake, mirin and wine in sauces or desserts, are a question for staff and for labels on the day, not for the search. A phrase card helps with the asking. And for certified halal meals, plan them outside the parks (near your hotel, or in Tokyo itself) and treat park eating as the flexible meal of the day.

Vegan and vegetarian

Plant-based dishes, and the dashi trap

Start from the plant-based options marked on menus: the reliable core of a vegan or vegetarian day here. Then watch the trap we warn every vegan guest about: Japanese cooking uses dashi (fish-based stock) in dishes that otherwise look vegetable-only, and soups, curries and sauces are where it hides. The dishes to start from are the core Special Dietary ones, the Vegetable Stew with Rice and the Vegetable Curry with Rice (mild): vegetable-based, but ask about the stock, because dashi is exactly the trap above. Name the specific dishes in your plan, not just the restaurants: that is the difference between hoping and eating.

Pescatarian

The easiest restriction to satisfy here

Good news first: this is the easiest need we plan for. Seafood is everywhere, from the port-themed restaurants at DisneySea to sushi-influenced counters. The work is mostly about variety and timing: base the day on the seafood restaurants of Mediterranean Harbor and American Waterfront at DisneySea, and mobile-order the popular seafood spots before the noon rush.

Coeliac and gluten

Gluten and wheat allergy, including coeliac

We will be straight with you: coeliac guests have the hardest time here, of everyone we help. Wheat is one of the labelled allergens, so the allergen search helps, but soy sauce (which contains wheat) is pervasive, and note that barley is not one of the 28 allergens: the rules chapter below explains why that gap matters. A dish made without wheat is not the same as gluten free, and must never be read as gluten free. The low-allergen menu is a useful in-park starting point, made with care, but it is made in a working kitchen, so cross-contact cannot be ruled out. If you have coeliac disease, confirm with staff before ordering, dish by dish: tedious, but it keeps you well. Many of our coeliac guests also use the bring-your-own arrangement described in the On the day chapter.

Diabetes

Meals on your schedule, not the queue's

Start with the gap: Disney does not publish carbohydrate counts for its dishes, and ingredients are not provided in writing before a visit. So when we plan for guests with diabetes, timing comes before menus: queues do not care about your meal schedule. Mobile-order at set times so meals happen on your schedule rather than the queue's, choose restaurants and dishes in advance from the published menus, and build the day around regular meal and snack points rather than long gaps, keeping snacks you trust on you for the gaps between meals. Carry your usual supplies as you would anywhere; park first-aid locations can help on the day.

The Special Dietary Menu: what it is, where it is, and how to ask for it

This is the menu the whole page turns on: the parks' own low-allergen menu, served at a named list of restaurants in each park, and the menu we build every restricted day around. Here is what it is, how you ask for it, the anchor restaurants we start from in each park, and where the full official list lives.

What it is

The parks' own low-allergen menu

Everything else on this page hangs on this menu: Disney's low-allergen offer, served at selected restaurants. Its core dishes, Vegetable Stew with Rice and Vegetable Curry with Rice, are made without the five major allergens (wheat, buckwheat, eggs, dairy products, peanuts).

How to ask for it

No reservation: ask a Cast Member on the day

No reservation is needed; just ask a Cast Member at the restaurant on the day. Do not describe the problem and hope: ask for the Special Dietary Menu by name, rather than asking for a normal dish to be changed. Cast Members know it by that name. Major restaurants have tablets where you can check the 28 ingredient list.

At course and buffet restaurants

Sometimes, it is the only option

Where you are eatingThe dietary option
Course meal restaurantsThe Special Dietary course or plate is the only option for other needs
Buffet restaurantsOnly the Special Dietary Plate is

If a table service meal is part of your day, we plan around it from the start, not as a surprise at the table.

Before you go

Recheck the roster close to your date

The roster changes seasonally (favourites come and go), so check the official 28-allergen information search before you go. Disneyland's list is about to grow twice, and DisneySea's is the longer one:

ParkNowFrom 2 Nov 2026From 21 Nov 2026
Tokyo Disneyland12 restaurants1314
Tokyo DisneySea17 restaurants1717

The two Disneyland additions: Plaza Pavilion Restaurant joins on 2 Nov, and The Diamond Horseshoe adds show dining on 21 Nov.

Illustration of the Special Dietary Menu's two core dishes on a tray: a bowl of vegetable stew with rice, and a bowl of vegetable curry with rice
The two core dishes of the Special Dietary Menu, as we picture them: Vegetable Stew with Rice, and Vegetable Curry with Rice (mild).

Anchor restaurants: Disneyland

The anchors we start from, and the four we would send our own family to, all on the official Special Dietary Menu list: three in World Bazaar, and Hungry Bear in Westernland as the adult anchor for the core dishes.

Tokyo Disneyland

Eastside Café

Area
World Bazaar
What makes it useful
Serves a Special Dietary Child's Set from 1 Nov 2026. Its Special Dietary Menu plate (1,500 yen) ended on 31 Oct 2026, so from November this is the children's anchor in World Bazaar, not the adult one.
The catch
The menu rotates seasonally. Recheck the official page close to your date.

Tokyo Disneyland

Restaurant Hokusai

Area
World Bazaar
What makes it useful
Serves a Special Dietary Child's Set now, and the stew and curry join from 2 Nov 2026, which widens the choice for late 2026 trips.
The catch
What is on offer depends on your date. A trip before 2 Nov 2026 gets the narrower menu.

Tokyo Disneyland

Hungry Bear Restaurant

Area
Westernland
What makes it useful
Serves the core dishes, Vegetable Stew with Rice and Vegetable Curry with Rice (mild), 980 yen, with no end date shown: the adult anchor from 1 Nov 2026, when the Eastside Café plate ends.
The catch
A counter across the park from the World Bazaar anchors, so plan it as a stop, not a fallback. We pair it with a Westernland ride.

Anchor restaurants: DisneySea

DisneySea's official Special Dietary Menu list is the longer one, and we spread our own days across these three anchors, so a restricted eater is never far from an option.

Tokyo DisneySea

Miguel's El Dorado Cantina

Area
Lost River Delta
What makes it useful
Also serves the core stew and curry, deep in the park, so the back half of a DisneySea day has a covered lunch or dinner.
The catch
It is one counter among a busy land, at the far end of the park, so plan it as a stop in the back half of the day.

Tokyo DisneySea

Restaurant Sakura

Area
American Waterfront
What makes it useful
Serves a Special Dietary Steamboat Set (listed from 1 Jul 2026). Choose it when the restricted eater wants a proper sit-down set meal, not another counter tray.
The catch
A set menu means less room to mix and match for a mixed-needs table, so check the current set before you rely on it.

The rules that decide what you can eat

Before any restaurant names, here are the rules underneath everything, stated exactly as they stand. We have seen the day these rules are learned at the counter instead: hungry, anxious, or eating plain rice while everyone else feasts. Learned here, at home, they simply become the shape of a good plan.

Rule 1

Kitchens cannot modify dishes

Tokyo Disney kitchens cannot modify dishes: no swaps, no "hold the sauce". What is on the menu is what is served, so "almost right" dishes stay almost right. So we do the choosing before the trip: every meal picked in advance, from the official allergen information, the low-allergen menus and the plant-based options marked in park. Done at home, it stops feeling like a restriction and becomes just the plan.

Rule 2

Allergen information exists, and it takes decoding

Allergen information exists but is scattered and hard to decode, and menus change seasonally. Use the official search the way we do: search by allergen, tick yours, and the results become the shortlist you work from. Screenshot it before you fly. And always confirm ingredients with restaurant staff on the day, even for a dish you checked carefully at home: we do, every time.

Rule 3

Low allergen is not a guarantee of allergen free

The official site publishes allergen information you can search by item, covering the major allergens Japan requires and recommends labelling for, and selected restaurants offer a low-allergen menu designed to exclude the main allergen groups. The limit we plan around, and say out loud to every guest: the low-allergen menu isn't guaranteed allergen-free, because kitchens are shared and cross-contact is possible.

Rule 4

There is no halal-certified restaurant in either park

Stated once, plainly: no halal-certified restaurant inside either park. The Halal card in the first chapter gives the honest way round it. The same chapter's Coeliac card covers the need our guests find hardest of all.

The 28-allergen system, explained

Disney's allergen labelling covers 28 items in two tiers. Those 28 items are the list behind the official allergen information and the Special Dietary Menu. Here they are at a glance:

Labelled by law: the mandatory 8

ShrimpCrabWalnutsWheatBuckwheatEggsDairy productsPeanuts

Labelling recommended: the other 20

AlmondsAbaloneSquidSalmon caviarOrangesCashewKiwisBeefSesameSalmonMackerelSoyChickenBananasPorkMacadamia nutPeachesMountain yamApplesGelatin
Barley sits outside the 28 entirely, so the search cannot filter it out. For coeliac guests, this is the gap that matters most.

The official allergen search works two ways: search by restaurant, or search by allergen. We almost always start by allergen. Either way, the point of the search is to ask for menu items prepared without the allergens you select, so the results become the shortlist you confirm with staff on the day. You can run it yourself in the Official 28-allergen information search (Tokyo Disney Resort).

That gap is why a dish that comes up wheat free does not automatically count as gluten free. If barley matters to you, it has to be checked separately, with staff, dish by dish.

The official rules, in brief: the short version lives in the Special Dietary Menu chapter above: how to ask for the menu, the course and buffet rule, and the tablets for checking the 28 list.
Please note: this is planning information from published menus and allergen guides, not medical advice. Always confirm ingredients with restaurant staff on the day, menus change.

On the day: ordering and eating together

Knowing what you can eat is half of it. The other half is the day itself, and a little local rhythm helps: how ordering runs at a counter, at a table and in the app, how a mixed table eats together, and the arrangement that lets a guest with a restriction bring their own food when their companions order.

Counter service

Order separately, then sit down together

Each person orders what suits them, at the same counter or a nearby one, and the table eats together. This is how our own mixed table eats. Agree the plan before anyone queues: order separately, eat together.

Table service

Courses, buffets and set menus

At course meal restaurants, the dietary answer is a set one, the Special Dietary course or plate, and at buffet restaurants only the Special Dietary Plate, as the Special Dietary Menu chapter sets out. A set menu means less room to mix and match for a mixed-needs table, so check the current set before you rely on it, and raise your need when you arrive, not when the courses start. That one timing change saves most table-service stress.

Mobile order

What it does for you, and where the dietary side stays in person

Mobile order is how a mixed table skips the queues: each person orders what suits them, from different counters or different restaurants, then the group regroups to eat. Our 10:30 mobile-order habit gets you the quieter seating areas, and for diabetes it means meals happen on your schedule rather than the queue's. The dietary side still runs in person: dietary requests and special preparation cannot be added to a Mobile Order, and the Special Dietary Menu is normally asked for from a Cast Member at the restaurant on the day, with ingredients confirmed with staff on the day. If a named Special Dietary dish appears on a restaurant's ordinary menu, though, it is ordered there like any other item on that menu, including in the app where the venue takes Mobile Order.

At the restaurant door

Phrase card first, before anyone orders

Show your phrase card first, before you are seated and before anyone orders: at the door, not at the table. Ask for the Special Dietary Menu by name, rather than asking for a normal dish to be changed.

The own food rule

Bringing food in: an accepted arrangement

If you eat with a restriction, you may bring your own food into a restaurant when your companions are ordering there, so nobody is exiled to a bench while everyone else sits down. Mention it to staff as you enter; it is an accepted arrangement for dietary needs, and in our experience it is met with a nod, not a fuss. If nothing on the menu is safe, use it without apologising: it keeps the whole table together, which is rather the point of eating together on holiday.

Where to go next

Eating is one part of the day. These are the pages our readers open next, and the way to reach us.

Sensory planning

Noise, crowds and overwhelm shape a park day as much as food does: rest rhythms, the queue options that exist, and a planned exit.

Plan the day's rhythm

Accessibility at the parks

Wheelchair and mobility, DAS and waiting support: the access guide, all in one place, plus the free document checker.

See the accessibility guide

See the ways we can help

The $39 guide and the $149 checked plan are bought on the spot on our pricing page, and only the $799 park day starts with a conversation.

See the plans

Home · Guides · Disney hotels

The Disney hotels, and how we will help you choose

Choosing a Disney hotel means weighing six good options, and these are the six we help families choose between all the time. Each one asks you to trade something different, and booking morning forgives nobody, not even us. So we will walk you through it the way we would over coffee, in the order you will meet it all: Choose your hotel; First, know your window; The 11:00 drop, step by step, just as we do it; If it sells out, do not give up yet; and Staying outside Disney is a fine choice too.

The guide cats at a laptop on hotel booking morning, grand hotel in daylight outside the window

Booking morning, in brief

The whole booking morning on one card, before the detail. Each line is a chapter below.

11:00 Japan time, exactly four months before check-in: every room for your date is released at that one moment, and the most wanted hotels can sell out within minutes. Be logged in, on the right page, with payment ready before 11:00, not after it. First, know your window · The drop, step by step

Around 11:40 the same morning: rooms from abandoned and timed out bookings come back. It is a reported pattern, not a guarantee, and it rewards anyone still watching.

Then the cancellation waves: cancellation fees are fixed per room and step up as check-in gets closer, so rooms reappear around 15 days, and again around 8 days, before you arrive. If it sells out, do not give up yet

Illustration of a hotel room table at dusk with a laptop and notebook open, a lit storybook castle across the water seen through the window

Choose your hotel

Start with the ladder, because where a hotel sits on Disney's own ranking decides most of the trip. Then the six Disney hotels side by side, ranked, in one short table.

The hotel ranking, in one look

Every hotel near the parks sits somewhere on Disney's own ladder. Twenty-five hotels carry a Disney title of some kind; everything else is simply a hotel near Disney. The higher the rung, the closer you sleep and the more Disney hands you. The lower the rung, the kinder the price and the more of the trip you arrange yourself.

1. Disney Hotels (6): on the resort grounds or minutes from the gates. The only hotels with Happy Entry, and the only ones where park tickets are guaranteed at the hotel. Book on the official site, 11:00, four months ahead. Highest prices.

2. Official Hotels (6): on the resort grounds by Bayside Station, on the monorail loop, but not run by Disney. No Happy Entry; you can still buy park tickets at the hotel, and their shuttle takes you to Bayside Station. Book each hotel directly. Kinder prices, bigger rooms.

3. Partner Hotels (4): at Shin-Urayasu. A free shuttle straight to the park gates, about 15 minutes. No Happy Entry, and no sold-out-day ticket rescue. Book each hotel directly. Kinder again.

4. Good Neighbor Hotels (9): across Tokyo and Chiba. A free shuttle to the parks, but you reserve your seat and the ride is longer. Really a Tokyo sightseeing base with a Disney day added.

5. Other hotels: everything else. No Disney title, no shuttle, no ticket help: you arrange all of it yourself, and in return you get the widest choice and often the lowest price.

The six Disney hotels, ranked

Ranked by Disney's own classes, dearest first: Deluxe, then Moderate, then Value. Every name links to the hotel's official page.

#HotelHappy EntryGetting to the parksPrice a nightBest forThe catch
1Tokyo DisneySea Fantasy Springs HotelBoth parksOwn Fantasy Springs entrance¥80,000–140,000+Fantasy Springs fansEntrance closes 21:00; shop needs a park ticket
2Tokyo DisneySea Hotel MiraCostaBoth parksOwn gate into DisneySea¥60,000–130,000+DisneySea-first tripsSells out in minutes; no convenience store
3Tokyo Disneyland HotelDisneyland only1 min walk to the gate¥50,000–115,000+Disneyland days, easy breaksNo DisneySea early entry
4Disney Ambassador HotelDisneyland onlyWalk 10–15 min, or free shuttle¥45,000–90,000Balanced deluxe, Chef Mickey, Ikspiari next doorNo DisneySea early entry
5Tokyo Disney Resort Toy Story HotelDisneyland only5 min walk to Bayside, then monorail¥35,000–70,000Young kids, playful themingSmallest rooms, one restaurant, guests-only shop
6Tokyo Disney Celebration HotelDisneyland onlyFree shuttle, about 20 min¥25,000–50,000Cheapest Disney benefitsOff-site, simplest rooms, 11:00 checkout

The other nineteen hotels, ranked

The same table as the Disney hotels, continued: ranks 7 to 25, grouped by their rung on the ladder. Every name links to the hotel's official page. Prices are relative across all twenty-five hotels: the more ¥ signs, the dearer it tends to run, so check your own dates for the real number.

#HotelHappy EntryGetting to the parksPriceBest forThe catch
Official Hotels: tickets at the hotel, even on sold-out days · shuttle to Bayside Station, then the monorail
7Hilton Tokyo BayNoShort walk to Bayside¥¥¥Big family roomsDearest of the six
8Sheraton Grande Tokyo BayNoShort walk to Bayside¥¥¥Resort feel, pools, familiesBig and busy
9Grand Nikko Tokyo Bay MaihamaNoAt Bayside Station¥¥The value pick of the sixLess character
10Hotel Okura Tokyo BayNoShuttle or walk to Bayside¥¥Quiet, big rooms, couplesOlder feel
11Tokyo Bay Maihama Hotel First ResortNoShuttle to Bayside¥¥Themed rooms, kidsDated in places
12Maihama View HotelNoShuttle to Bayside¥¥Fresh from its 2025 relaunchWebsite is Japanese only
Partner Hotels: free shuttle straight to the gates, about 15 minutes · park tickets the usual way
13Oriental Hotel Tokyo BayNoAt Shin-Urayasu Station¥¥Families, right on the stationSells fast on weekends
14Urayasu Brighton Hotel Tokyo BayNoAt Shin-Urayasu Station¥¥Couples, quieterLess for young kids
15Hotel Emion Tokyo BayNoShuttle from Shin-Urayasu¥Space for the priceWebsite is Japanese-led
16Mitsui Garden Hotel Prana Tokyo BayNoShuttle from Shin-Urayasu¥Newest of the fourA little further out
Good Neighbor Hotels: free shuttle, with your seat reserved · the ride is longer
17Sotetsu Grand Fresa Tokyo-Bay AriakeNoAriake, the closest group¥A Disney day from the bay sideRooms are compact
18Hilton Tokyo OdaibaNoOdaiba¥¥¥Views, a Tokyo trip with Disney addedPremium price for the distance
19Tokyo Bay Ariake Washington HotelNoAriake¥A simple, sensible baseNo frills
20Hotel East21 TokyoNoKoto, east Tokyo¥Big rooms for the moneyQuiet area at night
21Tobu Hotel Levant TokyoNoKinshicho¥Skytree views, easy trainsThe shuttle ride adds up
22Dai-ichi Hotel RyogokuNoRyogoku¥Big rooms, sumo countryThe shuttle ride adds up
23Keio Plaza Hotel TokyoNoShinjuku¥¥¥The best Tokyo sightseeing baseThe longest popular shuttle ride
24Keisei Hotel MiramareNoChiba city¥Chiba-side tripsFar from the parks
25Hotel New Otani MakuhariNoMakuhari¥¥Makuhari events and conventionsFarthest of the nine for Disney

How to read those prices, honestly: Disney does not publish a fixed price list. The official calendar shows the cheapest room still left for that night, so when the cheaper rooms sell out, the price you see jumps to whatever is next, sometimes a suite, and the hotel suddenly looks far dearer than it usually is. Treat our bands as planning ranges guests report, and always check the live calendar for your own dates.

Happy Entry, in full, because this is the detail people get wrong: all six Disney hotels give you 15 minutes early entry at Tokyo Disneyland. At Tokyo DisneySea, only MiraCosta and Fantasy Springs Hotel guests get it, at 5 to 15 minutes early, a rule that changed in September 2025, and no end date for it has been announced. Happy Entry does not apply on your check-in day, but it does apply on your checkout day, so please plan your early mornings for the days after your first night, checkout morning included. Your exact time is printed on the pass you receive at check-in, and a few dates are excluded altogether, so check your dates when you arrive.

A word before the next table: the six below it are not Disney hotels. The Hilton and Sheraton everyone asks us about are Official Hotels, ranks 7 and 8: no Happy Entry, a different booking site, kinder prices. Same ladder, lower rung.

Two benefits every Disney hotel guest gets, and we wish more people knew

Whichever of the six you choose, these come with your stay, and they quietly save trips.

Your park tickets are safe, even on a sold out day. As a Disney hotel guest, you can buy park tickets at the hotel for your stay dates even when the official site shows them sold out. That one fact takes a whole layer of worry off the trip.

Your bags can travel without you. You can ship your luggage to the hotel ahead of you, writing your booking name and arrival date on the slip, and collect it when you arrive. And if you are splitting your stay between Disney hotels, guests tell us the move is easy: your bags are transferred for you and are waiting in your next room by check-in. It is one of those small kindnesses people write home about.

Breakfast, the way we would plan it for you

This one comes from guest experience rather than any official page, so take it as a pattern families report, and a good one.

Please do not spend your Happy Entry morning in a breakfast queue. The hotel buffets need a reservation, the best times go quickly, and every minute at the buffet table is a minute of early entry gone. On a Happy Entry morning, we would do what experienced guests do: buy sandwiches, onigiri and drinks at the hotel convenience store the night before, because the morning shelves empty fast, eat in the room while you get ready, and walk in early and fed.

Save the big buffet breakfast for a morning it deserves, a checkout morning or a day with no park, and enjoy it slowly. One exception to plan around: MiraCosta has no convenience store, so if you are staying there, bring snacks with you or book room service breakfast well ahead, because guests tell us it is popular and goes early. And at the Toy Story Hotel, remember there is only one restaurant, so the moment your room is booked is the moment to reserve your table there too.

First, know your window

Every room for your check-in date appears at the very same minute, and it does not wait for anyone. If we can help you do one thing on this page, it is this: know that minute in your own time zone before it arrives.

Here is the rule we plan our own mornings around: Disney hotel rooms open for booking at 11:00 JST, exactly four months before check-in, for a stay of up to 5 nights, and the two everyone wants, MiraCosta and Fantasy Springs, can sell out within minutes of the drop. Most visitors from overseas never even hear that this window exists until their trip is already set, and we do not want that to be you. Packages open earlier, five to six months ahead; Chapter 3 makes sense of them.

Let us turn that into your time zone: our free Booking timeline builder takes the 11:00 JST drop, the 11:40 returns pattern and the 14:00 JST ticket sale and shows you each one in your local time, with a live countdown and calendar files you can save. It is our morning here in Tokyo, not your 3am guesswork.

The money side, stated exactly so there are no surprises: when you book, a deposit is taken for each room, and it counts toward your room charge, with the rest paid at the hotel. Your booking is confirmed once that deposit is paid. How much the deposit is, and what cancelling costs at each point, depends on which hotel group yours is in:

Deposits and cancellation fees, by hotel group

Read across your row. On a phone, swipe the chart sideways to see the whole row.

Hotel group
Deposit per room
Cancel 15 days or more before check-in
Cancel 8 to 14 days before
Cancel 2 to 7 days before
Cancel the day before, on the day, or do not arrive
Fantasy Springs Hotel, Tokyo Disneyland Hotel, Disney Ambassador Hotel and Hotel MiraCosta
30,000 yen per room
No fee, and your deposit is refunded in full
10,000 yen per room
20,000 yen per room
30,000 yen per room
Toy Story Hotel and Tokyo Disney Celebration Hotel
15,000 yen per room
No fee, and your deposit is refunded in full
5,000 yen per room
10,000 yen per room
15,000 yen per room

The cancellation fee is a fixed amount for each room, not a slice of your bill. That detail matters more than it sounds, and we explain why in Chapter 4. If you are cancelling online, you can do it until 20:59 Japan time the day before check-in; after that, you phone the hotel.

If your room goes at the drop, take a breath: rooms come back, at moments you can plan around, and Chapter 4 walks through every one of them. The $149 plan exists for exactly this stretch: reminder emails before your drop and at the cancellation window, and a room watch that pings you when a room opens. Chapter 4 has the details in context.

The 11:00 drop, step by step, just as we do it

Booking morning feels like a scramble if you meet it unprepared. We do it as a sequence instead, and this list is that sequence: be ready before 11:00, and know your second chances before you need them.

  1. Rank your room choices before the day: your first pick, your second pick, and the hotel you will happily take if both go. Decide it together now, not in a panic at 11:01.
  2. Book a backup first, before your real drop. This is the sequence guests who sleep well the night before swear by, so we will pass it on as they tell it: hold a room you can cancel for free, at Celebration, the Ambassador, or one of the Official Hotels in Chapter 5, and only then hunt for your first choice. If the dream room lands, you cancel the backup. If it does not, your trip is safe either way, and booking morning stops feeling like a cliff edge.
  3. Do a full practice run on an earlier date. Guests who land the hard hotels tell us this is the difference: rehearse the whole booking on a date you do not need, so you know every click, every screen and where your card details go, before the real morning. MiraCosta and Fantasy Springs can go within minutes of the drop, and that is no time to be learning the website. Be on the site about 15 minutes early on the day, and do not be surprised if a virtual waiting room holds you in a queue first; that is normal, and it lets people in in order.
  4. Turn 11:00 JST into your time zone and set an alarm (the builder in Chapter 2 does it in seconds).
  5. Decide what you are booking: a room on its own, or watching for a Vacation Package batch instead. We will explain packages just below.
  6. Log in to your account well before 11:00 JST, not at 11:00, and be on the right page, with your payment details ready, before the clock, not after it. This is the step we gently nag everyone about, because it is the one that saves the morning.
  7. Have your payment card ready. The deposit is taken when you book, and the money section in Chapter 2 sets out the amount for each hotel.
  8. Set your dates: your check-in day, and no more than 5 nights.
  9. When 11:00 lands, book. The most wanted hotels can sell out within minutes of the drop, so save the room photo comparisons for another day.

Vacation Packages, explained the way we explain them to friends

The confusion we hear most, so let us clear it up first: a Vacation Package price is per person, not per family. A 2-day package for three people can come to roughly $2,400 to $2,500 in total, around $800 per person, depending on the hotel and dates. For that per-person price you typically get the Disney hotel nights, park tickets for each day, a set of attraction passes, and extras like a drink ticket, depending on the plan. Packages open roughly five to six months ahead, in monthly batches: an announced watch window, never a promised date, and we will always call it that. Always multiply by your party size and compare against booking the hotel and tickets separately. Sometimes the package wins, sometimes it really doesn't, and we will show you the maths either way.

Now the honest side of packages, the way guests who have done the sums describe it: because packages go on sale earlier and come from their own separate pool of rooms, they can be the easier way to land MiraCosta or Fantasy Springs when the room only drop looks hopeless. That ease is real, and so is the price: packages cost significantly more than booking the same pieces separately, and they only cover short stays, a 1 night and 2 day pattern or a 2 night and 3 day pattern. Our honest read: if your trip is one or two days built around Fantasy Springs, a package can earn its premium. If you are staying for four or more park days, guests who have priced both ways usually skip the package and book the pieces separately.

Package, or book it yourself? Let us do the maths with you

This is the money question behind every Vacation Package, so we will answer it with worked examples rather than a rule of thumb.

Package or book it yourself

The verdict
A Vacation Package is a convenience product, not a saving. If saving money is your goal, we would book the parts yourself, and we will help you see why.
The maths
In the examples we have worked through, the same trip cost about 62,100 to 124,800 yen more as a package than booking the hotel, tickets and passes separately.
What the premium buys
Ride access secured in advance, before you enter the park, plus breakfast and vouchers. That certainty is what you are paying for, and for some trips it is worth every yen.
The call
If guaranteed rides on a peak date are not why you are buying, we would book room only and tickets yourself, each at its own drop.
About these timings and the example price: the 11:00 JST drop, four months before check-in, is the official Disney hotel booking rule. The roughly 11:40 release is a pattern guests report, when timed out bookings return to the rooms on sale; it is not an official or guaranteed time, which is why we treat it as a moment to be ready for rather than a promise. Your own total will differ by dates, hotel and party size, so please use the example as a shape, not a quote.

Booking morning on the clock, Japan time

The list above is the sequence. Here it is on the clock, so you can set your alarms to it. Every time here is Japan time; the converter in Chapter 2 turns each one into your own time zone.

When
What to do
Days before
Rank your first, second and fallback room choices. Hold a room you can cancel for free as your backup, and rehearse the whole booking on a date you do not need.
10:45 JST
Be on the site, logged in, on the right page, with your payment card ready.
11:00 JST
The drop. Book your first choice and pay the deposit. Your booking is confirmed once the deposit is paid, so save the room photo comparisons for later.
11:40 JST
The reported release. Chapter 4 tells the full story. Stay watching.
After the morning
If you landed your first choice, cancel the backup. Then the two cancellation waves, around 15 and around 8 days before check-in (Chapter 4).

That is the whole morning, the same morning the $149 plan sends its reminders for.

If it sells out, do not give up yet

If you see a sold out screen at 11:01, please do not take it as the end of your trip. We have watched rooms come back at moments you can plan around, and here is the short version, the way we would tell a friend.

  1. ~11:40Same morning

    The release

    Bookings people started and abandoned, and bookings that timed out, fall back into the rooms on sale roughly 40 minutes after the drop. Most people have given up by then, so please do not be one of them.

  2. Around 15 days, then around 8 daysBefore check-in

    The cancellation waves

    Rooms come back in waves around the cancellation fee steps we set out in Chapter 2, and now you can see why. While cancelling is still free, at 15 days or more before check-in, some guests let rooms go, and a first wave appears around 15 days out. Then, just before the fee rises at 7 days, a second wave appears around 8 days out, as people decide not to pay more to cancel later. Guests watch both moments. The second wave, around 8 days out, has no reminder of its own, so put that one in your diary today.

Between those moments, please do not spend weeks refreshing the page. It will wear you out, and it rarely helps. Write the moments down now, the return about 40 minutes after the drop, the wave around 15 days out, and the wave around 8 days out, and be ready when each one comes. And remember the backup first sequence from Chapter 3: if you already hold a cancellable room, you can watch these waves with a steady heart instead of a sinking one.

If you would rather not watch these moments alone, this is the stretch our $149 plan was built for. The optional booking-window support in our $149 plan is where we teach you these tactics in advance, and we will send you reminder emails three days before your hotel drop, on the morning of the drop itself, and at the start of the cancellation window, so you are watching the right page at the right second instead of refreshing for weeks. The plan also includes our hotel room assistant and its room watch: it watches your own dates at the hotels you want, and when a room opens up it pings you by email or WhatsApp, so you can grab it yourself. It is a notification only: it does not book the room, and it does not guarantee a reservation.

Staying outside Disney is a fine choice too

You do not have to sleep in a Disney hotel to have a wonderful trip. Plenty of lovely trips start with a morning train ride in. Here are the alternatives we talk through with people, honestly, including what each one costs you in time. We live in Tokyo, and these are the beds we point our own visiting friends and family at when the Disney hotels are full or the budget says no.

Option 1

Official Hotels, by Bayside Station

The six Official Hotels are all in the ranked table in Chapter 1 (ranks 7 to 12), so here is only what the table cannot tell you. Their shuttle goes to Bayside Station, not the park gates: budget the monorail hop every time, every day. What makes them our first fallback is the desk: park tickets sold at the hotel even on sold-out days, and free baggage delivery from Maihama Station. If your Disney hotel stays full, take the sure thing here and get back to looking forward to the trip. A room you hold beats weeks of refreshing for one you may never get.

Option 2

Partner Hotels, at Shin-Urayasu

Ranks 13 to 16 in the table. The one gap to know before you count on them: the sold-out-day ticket rescue does not apply here, so your park tickets need the usual booking morning. Baggage delivery from Maihama Station exists, for a fee. Booked separately from everything Disney, which is their quiet strength: hold one as your base and keep the rest of the trip simple. Shin-Urayasu is an ordinary, likeable town: you will eat breakfast next to commuters, not characters, and plenty of our guests end up preferring exactly that.

Option 3

Good Neighbour Hotels, across Tokyo

Ranks 17 to 25 in the table. Our honest framing has not changed: these are Tokyo sightseeing bases with a Disney day added, not resort bases. If most of your trip is Tokyo itself and Disney is one special day, they can suit you beautifully. If Disney is the trip, stay closer and save your mornings: the shuttle seat is free, but the ride is part of your day, every day.

Option 4

Other hotels

Everything else, from a Maihama business hotel to a tower by Tokyo Station. No Disney title, no shuttle, no ticket help at the desk: you arrange all of it yourself. In return: the widest choice and often the lowest price.

The Tokyo Station side is simple for trains: Maihama Station is about 15 minutes from Tokyo Station on the JR Keiyo and Musashino lines. But the Keiyo Line platforms sit at the far end of Tokyo Station, a 5 to 10 minute underground walk, and from central Tokyo you should allow about an hour door to gate, so count the whole door to gate trip, not just the train ride, and decide with the real number in front of you.

Home · Guides

Guides for your Tokyo Disney trip

Every guide here is free, written by the two of us from inside both parks, and kept up to date as the parks change. They sit in the order a trip actually needs them: plan the trip first, then settle any access needs while there is still time to act on them, then the rides, passes and shopping waiting for you inside the gates. Start wherever your trip is up to.

1. Plan the trip

Before anything is booked, the shape of the trip has to be right: which park on which day, and where you will sleep. These guides carry the whole method, in the order you will live it.

How to use the app

One account for each adult, every ticket on the right phone, one Create Group for the party, and the on the day order for Premier Access, Entry Request, Standby Pass and Mobile Order, set up at home before you fly.

Set up the app

Disney hotels

The six Disney hotels weighed against each other, the 11:00 booking window four months out explained step by step, what to do when your hotel sells out within minutes of the drop, and why staying outside Disney can be a fine choice too.

Choose your hotel

Buying tickets

The 14:00 sale moment two months ahead, which ticket fits your day, the official route against other sellers, what to do when your card fails, and the discounted disability passport.

Buy tickets without the card failure

2. Access needs

If anyone in your party has access needs, this is not a footnote to the trip: it shapes which rides you can do, what paperwork to carry and how the day is paced. Sort it here, early, while every option is still open to you.

Accessibility

Wheelchair boarding and DAS on one page. Which rides you can and can’t do, ride by ride: the transfer and emergency-evacuation rules Tokyo is strict about, step-free routes through both parks, planned rest breaks, rentals, and the discounted disability passport. Plus the DAS paperwork for overseas visitors: the original certificate to bring, what to show a Cast Member at each attraction, and how doctor’s letters are treated on the day. Park staff decide eligibility; this guide gets you there prepared.

See what you can ride, and sort the paperwork

Dietary restrictions

Eating with allergies, halal, vegan, vegetarian, coeliac or diabetes needs: the rules that decide what you can eat, the Special Dietary Menu and where to find it, the mixed-family strategy, and Japanese phrase cards to carry.

Plan eating safely

Sensory planning

For guests who find a full park day a lot: where the sensory load rises, rest rhythms that bring it back down, the queue options that actually exist, including DAS (waiting outside the physical queue) and the Separate Wait Service, and a planned exit decided before you enter.

Give the day a rhythm

3. Rides, passes and shopping

With the trip planned and access settled, the last guides are about the day itself: the paid pass that swaps a long line for a short one, the food worth queuing for, and the shopping that catches so many visitors out.

Pass systems

Disney Premier Access (the paid pass), Entry Request (the free show lottery), Standby Pass (free, for shops) and Happy Entry (early entry for hotel guests) compared on one page: what each system is, when you can get it, how it works, and what it covers at Tokyo Disneyland and Tokyo DisneySea.

Compare the pass systems

Premier Access

What the pass costs now, ride by ride for both parks, when you may buy the next one, how getting into Fantasy Springs works today, and how we spend our own pass money when we go.

Read the pass guide

Disney shopping

Disney Store Japan and Tokyo Disney Resort sell different merchandise: which shop sells what, what is exclusive where, Bon Voyage rules, shopping in the app on your park day, purchase limits and the resale traps.

Shop without the traps

Want these guides as one book, or a person to check your plan?

These pages are the free, live version of our guides, and they stay free. This site is the broad knowledge. The $39 pack is the full runbook: the complete guide as one printable playbook, with the coloring book alongside it. And the $149 checked plan is a person doing the judging: up to 3 park days checked line by line, your spend checked with them, a finished plan as a printable PDF within 3 days, a 60-minute call, one revision round and 2 weeks of follow-up, plus our hotel room assistant if you are booking one of the Disney hotels: booking-window support and the room watch.

See the plans

Home · Tools

Free tools for your Tokyo Disney trip

Every tool here is free, runs in your browser, and collects nothing: no account, no sign-up, and nothing you type is stored or sent. They sit in the order a trip actually happens, so start wherever yours is up to: choose your days first, then book on the right day at the right time, then plan the day itself and what it will cost.

1. Choose your days

Before anything can be booked, the days themselves have to be right. This is the first question every visitor asks us, so it comes first.

Crowd Calendar

Our estimated crowd level for every day at both parks, from 1 (quietest) to 10 (peak), months ahead: built from weekdays, Japanese public holidays, school breaks and event seasons, with the method published in the open. Pick a quieter day here first, then check your exact dates with Your Dates above.

See the crowd calendar

2. Book on the right day, at the right time

A Tokyo Disney trip is not booked in one sitting. The hotel, the tickets and the restaurants each open on their own day, months apart, and every one of those days runs on Japan time.

Booking timeline builder

Tell it your dates and it lines up every booking morning for your trip in the order the windows open, each one in Japan time and in your time zone, with a live countdown and a calendar file for each.

Work out your booking timeline

Booking time converter

The short answer, explained properly: when hotel rooms and park tickets open, how the counting works month to month, and what happens when the date does not exist, with worked examples you can check. The timeline builder above turns the answer into your own dates, in your time zone, with a countdown and calendar files.

Read the short answer

Hotel Price Calendar

What a Disney hotel night typically costs, day by day: pick a month and a hotel and see the typical price for every date, moving with the crowd level, so a quieter week can pay for the nicer room. Typical ranges from our hotel guide, honestly labelled, not live prices.

See typical prices

3. Plan the day and the budget

With the days chosen and the bookings made, the day itself is the last piece: which passes are worth paying for, and how the hours fit together.

Premier Access calculator

Tick the rides, shows and parades you would actually buy, set your party size and your days in each park, and get the trip total split by park, in the order we would buy them, sell-out risks first.

Add up my passes

Build Your Day

Drag attractions, shows and restaurants from the full official lists for both parks onto one timed grid, and the page checks clashes, Premier Access spacing and backtracking as you build.

Build my day

Live Wait Times

The queues at both parks right now, park-reported and refreshed when you open the page: sort by the longest wait to see where the crowds are standing, or search for your must-do ride before you cross the park for it.

Check the queues

Budget Simulator

What the whole trip adds up to, line by line: tickets priced off the crowd level for your date, plus hotel, food, Premier Access, souvenirs and getting here, worked out for your party and your dates.

Add up my trip

4. Access needs

If anyone in your party uses disability access, the paperwork is part of the planning, and it is much easier sorted at home than at a ride entrance.

DAS document checker

DAS is the Disability Access Service. Answer four questions for a document checklist made for your situation, then draft a letter for your own doctor to review and sign. Cast Members decide eligibility at the park; this tool gets your paperwork ready, and nothing you type is collected, stored or sent.

Run the document checker

5. Know the rides before you go

The rides themselves are the last piece: what your smallest rider can actually ride, which ones take Premier Access, and where the thrills are, all settled before anyone’s heart is set on the wrong thing.

Attractions Explorer

Thirty headliner rides across both parks in one searchable table: height limits, Premier Access, single rider, indoor or outdoor, and how much thrill to expect. And for what is closed on your own dates, Your Dates checks every day of your trip.

Explore the rides

Want a person to check your plan?

The tools do the counting. The $149 checked plan is a person doing the judging: up to 3 park days checked line by line, your spend checked with them, a finished plan as a printable PDF within 3 days, a 60-minute call, one revision round and 2 weeks of follow-up, plus our hotel room assistant if you are booking one of the Disney hotels: booking-window support and the room watch.

See the plans

Home · Tools · Crowd Calendar

Which days are quiet at Tokyo Disney?

Our crowd levels for every day from October 2026 to December 2027, from 1, quietest, to 10, peak, worked out separately for Disneyland and DisneySea. This is our estimate model, set out in full below: not official data, and not a promise. DisneySea usually runs about one level busier than Land, because Fantasy Springs and the 25th anniversary crowds are still pulling people to Sea. Like every tool here, it runs in your browser and collects nothing.

1–3 Low · 4–6 Moderate · 7–8 Busy · 9–10 Peak

Tap any day for the level in words, the headliner waits we would expect, and what we would do with a day like that.

Your day

Tap a day on the calendar above and we will tell you, in plain words, what that level means for queues — and whether we would pick it ourselves.

How we estimate — our methodology, in the open. A weekday base (Tuesdays and Wednesdays lowest, Saturdays highest), plus Japanese public holidays, plus school breaks (late March to early April, late July to August, late December to early January), plus event seasons (Halloween, 10 September to 31 October; Christmas, 7 November to 25 December; Golden Week, 29 April to 6 May), plus one level for DisneySea. Weather, last-minute closures and ticket sales can move a real day up or down from the model, so treat the level as a planning signal, not a guarantee. We publish the inputs so you can judge the model yourself, and we will track predicted levels against actual headliner waits and publish the score, good or bad.
Already picked your days? Your Dates checks them for closures and hours: one card per day of your trip, with the rides closed at each park and the park hours for those exact dates.

The year at a glance

DisneySea ranges for 2027, from the same model. The pattern every year: mid-January to February and rainy June are the quiet, good-value months, and the last week of August is the softest part of the summer holidays.

← All tools

Want a person to check your plan?

The tools do the counting. The $149 checked plan is a person doing the judging: up to 3 park days checked line by line, your spend checked with them, a finished plan as a printable PDF within 3 days, a 60-minute call, one revision round and 2 weeks of follow-up, plus our hotel room assistant if you are booking one of the Disney hotels: booking-window support and the room watch.

See the plans

Home · Tools · Live Wait Times

What are the queues like right now?

Live, park-reported wait times for both parks, fetched fresh when you open this page and whenever you tap refresh. Sort by the longest wait to see where the crowds are standing, or search for your must-do ride before you cross the park for it. If the live feed cannot be reached, we show a clearly labelled sample instead — never a sample dressed up as live.

Show
Where the waits come from: live data from ThemeParks.wiki, the community-run live theme park data project — thank you to their team. If that feed cannot be reached, we try Queue-Times instead, and if neither answers, we show a clearly labelled sample rather than nothing. Waits are park-reported and can change minute to minute, and a ride shown open can still pause without warning, so treat this as a strong signal, and the official app as the final word on the day.

← All tools

Want a person to check your plan?

The tools do the counting. The $149 checked plan is a person doing the judging: up to 3 park days checked line by line, your spend checked with them, a finished plan as a printable PDF within 3 days, a 60-minute call, one revision round and 2 weeks of follow-up, plus our hotel room assistant if you are booking one of the Disney hotels: booking-window support and the room watch.

See the plans

Home · Tools · Budget Simulator

What will this Tokyo Disney trip actually cost?

The question behind half the messages we get. Tell the simulator who is coming and how you travel, and it adds the trip up line by line — tickets at the price your date is likely to carry, because a peak Saturday ticket costs more than a quiet Tuesday one, hotel, food, Premier Access, souvenirs and getting here. Nothing you type is stored or sent.

Please note: these are estimates from our published typical ranges, not quotes. Adult tickets run ¥9,900–12,400, juniors ¥7,800–9,800 and children ¥5,600–7,000 under dynamic pricing, and busier dates cost more — the simulator reads the ticket price off the crowd level for your date. Hotel, food and transport figures are the typical midpoints we see, and your real numbers will move around them. Adding up Premier Access on its own, ride by ride and in the order we would buy it, is a job of its own: our Premier Access calculator does exactly that.

← All tools

Want a person to check your plan?

The tools do the counting. The $149 checked plan is a person doing the judging: up to 3 park days checked line by line, your spend checked with them, a finished plan as a printable PDF within 3 days, a 60-minute call, one revision round and 2 weeks of follow-up, plus our hotel room assistant if you are booking one of the Disney hotels: booking-window support and the room watch.

See the plans

Home · Tools · Hotel Price Calendar

What do Disney hotels cost, day by day?

Pick a month and a hotel and see the typical nightly price for every single day of it, moving with the crowd level — because the same room can cost half as much again on a peak Saturday as on the quiet Tuesday either side of it. These are typical ranges from our hotel guide, not live prices: real prices move daily, and rooms sell out.

Typical ranges, honestly labelled: every price here is our guide’s typical range for that hotel, adjusted by the day’s crowd level — a planning signal for choosing dates, not a quote and not availability. Live checking, with a person watching for the room you want, is in our $149 checked plan: the optional hotel room assistant, with booking-window support and the room watch. For the hotels themselves, read our Disney hotel playbook.

← All tools

Want a person to check your plan?

The tools do the counting. The $149 checked plan is a person doing the judging: up to 3 park days checked line by line, your spend checked with them, a finished plan as a printable PDF within 3 days, a 60-minute call, one revision round and 2 weeks of follow-up, plus our hotel room assistant if you are booking one of the Disney hotels: booking-window support and the room watch.

See the plans

Home · Tools · Attractions Explorer

Know the rides before you go

Thirty headliner rides across both parks, in our own words: height limits, Premier Access, single rider, whether it is indoors, and how much thrill to expect. Search for the ride your child has their heart set on, and check the height before you promise it.

Closed on your dates?

Rides close for refurbishment through the year, and the dates move too often for a static list on this page to stay honest. So instead of guessing here: Your Dates checks every day of your trip against the official closures and park hours, one card per day.

Check my dates

← All tools

Want a person to check your plan?

The tools do the counting. The $149 checked plan is a person doing the judging: up to 3 park days checked line by line, your spend checked with them, a finished plan as a printable PDF within 3 days, a 60-minute call, one revision round and 2 weeks of follow-up, plus our hotel room assistant if you are booking one of the Disney hotels: booking-window support and the room watch.

See the plans

Home · Tools · Booking time converter

What time do Tokyo Disney hotel rooms open where you live?

Booking morning lands at a very different hour depending on where you live. This page gives you the rules straight and shows the counting in worked examples, and the free Booking timeline builder turns them into your own dates, in your own time zone, with calendar files and a countdown. It is our morning here, not your 3am guesswork.

Short answer: Disney hotel rooms open at 11:00 in the morning, Japan time, exactly four months before your check-in date, and park tickets are sold daily at 2:00 in the afternoon, Japan time, for admissions on the same date two months later. If that date does not exist in the month two months before, tickets are available at 2:00 in the afternoon, Japan time, on the first day of the following month.

Your booking morning, in your own time zone

The rules are above and the worked examples are below. What those moments are in your own time zone, for your actual trip, is a bigger job than one date, so it lives in the free Booking timeline builder: give it your check-in day and your park days and it builds the whole sequence, rooms, the 11:40 second look, tickets and restaurants, every moment in Japan time and in yours, with calendar files to save and a live countdown to the next one.

Build my booking timeline

One free tool, the whole booking story in the order it opens: Disney hotel rooms, Vacation Package watch dates, park tickets and restaurant bookings, with the date-that-does-not-exist cases worked out the way Disney works them out. It runs in your browser; nothing is collected or sent anywhere.

Open the free Booking timeline builder

The counting behind your times, step by step

We would rather show our working than ask you to trust a black box with your booking morning. Here is exactly how the converter counts, and a few worked examples you can check against your own calendar.

How we work it out

The builder takes two dates from you, and each one drives a different result. Your arrival or check-in date drives the hotel result: we count back four calendar months from your check-in date for hotel rooms, and set that opening at 11:00 Japan time on the day we land on. Your first park day drives the ticket result: park tickets follow a different rule, tickets are sold daily at 14:00 Japan time for admissions on the same date two months later, so the ticket opening comes from your first park day itself, counted back two months to the same date. If that date does not exist in the month two months before, tickets are available at 14:00 Japan time on the first day of the following month, and the tool says so in the result above. The conversion to your time zone uses the standard international time zone database built into your browser, so daylight saving changes and the date line are handled properly. Japan itself never changes its clocks, but your home time zone may change between now and the opening, and the two moments can sit on different sides of a clock change. That is exactly why fixed offset maths, the kind that just adds or subtracts nine hours, gives the wrong answer.

Worked examples, so you can check our maths

  • New York, daylight saving: check-in on 20 July 2027. Rooms open at 11:00 JST on Saturday 20 March 2027, which is 10:00 pm EDT on Friday 19 March 2027, the night before the Japan date.
  • New York, standard time: check-in on 15 May 2027. Rooms open at 11:00 JST on Friday 15 January 2027, which is 9:00 pm EST on Thursday 14 January 2027. Tickets for the same trip, for a first park day on 15 May 2027, go on sale at 14:00 JST on Monday 15 March 2027, the same date two months earlier, which is 1:00 am EDT the same day, because the United States has moved its clocks by then. One trip, two different offsets.
  • Sydney: check-in on 10 June 2027. Rooms open at 11:00 JST on Wednesday 10 February 2027, which is 1:00 pm AEDT the same day in Sydney. Sydney runs ahead of Japan, so the opening lands later that day; the shift to the previous calendar day happens the other way, for visitors in the Americas, as the New York examples show.
  • A check-in on the 31st: check-in on 31 October 2027. June has no 31st, so Disney opens reservations on the first day of the following month instead: Thursday 1 July 2027, at 11:00 JST. When this happens with your date, the builder says so clearly in the timeline it builds.
  • A first park day with no matching date: first park day on 30 April 2027. February has no 30th, so tickets go on sale at 14:00 JST on Monday 1 March 2027, the first day of the following month. When this happens with your date, the builder says so clearly in the timeline it builds.
Please note: booking windows last checked against official Tokyo Disney Resort information. Park systems can change, so confirm the current position in the official app before you rely on a date. Happily Ever Tokyo is an independent planning service. It is not affiliated with, endorsed by, or connected to The Walt Disney Company, Tokyo Disney Resort, or Oriental Land Co., Ltd.
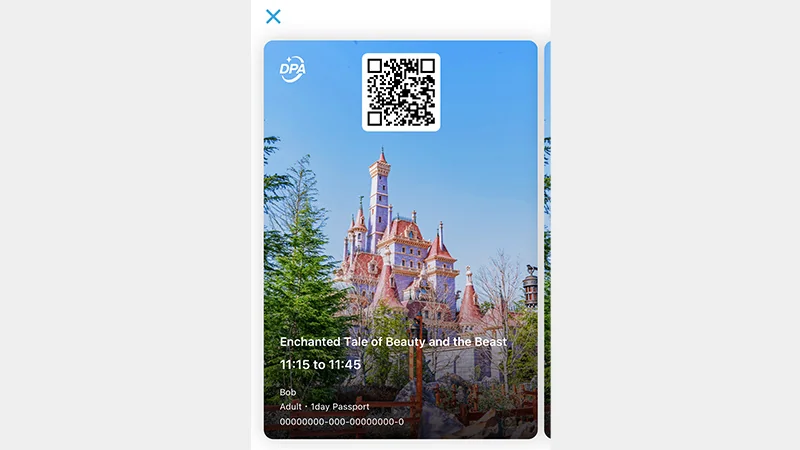
That is all there is to it: the rules above, your dates in the builder, and alarms you can trust. Build your timeline now, while it is still weeks away and easy, and booking morning becomes one small thing you are ready for instead of a scramble. We will be up with our coffee here in Tokyo when it lands. Good luck, and we hope you get the room you want.

Build Your Day

Prefer to plan the day itself? Drag attractions, shows and restaurants from the full official lists onto one timed grid, and the page checks clashes, Premier Access spacing and backtracking as you build.

Build my day

Premier Access calculator

What will the paid passes actually cost your group? Tick the rides and shows you want and see the total per person and for the whole trip, in the order we would buy them in.

Add up my passes

Your Dates

Your trip dates on one calendar: checked park hours, official ride closures, shows in season, and the Japanese holidays and long weekends that make the parks busy.

See my dates

Home · Tools · Booking timeline builder

What to book when: your whole Tokyo Disney timeline

Your booking mornings start arriving months before your trip does, and this is the builder we point every guest to before they do. A Tokyo Disney trip is not booked in one sitting: the hotel, the tickets and the restaurants each open on their own day, months apart, and every one of those days runs on Japan time. Tell the builder your dates and it lines up every window for your trip in the order the windows open, each one in Japan time and in your time zone, with a live countdown and a calendar file you can save for each. It runs entirely in your browser: nothing is collected, stored or sent.

Short answer: a Tokyo Disney trip is booked in a strict order, months apart, and every window opens on Japan time. Disney hotel rooms open at 11:00 Japan time, four months before check-in. Park tickets are sold daily at 14:00 Japan time for admissions on the same date two months later, and if that date does not exist in the month two months before, tickets are available at 14:00 Japan time on the first day of the following month. Park restaurant bookings open at 10:00 Japan time, one month before each day you want to eat.

Your dates in, your booking mornings out

Your first park date, your hotel check-in date, how many park days you are planning and where you are staying: that is all the builder asks for. It does the rest, and lines up every window for your trip in the order the windows open.

Your check-in date starts as the same day as your first park date. Change it if you arrive on a different day.

Park restaurant bookings

How each window works

The same windows as your timeline, taken one at a time, with the official pages we checked each rule against, and the honest notes we would give a friend before they relied on a date.

Disney hotel rooms. Rooms for a check-in date are released together at 11:00 Japan time. This builder counts back four calendar months from your check-in date, the rule our Booking time converter runs. Read our Disney hotel playbook for the drop, the returns pattern and the cancellation window in full.

Park tickets. Tickets are sold daily at 14:00 Japan time for admissions on the same date two months later, so each park day opens on its own day, two months before you visit. If that date does not exist in the month two months before, tickets are available at 14:00 Japan time on the first day of the following month. For a trip with park days on consecutive days, the ticket openings fall on consecutive days too, so this builder shows the ticket opening as a window from the first park day's sale day to the last park day's sale day, with a calendar entry for the first sale day. This builder works to that rule. The official park ticket information (Tokyo Disney Resort) is the page to check for the tickets themselves.

Park restaurants (Priority Seating). The official Priority Seating page (Tokyo Disney Resort) states that advance bookings open at 10:00 Japan time one month before the day you want to dine, run until 20:59 Japan time the day before, and that same-day bookings open at 09:00 Japan time on the day itself. A second honest note: some guides mention an earlier advance window for Disney hotel guests. The official Priority Seating page does not list one, so this builder does not invent one.

Vacation Packages. Tokyo Disney Resort announces package sale dates in advance; there is no fixed formula to compute. Packages open roughly five to six months ahead, in monthly batches: an announced watch window, never a promised date, and the announcement is the only date worth trusting. Watch the official Vacation Packages page (Tokyo Disney Resort).

On the day. Disney Premier Access, Entry Request and Standby Pass can only be obtained after you enter the park that day, in the official app. There is nothing to book in advance for them, which is why they appear in your timeline as information, with no calendar file.

Please note: rules checked against official Tokyo Disney Resort pages. Park systems can change, so confirm the current position in the official app before you rely on a date. Happily Ever Tokyo is an independent planning service. It is not affiliated with, endorsed by, or connected to The Walt Disney Company, Tokyo Disney Resort, or Oriental Land Co., Ltd.
Home · Tools · Build Your Day

Your park day, built one block at a time

A park day is much easier to plan when you can see the whole day at once, and this is the board we would spread out on the table if you were planning the day with us in person. Pick a park, pull in the attractions, shows and restaurants you care about from the full official lists, and lay them out on one timed day. As you build, the page checks your plan for clashes, for Premier Access spacing and for backtracking across the park, and it saves itself in your browser as you go, so you can leave and come back to it. Nothing here predicts a wait time: every block is a planning slot you size yourself.

Short answer: drag attractions, shows and restaurants onto one timed day, 08:00 to 21:00. Attraction, show and restaurant names and Premier Access prices were checked against the official Tokyo Disney Resort pages. On a phone, tap an item to add it; dragging is there too, on screens that make it comfortable.

Lay out your day

Choose your park at the top, and add your park date if you would like the calendar file at the end. On a phone, tap an item in the list to add it; on a bigger screen you can drag items onto the day as well. Drag a block up or down to move it, and tap a block to change its start time or its length, or to switch on Premier Access at the price shown.

Park

Your day saves itself in this browser as you build, one day per park. Nothing is sent anywhere.

Tap or click an item to add it to the first free slot, or drag it onto the day. Items marked Premier Access can be switched to a paid pass in the editor after you add them, at the price shown.

Drag a block up or down to move it. Tap a block to open its editor: start time, length, Premier Access on or off, and remove. On a keyboard, Tab to a block, use the arrow keys to move it, and Delete to remove it.

Plan checks

How to read the checks

Once your day is laid out, the Plan checks panel starts talking. Here is what each flag is really saying, and the two honest notes we would leave you with before you go.

The checks are the rules an easy day runs on, nothing more. A clash means two blocks want the same minutes. The Premier Access window spacing check is a caution about tight windows only: it flags Premier Access windows that overlap or sit within 30 minutes of each other, and it is not a rule check. The official purchase rule is separate context: a different attraction opens at the earlier of 60 minutes after you buy or the start of your return window. The full rule is on the Premier Access page. Backtracking spots the pattern that tires everyone out: one land, then another, then back to the first. And the food and rest notes exist because both are easy to forget while the day still looks empty. The tool never predicts a wait time or a pass selling out, because nobody can.

New to this? Do it the way we do: add your must do ride first, then build the rest of the day around it, and let the checks watch for clashes as you go.

The honest upsell: if this tool flags your day three times, that is exactly the day the $149 checked plan exists for: we rebuild it hour by hour around your party, your must-dos and your dates, with the booking order settled before you fly. See the checked plan on the pricing page.
Please note: attraction, show and restaurant names and Premier Access prices checked against the official Tokyo Disney Resort pages. Parks change lineups, prices and closure dates, sometimes with little notice, so confirm the current position in the official app before you rely on a plan. Show times and parade times are set by the park nearer the day; the slots here are yours to size. Happily Ever Tokyo is an independent planning service. It is not affiliated with, endorsed by, or connected to The Walt Disney Company, Tokyo Disney Resort, or Oriental Land Co., Ltd.
Home · Tools · Premier Access calculator

Premier Access, added up for your whole party

Disney publishes every Premier Access price, one ride at a time, and never adds them up for you. This calculator does the adding up. Tick the rides, shows and parades you would actually buy, tell it how many of you are paying and how many days you have in each park, and it gives you the total for the whole trip, split by park. Disneyland rides are multiplied by your Disneyland days only, and DisneySea rides by your DisneySea days only, because you can only buy a ride's pass on a day you are in that park. Underneath, it lines your picks up in the order we would buy them in the park, because the popular passes sell out and the order matters. It runs entirely in your browser: nothing is collected, stored or sent.

Short answer: Premier Access costs ¥1,000 to ¥2,500 per person per ride, ¥2,500 per person for a show and ¥3,500 per person for a seasonal parade, at the prices that took effect on 1 September 2026. Every rider needs their own pass, bought in the official app after you enter the park. Children aged 3 and under do not need a pass: they ride free with a paying adult. This calculator gives you a budget, never a promise: passes are sold in limited numbers and can sell out on the day.

Tick your passes, get your number

Tick the rides you would buy on a day in that ride's park. Your total updates as you tick, and the buy order underneath rearranges itself to match. Each ride is only multiplied by the number of days you spend in its own park, so a DisneySea ride is never charged on a Disneyland day, or the other way round.

Two passes are date-bound: the Haunted Mansion holiday version is only sold from 15 September 2026 to 7 January 2027, and Indiana Jones joins Premier Access on 30 November 2026. Set your first park day above, and any pass your trip cannot actually buy switches itself off.

Tokyo DisneySea rides

Tokyo Disneyland rides

Shows and parades, for the whole trip

Shows and parades run on a separate track from rides, so they never block a ride pass, and a ride pass never blocks them. Count how many of each you would buy across the whole trip, not per day: each one is charged once, however many days you have.

Your party and your days, park by park

How the maths works: your Disneyland rides are added up, then multiplied by your Disneyland days only. Your DisneySea rides are added up, then multiplied by your DisneySea days only. Shows and parades are added once for the whole trip. The two park totals and the shows total are then added together and multiplied by your paying guests. Set a park to 0 days if you are not visiting it, and its rides will not be charged.

Your Premier Access budget

Tick at least one ride above, or add a show or a parade, and your budget appears here.

Next in your trip

You have the budget. Now shape the day itself: the free Build Your Day planner lays your rides, shows and meals on one timed grid and checks the order as you build. Our Premier Access page gives our verdict ride by ride, free: which passes are worth their price on a busy day, and which are fine on standby. And the $149 checked plan has us check your finished days line by line.

How to read the number, and the buy order

The total is a ceiling to budget against, not a prediction of what you will spend, and the order is the part that actually saves a day.

A budget, not a promise

Premier Access is sold in limited numbers, in the official app, only after you have entered the park. Nothing can be bought in advance, and a pass you planned to buy may already be gone when your moment comes, most often Frozen Journey at DisneySea and Beauty and the Beast at Disneyland. So treat the trip total above as the most this part of the trip could cost, and be pleasantly surprised if the day lets you spend less. Standby queues are always there, and they are free: plenty of a good day happens without a single pass, and our own habit is one headliner first, then the phone goes away for a while.

Why the order matters

Buying a pass starts a clock. A different attraction unlocks at the earlier of 60 minutes after you buy, or the moment your return window starts. The same attraction again unlocks only once you have ridden it or its window has passed. Shows and parades run on a separate track under the same rule, so they never block a ride pass. That clock is why the order above runs sell-out risks first: while you wait out the 60 minutes between purchases, you want the passes already in your pocket to be the ones that disappear earliest. The full rule, with a worked example, is on our Premier Access page, and all four pass systems sit side by side on the pass systems page.

Planning which days to spend on

Pass money goes furthest on the days you most need it. Our free Your Dates reads your trip dates against Disney's closure lists and the Japanese holiday calendar, so you can see which of your days are the busy ones before you decide where the passes earn their keep.

Please note: prices follow the official Tokyo Disney Resort Premier Access pages, at the rates in effect since 1 September 2026. Prices, lineups and seasonal offers can change, so confirm in the official app on your day. Happily Ever Tokyo is an independent planning service. It is not affiliated with, endorsed by, or connected to The Walt Disney Company, Tokyo Disney Resort, or Oriental Land Co., Ltd.
Your Dates

Which rides are closed while you are there, and which of your days land on Japanese holidays? Type your first and last day and get one filtered card per day.

Check my dates

Home · Tools · Your Dates

Your dates, in one list: closures, hours and busy days

Disney publishes all of this, but split up: park hours on one page, closures on a separate list for each park, show suspensions on another list again, and events somewhere else entirely. Nobody at Disney will take your actual dates and filter it down for you. This page does. Type your first and last day, up to 14 days, and you get one card per day with only what touches your trip: the rides closed at each park that day, the park hours, the shows not on, the events in season, and a busy-day signal read off the Japanese calendar, because a national holiday you have never heard of is exactly the day that catches visitors out. It runs entirely in your browser: nothing is collected, stored or sent.

Short answer: pick your dates and read down the cards. Closures and show suspensions come from Disney's official closure lists for the two parks. Park hours are shown where Disney had published them in the data we checked, and the card says so plainly where they had not. The busy-day signal is read off the Japanese calendar (weekends, national holidays, citizens' days, long weekends, school breaks and school seasons), plus Disney's own 1-day ticket price for the day where Disney has published one: it is a signal, not a crowd prediction. For a predicted crowd number per day, we link you to Yosocal's crowd calendar below, which is their own work.

Your dates in, your cards out

Tap your days on the calendar, or type your first park day and your last below. Fourteen days at most, which covers any Tokyo Disney trip we have ever planned.

Calendar

Tap a day to see it in full. Tap a second day and the calendar builds your whole trip between the two, up to 14 days. The colours are the busy signal: green is lower, yellow slightly busier, orange busier, pink much busier. A red dot marks a Japanese holiday or a local citizens' day, and a blue dot means at least one ride is closed that day.

Where this comes from, and how the busy signal works

Every line on your cards traces back to a source you can check yourself. Here is the honest account of each one.

Closures and shows not on

These come straight from Disney's own published lists: the official Tokyo Disneyland closure list and the official Tokyo DisneySea closure list. The lists run to 30 April 2027. A few venues sit on those lists with no reopening date (Swiss Family Treehouse and Cinderella's Fairy Tale Hall at Disneyland, Mermaid Lagoon Theater at DisneySea): your headline summary names them once, rather than repeating them on every card. Closure dates can change, and rides also stop without notice on the day, so treat your cards as the plan, not a guarantee.

Park hours

Disney publishes park hours in blocks, well ahead, and in the data we checked most days run 9:00 a.m. to 9:00 p.m. at both parks, with a few early closes at 6:30 p.m. (DisneySea on 27 November 2026 and 22 January 2027, Disneyland on 4 December 2026, in the data checked). Hours in our checked data run to 10 February 2027; beyond that, your card says the hours were not published yet rather than guessing. Always confirm your exact day on Disney's official calendar before you rely on it, because hours do change.

Show times

Disney publishes entertainment times only about a month ahead, so your cards do not invent times. What they do list is the other half of the picture, which Disney publishes much earlier: the days a show or parade is suspended, from the same official lists. When your trip is close, the official app and the daily calendar carry the actual times.

The busy-day signal

Here is the plain version first. We cannot count crowds, and nobody can: Disney does not publish how many people will be in the park on your day. What we can count is everything around the day that pushes crowds up or pulls them down: the Japanese calendar, the school year, and the price Disney itself puts on the day. That is all the signal is, and the detail below is here so you can check our working.

The signal is read off the Japanese calendar, and the reasons are printed on every card so you can judge it yourself. A Saturday is busy. A national holiday is busier, above all when it joins a weekend into a run of three or more days off, and the great travel weeks (Golden Week at the end of April and start of May, Obon in mid August, and the school breaks in spring, summer and around New Year) push the parks harder still. On top of that we count the days a holiday-only calendar misses: prefectural citizens' days when local schools close (Chiba's, on 15 June, is the big one here, because Chiba is the parks' home prefecture, and Tokyo's falls on 1 October), school trip season on weekdays, university spring break and graduation trips with student discount passes on sale, and the Lunar New Year week. And we count the lulls: entrance exam season in January and February, the rainy season in June and July, and the quiet pockets just after a school break ends. For dates Disney has already put on sale, we also count the day's own 1-day ticket price, because Disney sets that price by how busy it expects the day to be: a top-price day counts towards busier, and the cheapest days count towards quieter. Those prices come from Disney's official price calendar and run to 1 March 2027; later dates have no published price yet, so no price is counted for them. Sakura season and the autumn leaves fill Tokyo with visitors, so those weeks are named on the cards too. The holiday, school and ticket-price calendars behind the signal are worked out for 2026 and 2027, so the tool covers January 2026 to December 2027: ask for dates outside that range and it says it has no checked answer, rather than inventing one. What the signal is not is a crowd forecast: it cannot know the weather (rain empties the parks, and a sunny day after a wet week fills them), ticket sales or what else is on in Tokyo that day. For a predicted crowd number per day, the crowd calendar at Yosocal is the one we point friends to; their numbers are their own work, so we link you there rather than copy them here.

Deciding what to do with a busy day

A busy day is not a ruined day, it is a day to spend differently. This is the shape of a busy day that still works:

  • Headliners first. Be inside before opening and go straight to your one must-do ride, while its line is still short.
  • Buy the headliner pass in your first minutes. If you are buying Premier Access at all, the headliner is where it earns most, and its best return times go early.
  • Hold your lunch window early. Mobile-order lunch soon after you enter, or by about 10:30, so the noon rush is not your problem.
  • Eat off peak. A sit-down meal before 11:30 or after 13:30 is a rest as well as a meal, and the seating is there.
  • Put the middle of the day indoors. Shows and indoor attractions carry the crowded, hottest hours; save the outdoor rides for the edges of the day.
  • If you have two days, swap. Move the must-do show, or the second headliner, to your quieter day rather than fighting the busy one for everything.

Our free Premier Access calculator adds up what that spend looks like for your party, and the booking timeline builder lines up the mornings when each part of the trip opens for booking.

Please note: closure, suspension and hours data follows official Tokyo Disney Resort pages. Park systems can change, so confirm the current position in the official app before you rely on a date. Happily Ever Tokyo is an independent planning service. It is not affiliated with, endorsed by, or connected to The Walt Disney Company, Tokyo Disney Resort, or Oriental Land Co., Ltd.

Home · How to use the app

How to use the app

One app, set up once at home, then it runs your day.

We are Aaron and Maya, we live in Tokyo, and this is the app we set up with every guest before their trip: one MyDisney account for each adult, every ticket on the right phone, one Create Group for the party, and a card your bank has already let through once. Your tickets, Premier Access, the Entry Request lotteries, Standby Pass and lunch all live in this one app, and the setup is a single job at your kitchen table. Do it there and the in-park part shrinks to minutes of tapping, most of it while you walk.

The Happily Ever Tokyo guide cats holding a phone showing the park map, castle and volcano behind them

Step 1 · Before you go

One account for each adult

Each adult in your party needs their own MyDisney account. Register on the official website, not in the app: the website registration is the smoother route, and the same account then signs in on the phone.

  • Accounts are for ages 13 and over. A child under 13 has no account of their own, and their tickets live on a parent's phone.
  • The English and Japanese account systems are separate. Pick one, register there, and stay with it for the whole trip.
  • One account covers everything: park tickets, Disney hotel bookings and Vacation Packages all sit under the same login.
  • Never share one login across two phones. Each adult signs in as themselves, on their own phone. Sharing a login is how tickets and plans get tangled.
  • Wait times, the guide map, your current location and show times can all be checked without logging in, including before the trip. Some functions need GPS, so turn on location for the app.
  • One account limit for overseas visitors: Disney hotel online check-in and the room key in the app are for guests residing in Japan only.

Get this one right and every later step on this page falls into place. It is also the first thing we set up with guests on our checked plan, before anything else is booked.

Step 2 · Before you go

Get every ticket onto the right phones

Tickets bought on the official site or in the app are already there: open the app signed in as the buyer and the ticket sits under your account.

Tickets bought anywhere else are added by scanning the ticket's 2D code with the phone's camera inside the app. One practical catch: a code cannot be lifted from a photo or screenshot that sits on the same phone you are scanning with. Show the code on a second screen, or print it out, and scan from there.

The rule that keeps everything else simple: one ticket lives on one phone. Sharing a ticket with the rest of the party happens through the group in the next step, never by scanning the same ticket into several phones.

Get this split right at home and nobody is locked out of their own ticket at the Maihama gates.

A 1-Day Passport displayed in the Tokyo Disney Resort app, with the guest nickname, the date and the code scanned at the park gate
What a ticket looks like on the right phone: your passport in the app, with the code you scan at the gate.

Screenshots: Tokyo Disney Resort official app. Disney's concept images: the names, dates and prices in them are samples, not current, and the screens may differ from the app today.

Step 3 · Before you go

Create Group: one plan for the whole party

Create Group is where your party becomes one plan. Set it up and one person can book passes, lotteries and food for everyone, and the whole party can see what is booked. We set this up before anything on the day itself, because every booking in Steps 5 and 6 runs through it.

  • The creator starts: the person making the group needs their tickets displayed in the app, or a plan already started.
  • Create the group, then share the invitation. Everyone else joins from the invitation, signed in on their own account.
  • Make a fresh group for each park day. Yesterday's group is not today's group.
  • Any member can then book passes, lotteries and food for some or all of the group, and everyone in the group sees the plan.
  • Children under 13 are not members. A parent books for them, the same as with their tickets.

Disney's warning, and we back it: scan the same ticket into several phones outside a group and tickets and plans can disappear. The rule itself is Step 2: one ticket on one phone, shared through the group.

The app top page with Create Group highlighted, the starting point for sharing tickets and plans with a party
Tap Create Group to start a group for your party.
The Create Group screen in the app with the Invite members button
Tap Invite members, then send the invitation to everyone in your party.
A shared group screen in the app, showing the party tickets and plans together in one place
Once everyone has joined, the group tickets and plans sit together on one shared screen.

Screenshots: Tokyo Disney Resort official app (concept images; samples, not current prices or dates).

Step 4 · Before you go

Your card: the prep that actually matters

There is no screen in the app for registering a card in advance. The way around that is one we have tested this ourselves: start a ticket purchase, enter your card, and stop before you confirm. When we tested it, the details were still there when we came back to the ticket purchase. Do it at home, so buying your tickets is a few taps, and your bank has already seen a Tokyo Disney transaction before the gate.

Be ready to type the card once more for your first purchase inside the park, though: Disney's own FAQ says a card for Premier Access and Mobile Order is registered only when a payment in the park completes, and that the card used for park tickets dated on or after 1 April 2023 is held separately and does not carry over to those services. One exception: if you have already bought a Disney hotel, a Vacation Package, a Guided Tour or Bibbidi Bobbidi Boutique online, Disney says that card may already be displayed when you next pay in the app.

  • Aaron's own habit: keep the number where you can paste it, as a fallback. Save your card details in a locked note on your phone, one only you can open, before the trip. If you ever do have to type the number in the park, you can copy and paste it instead of typing it while a queue waits behind you.
  • Buying your tickets in the app for real is even better, if you still need them. Some banks flag a Tokyo Disney transaction as suspicious, so tell your bank in advance that you will be making this purchase. A card your bank has already let through once is far less likely to be stopped at the gate.
  • Know how your bank approves 3D Secure. Purchases can ask for a one time approval, by text code or inside your banking app. Work out which one your bank uses before you are standing in a queue.
  • Carry a backup card. If one card is refused, the day does not stop with it.
  • Check before you retry. If a purchase seems to fail, look at My Booking and your plans in the app first. The booking may already be there, and a second attempt can mean paying twice.
Step 5 · On the day

The order to do things in

Nothing in this step can be done from the hotel or the train. All four services open only after you enter, and only for the park you entered. Once you are through the gate, this is the order we work in:

  1. Disney Premier Access first. Choose the experience and the time, pick who is riding, and pay by card. Buying starts a clock: a different ride unlocks at the earlier of 60 minutes after you buy or your return window's start, and the same ride again only once you have ridden it or its window has passed. There are no changes or cancellations after purchase, so choose before you pay. If the app or your card will not cooperate, Premier Access is also sold at counters inside the park.

    Premier Access

    My Plan in the app with Disney Premier Access selected, then the Select Ticket screen for the party
    From My Plan, tap Disney Premier Access, then select the tickets for everyone who is riding.
    The Select Experience screen for Enchanted Tale of Beauty and the Beast, then the Select Time screen with a time chosen and Next highlighted
    Choose the experience, then the time, and tap Next.
    The Check Details screen for a Premier Access purchase, then the finished pass sitting in My Plan with its Display code button
    Check the details and confirm. The pass then sits in My Plan, ready to show.
    A finished Premier Access pass in the app with its code displayed for scanning at the attraction entrance
    When your time comes, open the pass and tap Display code at the entrance.
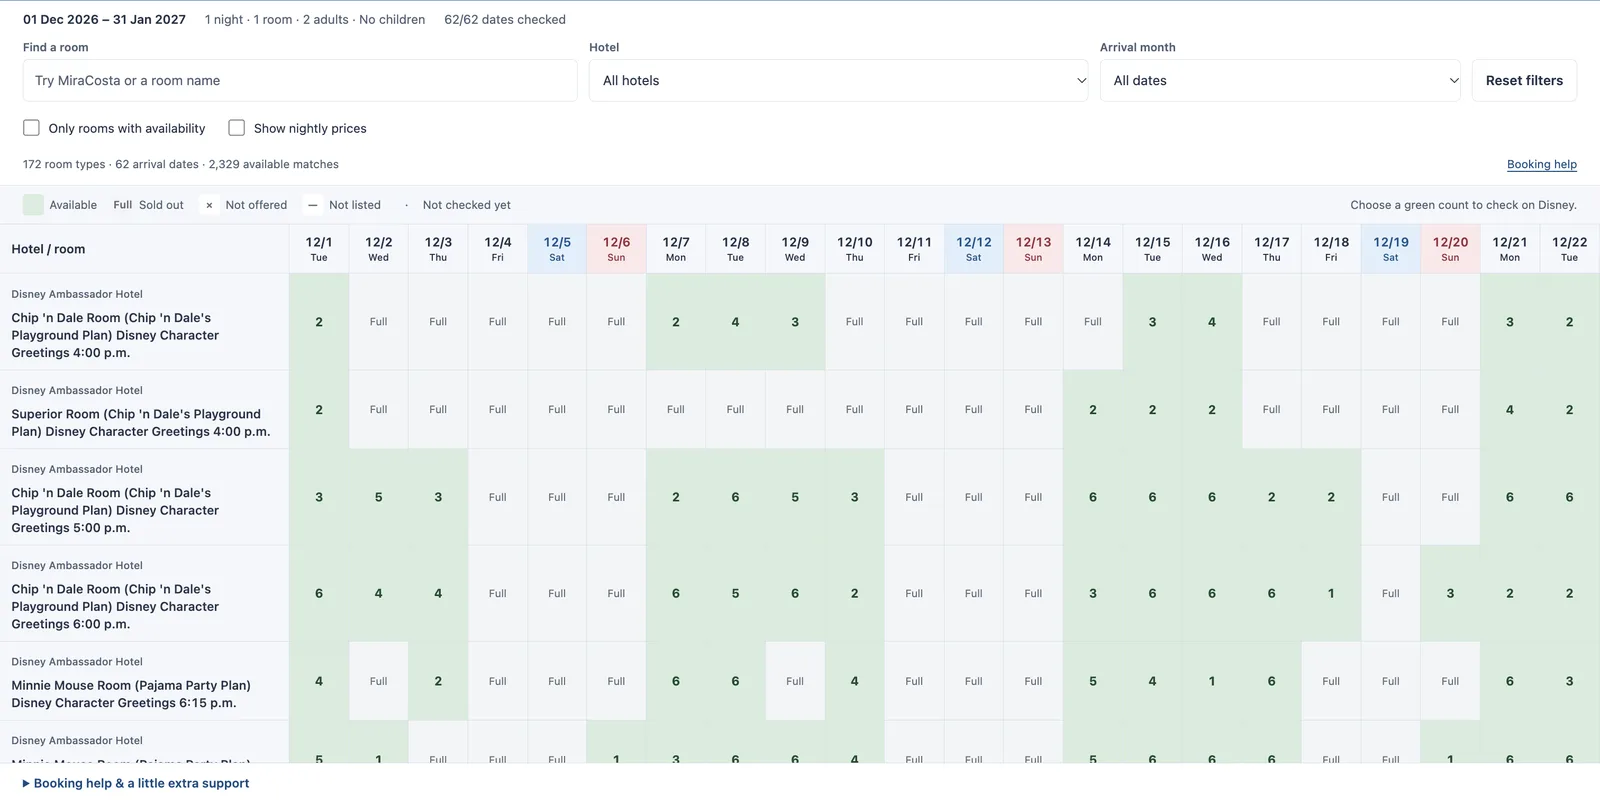
  2. Then Entry Request. The free lottery for shows, character greetings and, when Disney puts one on it, a parade. You get one request per venue per day, and a request cannot be changed or cancelled once it is sent, so agree as a group before anyone taps. Losing the draw does not close the venue: a few venues may offer standby seating if capacity allows.
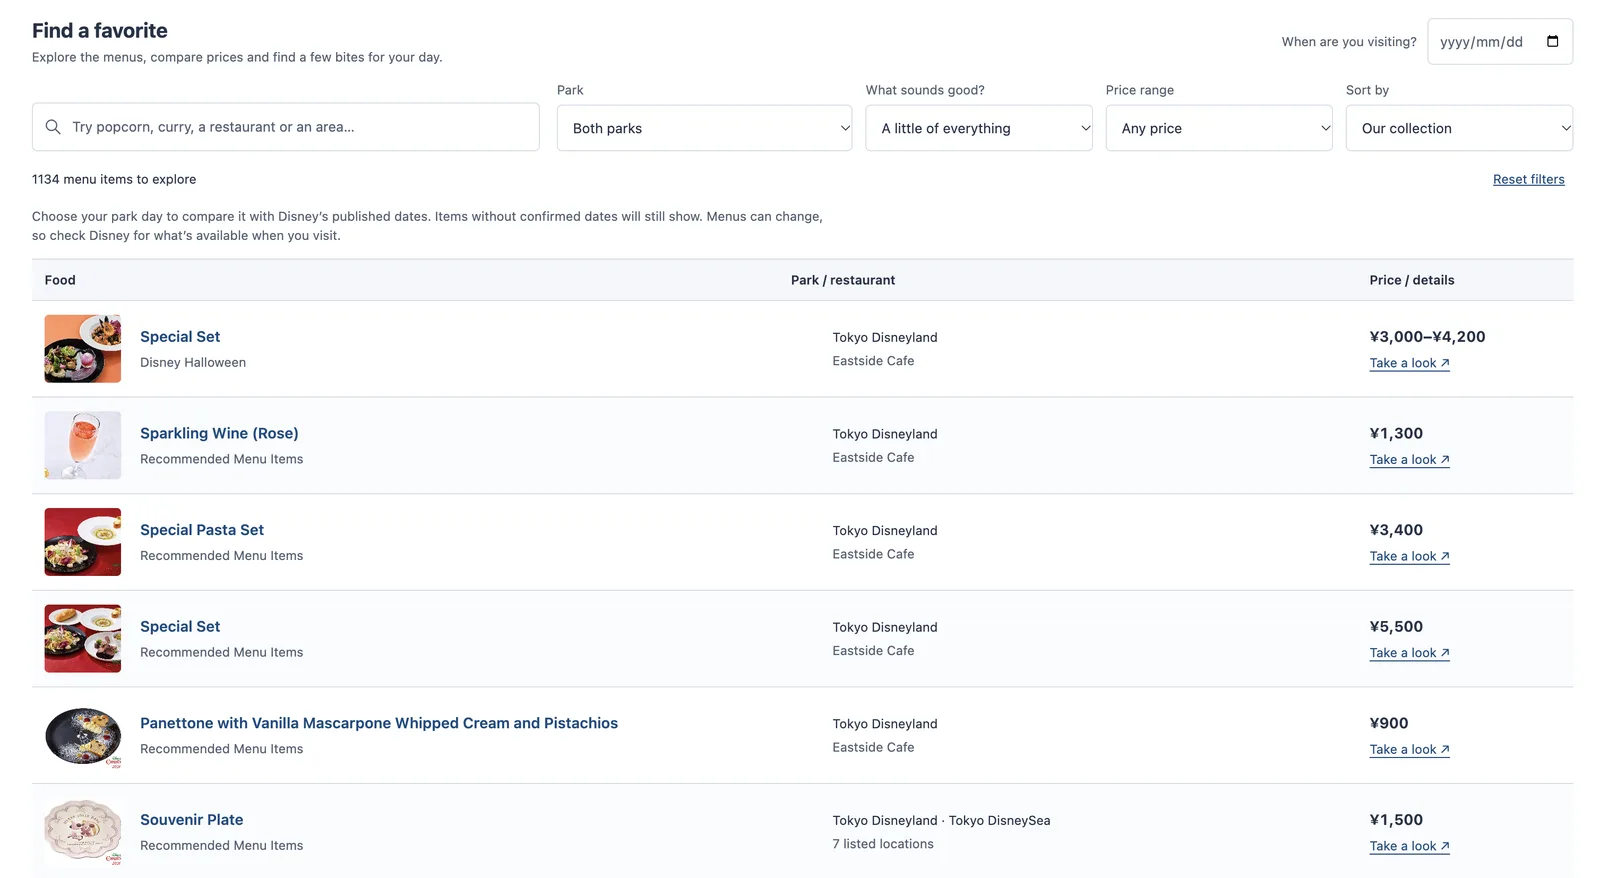
    Entry Request

    The app top page with Entry Request selected, the choice of shows or character greetings, then the Select Ticket screen
    Tap Entry Request, choose shows or character greetings, then select your tickets.
    The Select Experience screen for a show in the app, then choosing the performance time for the Entry Request
    Choose the experience and the time you want to request.
    An accepted Entry Request result screen, with the return time and Display code for the venue
    If your entry is accepted, the app shows your time and Display code, and the result also sits in My Plan.
    An unsuccessful Entry Request result screen in the app
    If you are not successful, the app shows it plainly, like this. That request cannot be changed or sent again.
    A finished Entry Request pass in the app with its code displayed for scanning at the venue entrance
    When your time comes, open the pass and tap Display code at the venue.
  3. Standby Pass, when a venue needs one. On busy and new release days, certain venues ask for one: some shops at both parks, the capsule-toy corners at DisneySea already, and from 10 November 2026 also the capsule-toy corners and the Jungle Carnival games (Log Toss and Ball Roll) at Disneyland. For capsule toys the pass covers the capsule toys only: you can still walk into the shop and buy anything else without one. Within one type of venue you hold one pass at a time, and the next opens 120 minutes after the pass was issued or at its return time, whichever is earlier; passes for different types of venue can be held one after another.

    Standby Pass

    Choosing a Standby Pass venue in the app: the Jungle Carnival games, Log Toss and Ball Roll, with the pass details and Issue button
    Choose the venue and check the details, then issue the pass. The Jungle Carnival games shown here join Standby Pass on 10 November 2026.
    Displaying a Standby Pass in the app, ready to be shown at the venue at the return time
    When your time comes, display your Standby Pass in the app at the venue.

Everything you book sits in My Plan, on the app's top page: passes, lottery results and food orders, all in one list. On a multi-day trip, pick your scheduled date on the top page, so you are looking at the right day. And after each purchase, the next purchase time the app shows is the one that counts.

Screenshots: Tokyo Disney Resort official app (concept images; samples, not current prices or dates).

Step 6 · On the day

Mobile Order, step by step

Lunch is where the app saves you the most standing around, and where its traps sit. Order in the app, pick a pickup window, and the food is ready when you reach the counter. What catches guests out is the payment timing and whose phone has to finish the order, so those come first in our order below.

  1. Build the order and choose a pickup window. Our habit is to place the lunch order soon after entering the park, or around 10:30 for an 11:30 pickup, because the window you want is the scarce thing, not the menu.
  2. Your order is not final until you tap "I'm Here": items, quantities and the arrival time can all be changed before that point, and the order can be cancelled. Not final is not the same as not paid, though: if you paid by debit, prepaid or Alipay, the money has already gone out, as the next point explains.
  3. When you pay depends on how you pay. With a credit card or PayPay, payment is processed when you tap "I'm Here", and only then does the kitchen start on your food. With a debit or prepaid card, or with Alipay, you are charged when the order is submitted. That difference matters if an order is left to cancel itself: a debit order that auto-cancels can take two to three months to refund.
  4. Turn the app's notifications on, so you do not miss the signal that your order is ready.
  5. Only the phone that placed the order can finish it. The "I'm Here" button, and the options to change or cancel the order, appear only on that phone. Anyone in your group can collect the food when it is ready, so decide whose phone places the order before you split up.
  6. Send someone ahead to find seats. Mobile Order reserves your food, not a table, so on a crowded day one person hunts for seats while the order is being prepared, and the group eats together.
The app home screen with Disney Mobile Order selected, then choosing a restaurant and an arrival time
Tap Disney Mobile Order, choose the restaurant, then the arrival time.
Choosing an arrival time in the app, then a dish page with its allergen information button and Add to Cart
Pick the arrival time, open the dish, and add it to your cart. Allergen information sits on the dish page.
The Confirm Order screen in the app, showing the arrival time and order details with the Place Order button
Check the order and the arrival time, then place the order.
A pickup time notification in the app, then the screen telling you your pickup time has arrived with the I'm Here button
When your pickup time arrives, tap "I'm Here". That tap starts the kitchen on your food.
The order ready screen in the app, showing the order number and the counter to collect from
When the app says your order is ready, go to the counter it names and give your order number.

One exception travels with all of this: dietary requests and special preparation cannot be added to a Mobile Order, and the Special Dietary Menu is normally asked for in person, from a Cast Member at the restaurant on the day. Named Special Dietary dishes on a venue's ordinary menu are ordered there like any other item: the detail is on our dietary page.

Screenshots: Tokyo Disney Resort official app (concept images; samples, not current prices or dates).

Step 7 · If it goes wrong

When something goes wrong

These five cover nearly every bad app morning we hear about, and each one has a first move.

  • Your tickets show as Guest. You are logged out. Log in again, from Help, with the MyDisney account you used to buy the tickets, and your tickets come back. A different account will not bring them back.
  • You are looking at the wrong day. On a multi-day trip, check the scheduled date selected on the top page. Another day's tickets and plans will not show until you pick that date.
  • Still not showing after logging in? Log out through Help, then log back in with the purchase account. That refresh is Disney's own fix when tickets do not appear.
  • A ticket or a plan has vanished. This usually means the same tickets were scanned into more than one phone. Fix it through Create Group, as Step 3 sets out.
  • Your card keeps erroring. The 3D Secure approval usually did not complete. Approve it in your banking app or by text code, or switch to your backup card, or buy at a Premier Access counter in the park.

From Aaron and Maya

How we do it ourselves

Everything above is how Disney says the app works, and Step 8 below is what regulars report. This card is just us, Aaron and Maya, planning our own days the same way we plan yours.

  • We walk and tap at the same time. The moment we are through the gate we walk purposefully toward our first standby headliner while we book. We never stand in the entrance hub doing admin: that walk is free queue time.
  • Two adults, two jobs. One of our phones buys Premier Access; the other sends the Entry Requests and places the Mobile Order, all in the same minutes. One person doing all three in sequence is the most common first-morning fumble we see.
  • We watch the wait times for a few days before a trip, at the same weekday and time we will visit. It tells us what our headliners really do.
  • We rehearse before our own park days. The setup in Steps 1 to 4 gets a run-through at home, not a first attempt at the gate. And once we are booking, the app's clock beats any guide, including this one.

Step 8 · On the day

What regulars do: tips from people who go often

These come from creators, repeat visitors and our own guests, not from Disney. We print them because they keep proving true on the ground, and we mark them as reports so you can weigh them the way we do.

Regulars add one thing to that walk: the entrance plaza is the worst signal spot in the park just after opening, and it settles a few minutes in.

  • Screenshot your day as a backup. Repeat visitors screenshot their passes, return times and order confirmations as they book, so the day's plan survives a dead zone. A screenshot is your memory, not your ticket: the app itself is still what gets scanned at the ride or the counter.
  • At DisneySea, buy Fantasy Springs in this order. Regulars report the Premier Access sell-out order runs Frozen Journey first, then Rapunzel's Lantern Festival, with Peter Pan's Never Land Adventure lasting longest, and that on busy days Frozen Journey can be gone within the first hour. If Frozen matters most to your party, it is the first tap of the day.
  • A sold out pass is not always gone for the day. Regulars report that Premier Access sometimes reappears later, so a ride that shows as sold out in the morning is worth one more check around the middle of the day. Treat anything you find as a bonus, never as the plan.
  • Some food is app only, so order it like a pass. Five places take Mobile Order and nothing else: the Mickey waffles at Great American Waffle Co., Yucatan Base Camp Grill (To Go) at DisneySea, and the Fantasy Springs restaurants, Royal Banquet of Arendelle, The Snuggly Duckling and Lookout Cookout. Regulars put the Royal Banquet order in early, the same way they treat a headline pass.

Step 9 · All day

Battery, signal and the honest limits

The app runs your day, so we treat the phone like part of the ticket: charged before we leave, power bank in the bag. If yours runs flat anyway, ChargeSPOT rental stations sit in both parks. Rent one before your phone is fully dead, because the rental itself needs a working phone.

Park Wi-Fi is limited, so your own data is the plan: an eSIM, a pocket Wi-Fi or roaming, set up before you fly, as the planning page covers under money and phones.

And the limits we plan around, so nobody promises you more than the app can do: it cannot sell you a sold-out date, and it cannot bend a window or a result after the fact. Everything in Steps 5 and 6 is built inside those lines. That is the whole secret of a smooth app morning here: the setup done early, and no arguing with the app on the day.

Where to go next

The app is one piece of the trip. These pages are where its pieces lead.

Pass systems, side by side

Premier Access, Entry Request, Standby Pass and Happy Entry compared on one page: what each one is, when you can get it, and how often.

Compare the systems

Premier Access, the full guide

Current prices ride by ride, the next purchase rule with a worked example, and how Fantasy Springs entry works now.

Read the guide

Planning

Where the app sits in the whole trip: booking windows, the week before, your first ten minutes inside the gate, and what to do if it goes wrong.

Plan the trip
Independent, not affiliated: Happily Ever Tokyo is an independent planning service run by Aaron and Maya. It is not affiliated with, endorsed by, or connected to The Walt Disney Company, Tokyo Disney Resort, or Oriental Land Co., Ltd.

Home · Guides · Pass systems

The access systems, side by side

✓ Four systems, one page — checked against Disney’s official pass pages by Aaron and Maya, who live in Tokyo.

Four systems, four similar names, all living in the same app — and your first morning inside the gate is the worst possible time to be decoding them. We know, because we live in Tokyo, and this is the moment we walk our own guests through: the names blur for everyone, so please do not feel behind. Here is the whole picture on one page, in the order you will actually use it. Disney Premier Access is the paid shortcut. Entry Request is the free lottery for shows and greetings. Standby Pass is the free pass that lets you into certain shops. Happy Entry is the early entry that comes with a Disney hotel. And one warning before the table, because older guides still get this wrong: the free Priority Pass ended on 31 August 2026 — there is nothing to book, whatever a video from last year tells you. It sits at the bottom of this page as a clearly marked historical note, only because people keep arriving looking for it.

The guide cats holding up four park pass cards at an information kiosk

Which pass do I need?

Start from what you want to do. Each want has exactly one system behind it.

You want to skip a long ride queue

Disney Premier AccessPaid, per ride or show — from ¥1,000. Bought in the app, after you enter.

You want a seat at a show, or a character greeting

Entry RequestFree lottery — one request per experience, per day.

You need into one specific shop on a busy or release day

Standby PassFree — one shop at a time, only on the days Disney switches it on.

You are staying at a Disney hotel

Happy EntryEarly entry before the general opening — 15 minutes at Disneyland.

Most first-timers only ever use the first two. The other two wake up only when a shop, or a hotel stay, calls for them.

Your first ten minutes at the gate

Three of the four systems are claimed in your first minutes inside the gate, and the order matters. This is the exact order we use ourselves — the one we agree with our guests the night before, so nobody is making decisions at the gate with a queue forming behind them. It is the same order the Planning and App pages use.

  1. Disney Premier Access first: buy the pass for your one headliner — the ride you would queue longest for. The best return times go in the first minutes, so do this while you walk, never standing in the hub doing admin.
  2. Then Entry Request: send your requests for the shows and greetings you want. It is a free lottery, one request per experience per day, and a request cannot be changed once it is sent — agree as a group before anyone taps.
  3. Then a Standby Pass, if you need one: only some venues require one, and only on busy or release days. If a venue on your list is one of them, take its pass now; you hold one pass at a time for that type of venue.

Happy Entry is not part of the ten minutes: it happens before them, at the dedicated entrance, for Disney hotel guests — if that is you, your morning starts earlier than everyone else’s. The comparison below puts all four side by side.

System Disney Premier AccessPAID · AFTER YOU ENTER Entry RequestFREE · LOTTERY Standby PassFREE · VENUES Happy EntryHOTEL GUESTS · EARLY ENTRY
What it is Paid skip-the-line pass, bought per attraction or show. Attractions ¥1,000 to ¥2,500, shows ¥2,500, seasonal parades ¥3,500. Free lottery in the app for shows, character greetings and, when Disney puts one on it, a parade. Free pass in the app that controls entry to certain venues on busy days: shops, capsule-toy corners and, from 10 November 2026, the Jungle Carnival games at Disneyland. Early entry into the parks through a dedicated entrance, for Disney hotel guests.
When you can get it After you enter the park, in the official app, or at purchase counters inside the park if you do not have the app or a card. On the day, during the application window set for each experience. After park entry, in the app, on days when a shop requires one, such as busy and new-release days. Before the general opening, on the mornings after your first night. It does not apply on your check-in day, but it does apply on your checkout day.
How it works Choose the ride or show, pay, and pick a return window for attractions. Send one request and the app draws the winners. A lottery, never first come, first served. Take a pass for one shop, then enter inside your set entry window. Show the Happy Entry pass you receive at check-in and enter through the dedicated entrance, ahead of the first pass booking rush.
How often Different attraction: the earlier of 60 minutes after buying or your window start. Same attraction: once ridden, or its window passed. Shows: a separate track, same rule. One request per experience, per day. One pass at a time within one type of venue. For a different venue of the same type, another pass opens 120 minutes after you took the first, or at its return time, whichever is earlier. For the same venue again, after you have used it or its time has passed. Each morning it applies during your stay, where your hotel and park qualify. It can be suspended on certain days.
Tokyo Disneyland Enchanted Tale of Beauty and the Beast¥2,500Splash Mountain¥1,500Big Thunder Mountain¥1,500Pooh's Hunny Hunt¥1,500The Happy Ride with Baymax¥1,500Monsters, Inc. Ride & Go Seek!¥1,000Haunted Mansion "Holiday Nightmare"Seasonal — on sale through 7 January 2027¥1,000 Mickey's Magical Music WorldThe D-Groovationz4 LiveJamboree Mickey! Let's Dance! Designated venues only, on the days they require one. 15 minutes early, for guests of participating Disney hotels. All six Disney hotels give Happy Entry at Disneyland.
Tokyo DisneySea Anna and Elsa's Frozen JourneyClosed 7 to 30 April 2027¥2,500Soaring: Fantastic FlightClosed 10 to 11 April 2027¥2,500Toy Story Mania!¥2,000Journey to the Center of the Earth¥2,000Rapunzel's Lantern Festival¥2,000Peter Pan's Never Land Adventure¥2,000Tower of Terror¥1,500Raging Spirits¥1,500Indiana Jones AdventureJoins 30 November 2026¥1,500 Dreams Take FlightDance the Globe! Designated venues only, on the days they require one. 5 to 15 minutes early, limited to Fantasy Springs Hotel and Hotel MiraCosta guests since September 2025. Guests of other Disney hotels do not get Happy Entry at DisneySea.
Good to know Buy your headliner first: headline rides can sell out early in the day; after each purchase, the next purchase time shown in the app is the one that counts. Lose the draw? A few venues may offer standby seating if capacity allows; check the app on the day. Entry is never guaranteed. Standby Pass covers shops, capsule-toy corners and, from 10 November 2026, the Jungle Carnival games at Disneyland. It no longer covers attractions or restaurants, whatever older guides still say. Treat it as a head start rather than a guarantee, and confirm the arrangement for your dates in the official app.

Disney Premier Access

PAID · AFTER YOU ENTER

What it is

Paid skip-the-line pass, bought per attraction or show. Attractions ¥1,000 to ¥2,500, shows ¥2,500, seasonal parades ¥3,500.

When you can get it

After you enter the park, in the official app, or at purchase counters inside the park if you do not have the app or a card.

How it works

Choose the ride or show, pay, and pick a return window for attractions.

How often

One timed wait applies between purchases on each track, and shows run on their own track. The full next-purchase rule, with a worked example, is on the Premier Access page.

The rides and their prices

Sixteen attractions across the two parks carry a Premier Access price, from ¥1,000 to ¥2,500 per person, and the list changes as rides close and reopen. Every ride and its price is listed on the Premier Access page.

Good to know

Buy your headliner first: headline rides can sell out early in the day; after each purchase, the next purchase time shown in the app is the one that counts.

Entry Request

FREE · LOTTERY

What it is

Free lottery in the app for shows, character greetings and, when Disney puts one on it, a parade.

How often

One request per experience, per day.

The shows, park by park

At Disneyland: Mickey’s Magical Music World, The D-Groovationz4 Live and Jamboree Mickey! Let’s Dance! At DisneySea: Dreams Take Flight and Dance the Globe! Send one request per experience and the app draws the winners: a lottery, never first come, first served.

Good to know

Lose the draw? A few venues may offer standby seating if capacity allows; check the app on the day. Entry is never guaranteed.

Standby Pass

FREE · VENUES

What it is

Free pass in the app that controls entry to certain venues on busy days: shops, capsule-toy corners and, from 10 November 2026, the Jungle Carnival games at Disneyland.

How often

One pass at a time within one type of venue. For a different venue of the same type, another pass opens 120 minutes after you took the first, or at its return time, whichever is earlier. For the same venue again, after you have used it or its time has passed.

Good to know

Standby Pass covers shops, capsule-toy corners and, from 10 November 2026, the Jungle Carnival games at Disneyland. It no longer covers attractions or restaurants, whatever older guides still say.

Happy Entry

HOTEL GUESTS · EARLY ENTRY

What it is

Early entry into the parks through a dedicated entrance, for Disney hotel guests.

When you can get it

Before the general opening, on the mornings after your first night. It does not apply on your check-in day, but it does apply on your checkout day.

Good to know

Treat it as a head start rather than a guarantee, and confirm the arrangement for your dates in the official app. The minutes: 15 at Disneyland, for all six Disney hotels; 5 to 15 at DisneySea, for Fantasy Springs Hotel and MiraCosta guests only.

How we think about each one

The comparison above is the rules. This is the judgement we put on top of them — the same advice we give our own guests, and our own family, before a park day.

Disney Premier Access

The one we pay for

This is where pass money earns its keep. The three we buy without debating are Frozen Journey and Soaring at DisneySea, and Beauty and the Beast at Disneyland — the longest lines in each park, and the passes that sell out first. Everything else, we happily queue for on a normal day. Think of it as buying back time, not buying rides: one well-chosen pass can hand you back your whole morning.

Entry Request

Free — so always try, just agree first

It costs nothing, so we send a request for every show and greeting we would actually attend. The one real mistake is tapping before your group has agreed, because a request cannot be changed once it is sent. And if you lose? We do not let it bend the day. A few venues may offer standby seating, and there is plenty in both parks that needs no request at all.

Standby Pass

The one most people can ignore — until they can’t

On an ordinary day you will never touch this. It only wakes up on busy days and new-merchandise release days, and then it decides whether you get into that shop at all. Our rule: if a specific shop is on your list — a release you came for — take its pass in your first ten minutes. If you are just browsing, skip it, and do not give it another thought.

Happy Entry

Fifteen minutes worth more than they sound

Fifteen minutes sounds small. At the gate, it is not: it puts you inside, and first in the app, when Premier Access opens — ahead of the whole general-entry rush. At DisneySea it is 5 to 15 minutes, and only for Fantasy Springs Hotel and MiraCosta guests, which is the detail that catches people out. If you have it, be at the dedicated entrance early and spend it on position, not on a lie-in.

What it looks like in the app

The screens you will actually see, from Disney’s own app guides. Disney publishes these as concept images, so the names, dates and prices in the screens are samples — it is the layout, and the order of the taps, that is worth learning before you are standing at the gate.

Disney Premier Access

The Select Experience screen for Enchanted Tale of Beauty and the Beast, then the Select Time screen with a time chosen and Next highlighted
Choose the experience, then the time, and tap Next.
A finished Premier Access pass in the app with its code displayed for scanning at the attraction entrance
When your time comes, open the pass and tap Display code at the entrance.

Entry Request

The Select Experience screen for a show in the app, then choosing the performance time for the Entry Request
Choose the experience and the time you want to request.
An accepted Entry Request result in My Plan, with the return time and Display code for the venue
If your entry is accepted, the result sits in My Plan with your time and Display code.

Standby Pass

Choosing a Standby Pass venue in the app: the Jungle Carnival games, Log Toss and Ball Roll, with the pass details shown
Choose the venue and check the details, then issue the pass. The Jungle Carnival games shown here join Standby Pass on 10 November 2026.
Displaying a Standby Pass in the app, ready to be shown at the venue at the return time
When your time comes, display your Standby Pass in the app at the venue.

Happy Entry is not in the app at all. It is the paper pass you receive at hotel check-in — which is why there are no screens for it here.

Screenshots: Tokyo Disney Resort official app.

Where to go next

The systems make sense on their own. They earn their keep inside a plan — and these are the four next steps we point our own readers to.

Premier Access calculator

What the paid passes on this page would cost your group, per person and for the trip, in the order to buy them in.

Add up my passes

Premier Access, the full guide

How the paid pass really behaves in the app: the buying order, the next-purchase clock, and which rides are worth it.

Read the guide

Booking timeline builder

Rooms, tickets and restaurants each open on their own day. Build the whole sequence for your dates in one go.

Build my timeline

See it inside a plan

The passes are one piece of the day. Our pricing page sets out the three ways we can help, from the $39 guide you buy on the spot to a park day with one of us beside you.

See the plans
Historical note: the Priority Pass has ended. The free 40th Anniversary Priority Pass ended on 31 August 2026. There is nothing to book, and any guide or video still telling you to book one is out of date. Some of its rides moved to paid Premier Access from 1 September 2026, Raging Spirits among them, and the rest are standby only now. It is kept here, clearly marked as history, only because older guides still send people looking for it.
Independent, not affiliated: Happily Ever Tokyo is an independent planning service run by Aaron and Maya. It is not affiliated with, endorsed by, or connected to The Walt Disney Company, Tokyo Disney Resort, or Oriental Land Co., Ltd.

Home · Guides · Premier Access

Premier Access and Fantasy Springs, the way we actually use them

If you ask us two questions in Maihama, it is these: is the paid pass worth it, and how does Fantasy Springs actually work now? We are Aaron and Maya, we live in Tokyo, and we plan our own park days around these rules, so here is the honest local version, in the order you will meet it on the day: what the pass is, what it costs now, when you may buy the next one, how getting into Fantasy Springs works today, and exactly how we spend our own pass money when we go.

Prices and rules checked against the official Tokyo Disney Resort Premier Access pages

The guide cats walking the short Premier Access lane beside a long queue

What Premier Access is

Start here, because everything else on this page hangs off three simple facts. This is how we explain it to friends at the gate, before anyone opens the app.

The short version

A shorter line, bought per ride

Think of Premier Access as buying back time. It is the paid way to swap a long standby line for the short line at Tokyo Disney, bought in the official Tokyo Disney Resort app or at purchase counters inside the park, and only after you have entered the park. Pick the ride, take the return window the app offers, pay, and come back at your time to join the short line. That is it: we do most of ours while we are walking to the next thing.

Who needs one

One pass, one person, one ride

There is no family pass and no sharing: each pass is bought per person, per ride, against one park ticket, so every rider needs their own. The happy exception is that children aged 3 and under do not need a pass of their own: they ride free with a paying adult. The per-person maths catches more families out than any other rule on this page, so run your numbers before you go.

The honest limit

Sold in limited numbers

We will not pretend otherwise: passes are sold in limited numbers and can sell out early in the day. We have checked the rules and the prices on this page against Disney's official pages, but whatever the app shows on your morning is the final word.

What it costs now

Attractions run from ¥1,000 to ¥2,500 per person, and we write it in yen because that is what the app will charge you. Here is every ride on the list, park by park, at the prices that took effect on 1 September 2026. Prices can change, so treat this as the position on the day we checked it and confirm in the app on your day.

Tokyo Disneyland

AttractionPer person
Enchanted Tale of Beauty and the Beast¥2,500
Splash Mountain¥1,500
Big Thunder Mountain¥1,500
Pooh's Hunny Hunt¥1,500
The Happy Ride with Baymax¥1,500
Monsters, Inc. Ride & Go Seek!¥1,000
Haunted Mansion “Holiday Nightmare” (seasonal, on sale 15 Sep 2026 to 7 Jan 2027)¥1,000

Tokyo DisneySea

AttractionPer person
Anna and Elsa's Frozen Journey¥2,500
Soaring: Fantastic Flight¥2,500
Rapunzel's Lantern Festival¥2,000
Peter Pan's Never Land Adventure¥2,000
Toy Story Mania!¥2,000
Journey to the Center of the Earth¥2,000
Tower of Terror¥1,500
Raging Spirits¥1,500
Indiana Jones Adventure: Temple of the Crystal Skull (joins 30 Nov 2026)¥1,500

Add up your own passes

That is the list. Now the useful bit: tick the rides you would actually buy, tell it how many of you are paying and how many days you have in each park, and it adds the whole trip up, in the order we would buy them in, sell-out risks first. It is the same calculator as on our tools page, brought here so you do not have to leave the prices to use it. It runs in your browser: nothing is collected, stored or sent.

Two passes are date-bound: the Haunted Mansion holiday version is only sold from 15 September 2026 to 7 January 2027, and Indiana Jones joins Premier Access on 30 November 2026. Set your first park day above, and any pass your trip cannot actually buy switches itself off.

Tokyo DisneySea rides

Tokyo Disneyland rides

Shows and parades, for the whole trip

Shows and parades run on a separate track from rides, so they never block a ride pass, and a ride pass never blocks them. Count how many of each you would buy across the whole trip, not per day: each one is charged once, however many days you have.

Your party and your days, park by park

How the maths works: your Disneyland rides are added up, then multiplied by your Disneyland days only. Your DisneySea rides are added up, then multiplied by your DisneySea days only. Shows and parades are added once for the whole trip. The two park totals and the shows total are then added together and multiplied by your paying guests. Set a park to 0 days if you are not visiting it, and its rides will not be charged.

Your Premier Access budget

Tick at least one ride above, or add a show or a parade, and your budget appears here.

Beyond the rides

Shows and seasonal parades

Shows cost ¥2,500 per person, and seasonal parades cost ¥3,500 per person. They run on a separate track from attractions, under the same rule, so one never blocks the other. Our habit is to save a show pass for the one performance we would happily queue in the rain for, and let the rest look after themselves.

Lineup notes

What changed, and what is coming

The lineup last changed on 1 September 2026, when the free Priority Pass ended: Raging Spirits and The Happy Ride with Baymax joined at ¥1,500, and Monsters, Inc. Ride & Go Seek! joined at ¥1,000. Next in is Indiana Jones Adventure: it reopens on 30 November 2026 and joins Premier Access that day, so its row in the DisneySea table above carries that date. If an older blog gives you a different list, it is working from last season.

Closure dates

Two April 2027 closures at DisneySea

Two dates to circle if DisneySea is your April trip, from Disney's official closure list: Anna and Elsa's Frozen Journey is closed 7 to 30 April 2027, and Soaring: Fantastic Flight is closed 10 to 11 April 2027. If your DisneySea day falls inside those dates, plan it knowing neither ride will be running, and plan it now, not at the gate.

When you can buy the next one

This is the rule that trips up almost everyone we help. Buying a pass starts a clock, and the rule is not simply "wait an hour". It has three branches: one for a different attraction, one for the same attraction again, and one for shows. Learn the first row cold; the app handles the rest.

When can I buy the next one?

Read across your row. On a phone, swipe the chart sideways to see the whole row.

The pass you want next
What has to happen first
Your earliest moment
Worked example
A different attraction
Nothing but the clock. This is the easy one.
The earlier of 60 minutes after you bought, or the moment your return window starts. Whichever comes first is your unlock.
You buy at 9:00 and your return window starts at 11:00. Sixty minutes after buying is 10:00, which is earlier, so a different attraction unlocks at 10:00.
The same attraction again
You ride it, or its return window passes.
Only after you have ridden it, or after its return window has passed. There is no earlier shortcut for riding the same ride twice.
No clock time applies here: riding it, or its window passing, is itself the unlock.
A show or a parade
Nothing on the attraction track blocks it.
Shows and parades run on a separate track under the same rule, so an attraction pass and a show pass can be held at the same time.
Buying one does not block the other: you can hold an attraction pass and a show pass together.

Scanning in does not unlock anything early. We know, half the internet says tapping into your ride frees you to buy the next pass sooner. It does not; that claim is a myth, and it is not in the official rule. The unlock moments are the ones in the chart above.

And you do not need to do this maths in a queue. After each purchase, the app itself shows the exact time you can next purchase, and that time is the one that counts. The chart above explains the rule behind it, so you can plan your buying order the night before, instead of on a pavement inside the park.

Fantasy Springs, as it works now

Fantasy Springs is the corner of DisneySea people fly here for, and getting in is much simpler than the older guides, written when it opened, still make it sound. Here is how entry works on a visit today.

Getting in

Open to everyone

Walk in. Really. Entry to Fantasy Springs has been open to all guests since January 2025, and there is no separate area ticket to buy: with a Tokyo DisneySea park ticket, you can simply walk in. We still meet visitors budgeting for an area pass that no longer exists.

The rides

Three rides, two ways to queue

Its Premier Access rides are Anna and Elsa's Frozen Journey at ¥2,500, Rapunzel's Lantern Festival at ¥2,000 and Peter Pan's Never Land Adventure at ¥2,000. All three are also available from the standby line, so a pass is a choice, not a requirement. One date to know before you plan around it: Anna and Elsa's Frozen Journey is closed 7 to 30 April 2027, from Disney's official closure list.

Our one warning

Morning arrival matters here

Here is our one piece of tough love. The best return times for these rides are claimed early in the day. If Fantasy Springs is the point of your trip, be inside the park early and buy your first pass in your first minutes, while you walk. Coffee can wait ten minutes; the best Frozen times often cannot.

How we actually use it

Rules are one thing. This is the part friends actually text us about: how we spend our own pass money and time once we are through the gate.

Our habit

One headliner first, then the phone goes away

If this is your first visit and it all feels like a lot, steal our routine. Buy one headliner first: the single ride your group would be genuinely sad to miss. Then put the phone away for a while and enjoy the morning. The day gets better, not worse, for an hour without the app.

Permission, from us

Standby is a real option

You do not need a pass for everything, and chasing every pass is how a holiday starts to feel like a shift at work. Plenty of our favourite Tokyo Disney moments queue for nobody: the shows, the snacks you can only get here, the quiet corners of the park. Standby is a real option, and we use it on most days we go.

Accessibility

If you use a wheelchair, or have mobility needs

  • A pass is bought per ticket. Every rider who needs the shorter line needs their own pass, bought against their own park ticket.
  • DAS can be combined with Premier Access. The two systems do different jobs: DAS changes where you wait, a pass buys a shorter line. Holding one does not cancel the other.
  • A pass changes the queue, not the ride. Transfer and evacuation rules still decide who can board each attraction, so check the headliner transfer table before you spend. The accessibility page carries the ride by ride answer for every headliner, free, including the rides with no special boarding arrangement.

Out of date advice

What we never plan around

  • Standby Pass covers shops and capsule-toy corners, and from 10 November 2026 the Jungle Carnival games at Disneyland too. It no longer covers attractions or restaurants, whatever older guides and videos still say.
  • The free 40th Anniversary Priority Pass ended on 31 Aug 2026. There is nothing to book, and any guide still telling you to book one is out of date.

Which rides are worth paying for

Our verdict, ride by ride, exactly as we give it to friends who ask. It assumes a busy day: on a quiet weekday, let standby do more of this work for free and keep your yen.

Worth it on a busy day

The three we buy without debating

Anna and Elsa's Frozen Journey and Soaring: Fantastic Flight at DisneySea, and Enchanted Tale of Beauty and the Beast at Disneyland. Their standby lines are the longest in their parks, their passes sell out first, and at ¥2,500 they buy back the biggest chunk of your day. If you buy nothing else, buy the one of these your group came for.

Judgement calls

Worth it when the line is long and the ride is a must do

Journey to the Center of the Earth, Peter Pan's Never Land Adventure, Toy Story Mania!, Rapunzel's Lantern Festival, Splash Mountain, Tower of Terror and, from 30 November 2026, Indiana Jones Adventure. Our rule is simple: buy when the standby line is long and missing the ride would genuinely sting. One exception to weigh first: Indiana Jones has Single Rider, so if you are happy to be split up, the pass may be money you do not need to spend.

Usually fine on standby

Keep the money for the headliners

Pooh's Hunny Hunt, Monsters, Inc. Ride & Go Seek!, The Happy Ride with Baymax, Big Thunder Mountain and Raging Spirits. Their lines move, or the ride is short enough that the pass rarely changes the shape of the day. We queue for these, happily, and keep our pass money for the three above.

Rules, not availability: Premier Access is sold in limited numbers and may sell out on the day. This page states the rules and the prices as checked; it cannot say what will still be available when your moment comes. The app on the day is the final word.

Want a hand with all of this?

That is the whole page. What is left is deciding how much of it you want to carry yourselves. Most people take one of three routes, in this order: the guide to plan it yourselves, the checked plan to have your days read line by line, or one of us beside you on the day itself.

What will your picks cost? The Premier Access calculator

The calculator lives on this page now, up in What it costs now: tick the rides you would actually buy, set your party size and your days in each park, and it adds the whole trip up park by park, in the order we would buy them, sell-out risks first. It also stands alone on our tools page, if you would rather use it there.

Jump to the calculator

Start with the guide: Plan it yourself, with our guide, $39

The complete pack: the full guide to both parks, the food companion, the park menus with prices and a date check so you can see what is on during your visit, and the full coloring book, delivered by email straight after checkout.

See the $39 pack

Then, have us check it: Your plan, checked by us, $149

Your park days, planned around your party and your dates, and talked through live, including the spend check on your Premier Access money: where to buy it, and where not to. Bought up front through Stripe, and we never book anything on your behalf.

Buy the checked plan, $149

Then, if you want us in your corner: A local friend for your park day, $799

The human version of this page. We meet you at the park and explore the day together: the app, the passes, the queues and the Japanese, handled beside you. It includes everything in the $149 checked plan, and the price includes the local friend's own park ticket (Aaron's or Maya's); your own tickets, food and all other expenses are yours. It is a human service, sold by invoice after a call, not a digital good, and we never book hotels or park tickets on your behalf, so you always book in your own accounts.

Start with a call
Independent, not affiliated: Happily Ever Tokyo is an independent planning service run by Aaron and Maya. It is not affiliated with, endorsed by, or connected to The Walt Disney Company, Tokyo Disney Resort, or Oriental Land Co., Ltd.

Home · Guides · Buying tickets

Buying Tokyo Disney tickets without the card failure

We are Aaron and Maya, we live in Tokyo, and Tokyo Disney is our local park. If we could sit with you for one minute before you buy anything, it would be about tickets: this is the one purchase you cannot fix at the gate. There is no ticket desk on the day, and every ticket is tied to one date and one park. This page is what we tell friends, in full: which ticket fits your day, how we buy our own, what we do when a card refuses, and the discounted passport most visitors never hear about.

The short answer

Start with the official app or the official website, and start with your date, because the date decides everything else. There is no park hopper and no multi-day passport here, so a two-day trip means two tickets, one park per day, bought in advance. We buy our own exactly this way, from our sofa in Tokyo.

Hold on to this one line: your date goes on sale at 14:00 Japan time, two months ahead. Chapter 3 has the steps.

Once you are through the gate, a different game starts: our passes page covers Premier Access, Entry Request and Standby Pass in the order you will meet them on the day.

Which ticket to buy

Prices change with the date, so read every figure here as the floor for its ticket type, not the price of your day. Check the official calendar for your date before you budget: a Saturday and a quiet Tuesday are different purchases.

Full day

1-Day Passport

The standard ticket: one park, from park opening, on the date you choose. Adult from ¥8,900, junior from ¥7,400, child from ¥5,300. The ticket almost everyone we help ends up buying.

Afternoon, weekends and holidays

After 3 Passport

Entry from 15:00 on weekends and holidays. Adult from ¥7,900, junior from ¥6,600, child from ¥4,400. We suggest it when the evening is the point, or when the full day ticket has gone and a late start still gives you the night.

Evening, weekdays

After 5 Passport

Entry from 17:00 on weekdays, excluding holidays. Adult from ¥6,000, junior from ¥5,200, child from ¥3,800. A short evening, not a full day squeezed late, so count what fits in the hours left.

Ages are adult 18 and over, junior 12 to 17, child 4 to 11, and children aged 3 and under are admitted free. Limited-period tickets appear at times, so check an extra type's own dates and entry time first. Prices are subject to change without notice.

The sale moment, step by step

Read this chapter twice. We set an alarm for this moment and have our cards ready: on release day in Tokyo it feels less like shopping and more like a starting line.

  1. Choose your date and your park first. The ticket names both, and none covers two parks or two days, so this choice comes first.
  2. Work out your release day. Tickets are sold daily from 14:00 Japan time for admissions on the same date two months later. If that date does not exist in the month two months before, tickets are available from 14:00 on the first day of the following month.
  3. Turn that moment into your own time zone before sale day. It can land in the middle of your night, and daylight saving can shift it. Our booking timeline builder shows it in both time zones, with a countdown.
  4. Buy, then get the tickets onto the right phone. Screenshot everything, and link the tickets in the app before you travel, in one Create Group for the whole party. That group is what your park day runs on.
  5. If your date sells out, stay with it a little longer. Sold-out tickets may reappear without notice as other parties change plans, so check back before you rebuild the trip. If the date can move, moving it is the simplest fix of all.

Official, other sellers, hotel, package: decided fairly

Four ways in, all leading to the same two parks. What differs is who you deal with afterwards, and what you can change. Here is how we weigh them.

Our recommendation

Official app or website

Best when: you want the full range, disability passport and afternoon tickets included, and can change your date online, subject to availability. Changing it: yourself, online. Watch out: foreign cards fail here most, which is why the next chapter exists.

Other sellers

Travel platforms and resellers

Best when: you would rather book in a checkout you trust. Changing it: changes and refunds go through the seller, not the park, so read its terms first. Watch out: the disability passport is not sold this way. We do not link to resellers: the forums report unofficial-seller tickets failing at the gate.

Staying at a Disney hotel

Hotel ticket counter

Best when: you are a Disney hotel guest and your date has gone in the general sale. Hotel guests can buy tickets at the hotel even then, so ask before you give up on the date. Changing it: the hotel's own terms apply, and purchase limits apply, so ask what they are for your stay. Affiliated-hotel guests should contact their hotel directly.

Bundled

Vacation Package or travel agent

Best when: you want hotel, tickets and passes in one booking. An authorised travel agent can book all three. Changing it: through the package or the agent, on their terms. Watch out: a package can cost more than booking the parts yourself, so price it both ways before you commit, as we do.

When your card fails, in order

A refused card feels awful, but it is usually fixable. Work down it in order, and stop as soon as a step works: retrying blindly is how a failed purchase becomes a double purchase.

  1. Check whether it went through. Look in My Booking in the app and in your email before you retry anything. A purchase that looks failed can still have succeeded.
  2. Finish the 3D Secure approval. You may be asked for a one-time approval, by text code or in your banking app. Approve it there: an approval left half finished is the most common reason a card keeps erroring.
  3. Tell your bank, then retry once. Banks flag a Tokyo Disney transaction as suspicious, so tell your bank in advance.
  4. Switch to your backup card. Bring a second card to sale day: a card your bank has let through once is far less likely to be stopped again.
  5. Try the other official route. If the website will not take your card, try the app, and the other way round.
  6. Fall back to another route with your eyes open. A travel platform, a hotel counter if you are a Disney hotel guest, or an authorised travel agent can still get you a ticket, on the previous chapter's terms.
Before sale day, do this once: warn your bank (step 3), learn its 3D Secure approval (step 2), and save your card in the app. We tested that last one ourselves on 29 October 2026: start a ticket purchase in the app, enter your card details, stop before you confirm, and the app keeps it saved for later purchases. No money moves.

The discounted disability passport

The one ticket type marketplace pages never mention, and the one we flag to families who need it before they pay full price.

Guests holding an applicable disability certificate, and one accompanying guest per certificate holder, can buy a 1-Day Passport for Guests with Disabilities: adult from ¥7,100, junior from ¥5,900, child from ¥4,200. A ticket must still be purchased for each individual entering the park. Bought on the official website or in the app only, not through other sellers, and checked at the gate, so bring the certificate.

The listed certificates are the four Japanese ones; guests from outside Japan are asked to present an equivalent. Staff judge equivalence on the day, so bring your strongest government-issued document, and a plan to buy a full-price ticket if it is not accepted. Physical disability here does not include injuries or pregnancy, the same rule as the DAS paperwork. This ticket is entry only: DAS is separate, arranged at each attraction, and covered on our accessibility page.

Want a hand with all of this?

Tickets are one decision in a trip full of them, and order is most of the battle. The guide puts every decision in sequence, and the checked plan puts your own dates through it, with us.

Start with the guide: Plan it yourself, with our guide, $39

The pack: the guide to both parks, the food companion, the park menus with prices and a date check, and the coloring book, delivered by email after checkout.

See the $39 pack

Then, if you want us in your corner: Your plan, checked by us, $149

Your park days, planned around your party and your dates, and talked through live. Bought up front through Stripe; we never book anything on your behalf.

Buy the checked plan, $149
Independent, not affiliated: Happily Ever Tokyo is an independent planning service run by Aaron and Maya. It is not affiliated with, endorsed by, or connected to The Walt Disney Company, Tokyo Disney Resort, or Oriental Land Co., Ltd.

Home · Guides · Sensory planning

When a Tokyo Disney day feels like a lot

If the noise, the queues and the sheer number of decisions feel like too much before you even arrive, this page is for you. We are Aaron and Maya, we live in Tokyo, and we walk these parks with guests who tell us exactly that before they fly. The first thing we tell them is the first thing on this page: a Tokyo Disney day does not have to be endured at full intensity from gate to fireworks. Sensory load has a shape: it rises in queues, in packed hubs and around parades and fireworks, and it falls when you sit down, step one street back from a main route, and give the day a rhythm. This page gives you that rhythm, the queue options that actually exist, and a planned exit, without promising a quiet park, because no honest page can promise that. It is written for autistic and neurodivergent guests, and for the families and friends planning the day alongside them, as much as for anyone who finds a full park day a lot. The page goes in five chapters, in this order: what loads up first, shape the day around rest, when the queue is the hardest part, decide the exit before you enter, and pack for your own senses.

The guide cats resting on a bench in a shaded park garden by a small fountain

What loads up first

In our experience, four things do most of the damage, and none of them is a mystery once you name them. Plan for these four, and the rest of the day gets easier to handle.

Queues

Standing still, surrounded, with no exit in sight

A long queue is not just a wait. It is standing close to strangers, with music and announcements overhead and no clear way out if you need one. If queues are your hardest part, start with chapter 3: the queue is the one problem Tokyo Disney actually has named systems for, and that chapter walks you through both.

Noise and visual density

Everything, all at once, in every direction

Music, ride audio, announcements, signs, costumes and moving crowds arrive together, and the hub areas and parade routes concentrate all of it. The fix is not to avoid the parks: we would never tell you that. It is to spend less of the day in the most concentrated spots, and to step one street back when the main route feels like too much.

Transitions

Every change of plan is a new decision

Deciding what to do next, in a crowd, while tired, is its own load. A day with fewer decisions built into it feels easier even when the park is just as busy. Pick one headliner in advance, agree the next rest stop before you move, and let the rest of the day follow that shape.

Tiredness

Overload arrives earlier when you are tired

Hunger, heat, a bad night and a long walk to the gate all lower the point where the day stops being fun. Rest is not what you do when the day has already gone wrong. It is the thing that keeps the day from going wrong, and chapter 2 builds it in from the start.

Shape the day around rest

This is the rhythm we build every sensory-friendly day around. It is a rhythm, not a timetable: it tells you when to stop, not what to ride at each hour, and it works in either park.

The rhythm

A break every 60 to 90 minutes, before anyone needs one

Plan a seated break roughly every 60 to 90 minutes at a quieter seating area, scheduled before fatigue hits, not after. If you take one habit from this page, take that one: we mean it. A day paced like this ends with everyone still enjoying it.

Seated shows

Let a show be your rest

A seated show gives you a chair, a roof and a fixed end time, which is exactly what a rest stop should give you. Timed to the middle of the day, a show is a break that still feels like part of the day, not time lost from it.

Meals

Eat outside the lunch peak

Restaurants queue out at the lunch peak, and a hungry group in a packed restaurant is a hard combination. Eat early or late, sit down properly, and treat the meal as a rest stop with food, not as an errand between rides.

One headliner first

One decision, made before you arrive

Pick the single ride your group would be genuinely sad to miss, and plan around that one ride. Everything else is a bonus. One clear priority removes a dozen small decisions, and it stops the day turning into a chase for every pass: that is not settling, that is how the day stays yours.

When the queue is the hardest part

We explain these two systems to guests more than almost anything else, because they are easy to confuse. Two separate systems help with queues, and they solve different problems. Neither is promised to anyone, and staff decide on the day.

Disability Access Service

DAS changes where you wait, not how long you wait

DAS lets a guest who cannot wait in a conventional queue wait outside the queue and return at a set time, with their party. It does not shorten the wait, and you cannot hold a return time for one attraction while using it at another. You arrange it at each attraction with a Cast Member, with the certificate holder present, showing the original certificate and the group's tickets. Park staff decide eligibility on the day, and we never promise it.

Separate Wait Service

Split the wait within your group

With the Separate Wait Service, part of your party waits in the queue while you wait elsewhere with a companion, then you reunite to board. No certificate is needed, and staff confirm what applies to your party on the day. Ask a Cast Member at the attraction; it is a question to ask, not a pass to assume.

The honest limit

Neither system changes the ride itself

A pass, DAS or a split wait changes the queue, not the ride. Transfer and evacuation rules still decide who can board each attraction, so check those before you spend or queue. And if neither system applies to you, the rest of this page still stands: rest rhythm, seated shows and a planned exit are available to every visitor.

Decide the exit before you enter

We settle this one with guests the night before, every time. The hardest decision of the day is leaving. Make it before the day, when nobody is tired, and it stops being a negotiation in a crowd.

Agree it in advance

One exit time, agreed by everyone

Pick a leaving time before you enter, and agree what happens at that time: you walk to the gate together, no last-ride debate. Leaving before the end-of-day crush is a choice, not a failure, and it is often the difference between a good day and a day that ends in tears.

Agree a signal

One word that means we stop now

Agree a word or a gesture any member of the party can use that means we stop, sit down and reset, with no argument. It works for children, and it works for adults who do not want to explain themselves in a crowd.

If it goes wrong mid-day

Stop, sit down, get out of the flow

If overwhelm hits in the middle of the day, stop, sit down and get out of the flow of the crowd. Then speak to the nearest Cast Member, who can point you to the right help in the park. A quieter corner, a seated show and a slower hour are a plan, not a failure.

Pack for your own senses

General advice only, not medical advice for any individual. Our whole rule here is simple: bring what already helps you at home, and leave the experimenting for another day.

Sound and light

Bring what already works for you

If ear defenders, noise-reducing earbuds or sunglasses help you in busy places at home, bring them. A park day is not the day to test a new pair. Pack them where you can reach them without digging through a bag in a crowd.

Phone admin, done early

Less admin in the park means fewer decisions

Link tickets in the app and have a payment method ready before you arrive, so the first minutes inside the gate are not spent doing admin in the hub. The fewer jobs your phone has to do in the park, the less it pulls you out of the day.

Food, water and a way home

The basics, settled before the gate

Water, a snack you know you can eat, and a clear route home at the end of the day, all settled before the gate. Guests eating with a restriction should read the dietary page too: the mixed family strategy of ordering separately and eating together keeps one person's restriction from becoming everyone's problem.

The headliners, by sensory load

We read this table the other way up from the accessibility page's boarding table: the same headliners, read for the senses instead of for boarding. These are Disney's own published effect tags for each ride, gathered into one place: loud means the official attraction page lists loud sounds, and the same goes for the rest. Use it to choose your one headliner, and to know what is coming on the others.

AttractionLoud soundsDarknessDrops and sudden motionSpins, screens and flashingIn one line
Enchanted Tale of Beauty and the BeastYesYesNoneSpinsTrackless cups that dance through the film's scenes: dark and musical, with constant gentle turning.
Pooh's Hunny HuntYesYesNoneSpinsBouncy, spinning hunny pots in the dark, with sudden bounces.
Monsters, Inc. Ride & Go Seek!YesYesNoneSpinsA dark tram ride where you hunt monsters with a flashlight, and things pop up.
Toy Story Mania!YesYesNoneSpins and 3D3D glasses, spinning between games, and constant sound and colour.
Rapunzel's Lantern FestivalNoYesNoneNoneThe gentlest headliner in either park: a slow, dark boat ride.
Splash MountainNoYesOne big dropNoneDark stretches, then one big outdoor drop near the end.
Big Thunder MountainYesYesFast turns, no big dropNoneA loud, fast mine train that dives through dark tunnels.
Haunted MansionYesYesNoneNoneSlow and dark, with scary characters and sudden sounds.
Anna and Elsa's Frozen JourneyNoYesSmall dipsNoneA dark boat ride with small dips, forwards and backwards.
Soaring: Fantastic FlightYesYesLifts and tiltsBig screenA simulated flight: the seat lifts and tilts in front of a huge screen, at height throughout.
Peter Pan's Never Land AdventureNoYesTiltsSpins and 3D3D screens and a vehicle that turns and tilts in the dark.
Journey to the Center of the EarthYesYesSudden speedNoneThe most intense ride on this list: dark, loud and fast, with sudden acceleration.
Tower of TerrorYesYesRepeated dropsNoneBuilt around drops in the dark, with a scary story on the way up.
Indiana Jones AdventureYesYesSudden joltsNoneDark, loud and fast, with sudden jolts throughout.
Raging SpiritsYesNoFast, with a full loopA full loopA looping coaster: loud and fast, and upside down once.

Want a hand with all of this?

Two ways we can help, in the order most people take them: start with the guide and plan it yourselves, or have us check the plan, up to 3 park days read line by line, a finished plan as a printable PDF, a call to talk it through, and, if you are booking one of the Disney hotels, our hotel room assistant. And take the rhythm with you either way: it is free, and in our experience it is the part that changes the day most.

Start with the guide: Plan it yourself, with our guide, $39

The complete pack: the full guide to both parks, the food companion, the park menus with prices and a date check so you can see what is on during your visit, and the full coloring book, delivered by email straight after checkout.

See the $39 pack

Then, if you want us in your corner: Your plan, checked by us, $149

Your park days, planned around your party and your dates, and talked through live. Bought up front through Stripe, and we never book anything on your behalf.

Buy the checked plan, $149
Independent, not affiliated: Happily Ever Tokyo is an independent planning service run by Aaron and Maya. It is not affiliated with, endorsed by, or connected to The Walt Disney Company, Tokyo Disney Resort, or Oriental Land Co., Ltd.

Home · FAQ

What does everyone ask about Tokyo Disney right now?

These are the questions that fill our inbox and the Tokyo Disney groups every single week. We have grouped them in the order you will need them: before you book; packages and Disney hotels; Premier Access and Fantasy Springs; Access and dietary needs; and on the day itself. We will answer each one straight, including the answers that are not what you hoped to hear. If your question is not here, it is probably answered in full on one of the pages each answer points to.

Before you book, the choices we settle first

Disneyland or DisneySea: which one should I choose?

Tickets are for one park per day, and no park hopper is on sale. Tokyo DisneySea is unique to Japan and suits thrill seekers and adults. Tokyo Disneyland suits first-timers and younger kids best. With two days, do one park each day. Maps: Official park map, Tokyo Disneyland (Tokyo Disney Resort) and Official park map, Tokyo DisneySea (Tokyo Disney Resort).

When is the quietest time to go?

Weekdays outside Japanese school and public holidays are usually quieter. Arrive before opening if headliners matter. In summer heat or rain, build the middle of the day around indoor shows and rest breaks. No day is guaranteed quiet.

What will tickets and Premier Access cost in yen?

An adult 1-Day Passport is ¥8,900 to ¥12,400 by date, and Disney Premier Access is ¥1,000 to ¥2,500 per ride, per person. Tickets are sold daily from 14:00 JST for admissions on the same date two months later. If that date does not exist in the month two months before, tickets are available from 14:00 JST on the first day of the following month. Prices change, nothing is guaranteed. Official park tickets page (Tokyo Disney Resort). Premier Access prices, ride by ride.

Where should I buy park tickets, the official site or Klook?

On the official website or in the official app: we stick to official routes only. Park tickets are date-specific, sold in advance only, and can sell out; there is no buying at the gate on the day.

Be careful with unofficial resellers. The forums report tickets failing at the gate again and again, and a ticket that fails at the gate ends the day before it starts, so we never send readers to resellers or auction sites. If the official site rejects your card, try the official app, or a different card, before you look anywhere else. Either way: buy early, screenshot everything, and link the tickets in the app before you travel. Official park tickets page (Tokyo Disney Resort).

Should I use a travel agent instead?

For the booking itself, an agent can be the right call. An authorised travel agent can book park tickets, Disney hotels and Vacation Packages for you, and for a full package holiday that is often the simplest route. What an agent does not do is plan the day inside the park: the order to buy Premier Access in, how DAS and dietary needs fit around the rides, and the strategy for shows and lotteries. That inside the park planning is exactly what this service exists for. We never book hotels or park tickets on your behalf, so you always book in your own accounts.

Packages and Disney hotels, the mornings we set alarms for

How much is a Vacation Package really, total or per person?

Per person. This is the single most common confusion. A package price that looks like the total for your family is almost always the price for one adult, a 2-day package for three people can come to roughly $2,400 to $2,500 in total, around $800 per person, depending on the hotel and dates.

For that per-person price you typically get the Disney hotel nights, park tickets for each day, a set of attraction passes, and extras like a drink ticket, depending on the plan. Always multiply by your party size before comparing a package against booking the hotel and tickets separately, sometimes the package wins, sometimes it really doesn't. More on the Hotels page

When do Vacation Packages and Disney hotel rooms go on sale, and how fast do they go?

Packages open roughly five to six months ahead, in monthly batches: an announced watch window, never a promised date. Hotel rooms on their own open at 11:00 JST, exactly four months before check-in, not midnight, not "sometime that morning."

How fast? The most wanted hotels, MiraCosta and the Fantasy Springs Hotel, can sell out within minutes of the drop. Being logged in, on the right page, with payment details ready before 11:00 is not a nicety; it's the whole game. That's exactly what the optional booking-window support in our $149 plan prepares you for. More on the Hotels page

The Disney hotel I want is sold out. Now what?

Don't give up, rooms reappear at predictable moments. Abandoned and timed-out bookings release about 40 minutes after the drop, and cancellations cluster around 15 days before check-in, when cancellation deadlines bite. Community members also report that checking availability through a different hotel's listing page sometimes surfaces rooms the main search misses.

Our $149 tier includes optional hotel booking-window support. Before your window opens, we will send you reminder emails at three moments: three days before the hotel drop, on the morning of the drop, and at the start of the cancellation window. The room watch, part of our hotel room assistant, watches your own dates at the hotels you want, and when a room opens up it pings you by email or WhatsApp, so you can grab it yourself. It is a notification only: it does not book the room, and it does not guarantee a reservation. You always make the booking yourself, in your own account, here's how it works. The full sequence is on the Hotels page, in its If it sells out chapter.

What is Happy Entry?

Happy Entry is early park entry through a dedicated entrance, before the general opening: 15 minutes at Tokyo Disneyland, and 5 to 15 minutes at Tokyo DisneySea, where it is limited to Fantasy Springs Hotel and Hotel MiraCosta guests. At Tokyo Disneyland it covers guests of participating Disney hotels. At Tokyo DisneySea, since September 2025, Happy Entry is limited to guests of the Tokyo DisneySea Fantasy Springs Hotel and Hotel MiraCosta; guests of other Disney hotels do not get Happy Entry at DisneySea. It can be suspended on certain days, so treat it as a head start rather than a guarantee, and always confirm the arrangement for your dates in the official app. Happy Entry does not apply on your check-in day, but it does apply on your checkout day, so please plan your early mornings for the days after your first night, checkout morning included.

Those 15 minutes are genuinely valuable here: they put you ahead of the first pass-booking rush. Official Happy Entry page (Tokyo Disney Resort).

Premier Access and Fantasy Springs, the first minutes inside the gate

Do I actually need Disney Premier Access?

For headliners, often yes. Rides like Anna and Elsa's Frozen Journey, Soaring and Toy Story Mania! can pass 100-minute waits even on weekdays, and since the free Priority Pass ended in August 2026 there's no free alternative for them. Premier Access is paid, per ride and per person, and is booked in the app after you've entered the park, the best slots go in the first minutes.

Four systems, simply: Premier Access = paid, book a return time, skip the line. Standby Pass = free, and on busy or release days it is required just to enter certain shops. Entry Request = a free lottery for shows and greetings, you win a seat or you don't. Happy Entry = early entry into the parks for Disney hotel guests. A good plan decides in advance which of your rides justify paying. The full pass-timing playbook

Can anyone enter Fantasy Springs now?

Yes. Entry has been open to all guests since January 2025. Since 1 April 2025 its headliner rides can simply be queued for in standby as well as by Premier Access, and morning arrival matters because the best times go early. More on Premier Access and Fantasy Springs.

Access and dietary needs, the answers we take most care with

How does disability access (DAS) work for overseas visitors?

At each attraction where you want to use DAS, speak to a Cast Member at the attraction entrance, with the DAS holder present, and show your original disability certificate and the park tickets for everyone in your group. At an attraction DAS covers up to six people in total; at character greetings, up to ten. Staff set a return time for that attraction. If your home country does not issue a recognised certificate, a doctor's letter on official letterhead is commonly brought, but acceptance is decided by staff on the day and is not guaranteed. If a doctor's letter is your only document, buy a regular ticket, not the discounted disability ticket, because that ticket requires an accepted certificate, or a document staff judge to be equivalent, and entry with it can be refused if the letter is judged not equivalent.

Be clear on what DAS does: it lets you wait outside the physical queue and return at your time. It does not shorten the wait itself. There's also a discounted disability park passport for the holder plus one companion, and DAS can be combined with Disney Premier Access (DPA). Nobody can promise an outcome, and you should distrust anyone who does. The full DAS playbook

I'm a wheelchair user, which rides can I actually do?

The honest answer is: it varies ride by ride, and Tokyo is stricter than many visitors expect. A large number of attractions require you to transfer from your wheelchair and be able to evacuate in an emergency, sometimes including stairs. Some rides are effectively closed to guests who can't walk, because their boarding or evacuation rules require walking, and guests regularly discover this at the ride entrance, which is a miserable place to learn it.

That gap between expectation and reality is exactly what Your plan, checked by us, our $149 checked plan, is built to close: a ride-by-ride can / can't / transfer-required list for your situation, plus step-free routes and planned rest breaks, all settled before you fly. See the accessibility page.

Can I rent a wheelchair, and what about sensory needs?

Wheelchair rental is available in-park without a reservation. Scooters (ECV) are not rented inside the parks, but motorized wheelchairs, for guests age 18 and over in limited numbers, and battery-assisted push wheelchairs are rented, and powered rentals are not available in rain. Sensory and neurodivergent guests should look at DAS and the Separate Wait Service, which needs no certificate, and the Official disability services and DAS page (Tokyo Disney Resort).

Can the parks handle my allergy or dietary restriction?

Partly, with planning. Kitchens cannot modify dishes, so substitutions aren't an option. A low-allergen menu exists at selected restaurants, but it isn't guaranteed allergen-free, and there is no halal-certified restaurant inside either park. Coeliac visitors report the hardest time of all.

The workable strategy is choosing restaurants and dishes in advance, restaurant by restaurant, and carrying Japanese phrase cards for your restriction so staff can confirm with you directly. That's the eating plan we build for you inside Your plan, checked by us, our $149 checked plan, see the Dietary page. Before you go, check dishes in the Official 28-allergen information search (Tokyo Disney Resort).

On the day, from the train to your table

How do I actually get to the parks?

Take the train to Maihama Station on the JR Keiyo and Musashino lines, about 15 minutes from Tokyo Station. The Ikspiari shopping complex sits beside the station. The Disney Resort Line monorail loops the parks and the Disney hotels.

Should I arrive before opening, or is arriving after 9am actually fine?

Honestly? It depends on what you're chasing. If headliners and Fantasy Springs are the point of your trip, arriving early matters a lot: the first Premier Access slots, the Entry Request lotteries and short opening queues are all claimed in the first half hour.

If your day is about shows, parades, atmosphere and a handful of rides, arriving after the entry crush, 9:30 or so, is genuinely fine, quieter, and much kinder to children and anyone who finds the pre-opening crowd stressful. Neither answer is wrong; the mistake is choosing by accident. This is one of the first things we settle in a personal plan. More in the planning playbook

How do restaurant bookings work?

Table-service restaurants take advance Priority Seating bookings online from one month before the visit, and show restaurants are prepaid in advance. Many quick-service spots offer mobile order in the app; ordering lunch around 10:30 beats the noon rush. Official lists: Official restaurant list, Tokyo Disneyland (Tokyo Disney Resort) and Official restaurant list, Tokyo DisneySea (Tokyo Disney Resort).

Still deciding?

Every answer on this page is free, and the guides go deeper on all of it. If you would like your own trip looked at by a person, the plans run from the $39 guide pack to our $149 checked plan, where we read your park days line by line. Or skip the reading and send us a message: your dates and your question are all we need to reply.

Home · About

Who runs Happily Ever Tokyo?

We are Aaron and Maya, a Tokyo couple, and Happily Ever Tokyo is our independent planning service: not a travel agency, and not part of Disney. We live in Tokyo, we visit both parks ourselves, and one of us personally builds and checks every plan before a trip. Below: why we do this, the two cats you keep meeting, what you can buy from us, and the terms, in plain language.

Why we do this

We did not set out to start a business. We set out to answer the same questions properly, once, in one place.

We are Aaron and Maya. We live in Tokyo, and the two parks are our local parks: we go for the new snacks, for the parades, and sometimes just because a weekday evening is free. Maya reads the Japanese announcements the day they land. Aaron is the one who turned our booking-window notes into the tools on this site, including the room watch.

Planning a Tokyo Disney trip from abroad is harder than it should be. The hotel booking window opens at 11 in the morning our time, the passes live in an app with its own logic, and the rules that matter most, the access and dietary ones, are the hardest to piece together from overseas. We kept meeting the same three kinds of stuck visitor: the planner drowning in tabs, the wheelchair user who could not find a straight answer, and the guest with a dietary restriction reading menus through a translator at midnight.

So we started writing down what we actually do, the way we would explain it to a friend. That is still the whole method: this site is the broad knowledge, free to read, and the guide is the full runbook in one place. When you pay for more than that, you are paying for one of us, start to finish: the same person reads your draft, checks every line, and talks it through with you on the call. No handoffs, no call centre, just the person whose name is on your plan.

Aaron and Maya in front of the Beauty and the Beast castle at Tokyo Disneyland

Meet Yume and Michi

You have been meeting two cats all over this site. Time we introduced them properly.

Yume and Michi, the Happily Ever Tokyo guide cats, holding their storybook and map between the castle and the volcano

Yume is the cream cat, sakura on her cheeks, star wand in paw. Her name means dream, and the dream is her department: the castle in the morning light, the parade you have been picturing, the day as you imagined it when you booked the flights.

Michi is the grey tabby, leaf-green cheeks, brass compass in paw. His name means the way, and the way is his department: the 11:00 booking window, the step-free route, the running order that gets you to everything without the day unravelling.

Every good park day needs both, which is why the two of them turn up wherever a plan is being made or a problem is being sorted: at the planning table, on the step-free path, in front of the restaurant display case. One honesty note before you ask: Yume and Michi are characters, not portraits. Aaron and Maya are the humans in the photo above, and neither of us looks that good in 3D.

How your plan reaches you

Whichever plan you choose, from the $39 guide to a day in the park together, it arrives by email. Here is exactly what each tier delivers.

The Guide Pack ($39): Digital files, delivered by email straight after checkout.

The Checked Plan ($149): Your hour-by-hour plan, built by one of us and walked through together on a 60-minute call.

Park Day Together ($799): Everything in the $149 plan, hotel room assistant included, plus a day exploring the park together, with one of us beside you.

Refunds, terms and the honest limits

Said the way we would say them to a friend.

  • The $39 guide and the $149 checked plan are bought through Stripe. The $799 park day starts with a call and is invoiced after it.
  • If you buy a tier and we cannot deliver what it promises, we refund it in full. If the pack files arrive faulty or do not arrive, we will fix the delivery or refund you.
  • You always book hotels and park tickets yourself, in your own accounts. We never book on your behalf: the $39 and $149 tiers are planning and advice, and the $799 tier adds the day in the park together.
  • No tier can promise park outcomes. Premier Access availability, DAS eligibility and hotel rooms are decided by park staff and park systems on the day.
Park systems, menus and prices change, so always confirm the current position in the official app and with park staff on the day.

Home · Guides · Disney shopping

Disney shopping in Japan: which shop sells what?

We are Aaron and Maya, we live here in Tokyo, and this is the page we wish someone had handed us before our first souvenir run. Shopping is where we see visitors lose the most money, and it nearly always comes down to one simple confusion: two different companies run Disney shopping in Japan, and they mostly do not sell each other's goods. Get that one thing straight and the rest falls into place. So here, in the order we explain it to friends: which shop sells what, what you can only buy in one place, how app shopping works on your park day, how we use Bon Voyage ourselves, and the traps we warn everyone about before they fly in.

The short answer: park things live in the parks, general souvenirs are waiting at Bon Voyage outside the gates, Disney Store things live in the city, and if you see a park-only thing you love, buy it there and then. The rest of this page is how we know.
The guide cats leaving a park gift shop with shopping bags and a kimono plush

Two companies, four catalogues

Here is the thing nobody tells you until you have already got it wrong once. Two different companies run the shops. The Oriental Land Company runs everything at the resort: the park shops, Bon Voyage, the Disney hotel shops and the resort app. Disney Japan runs Disney Store Japan and its online shop. They mostly do not sell each other's goods, so the shop you walk into decides what you can buy, and the wording on the item tells you which world it belongs to.

It surprises most visitors, but Tokyo Disney Resort is not run by Disney itself. The Oriental Land Company operates the parks under licence from Disney, and it makes and sells all resort merchandise. Japan's Disney Stores were once run by the same group, but Disney took them back in 2010, so today Disney Store Japan is Disney's own retail chain, with its own ranges designed for shops, not parks.

The two parks do not match each other either. Disneyland and DisneySea carry different ranges, with only a small overlap such as headbands, and even the anniversary numbering differs: 43rd anniversary goods at Disneyland, 25th at DisneySea. Bon Voyage, outside the gates, stocks lines from both parks, which is exactly why we lean on it so much, as you will see below.

The tag test: how to tell from the item itself

Forget the sign over the door, and ignore the bag they hand you at the till. This is the test we use standing in the shop: turn the item over and read the wording printed on the item, its packaging or its tag. If it says Tokyo Disney Resort, Tokyo Disneyland or Tokyo DisneySea, it is a resort item. A Disney Store bag, receipt or shop name proves nothing: an official Disney Store bag is not official Tokyo Disney Resort merchandise. Disney Store Japan items carry Disney Store branding, and their Japan-only lines carry their own line names.

The four places you can buy, compared

Four channels, four catalogues, and the same character on the shelf is not the same product. Here are the four the way we lay them out for friends: who runs each one, whether you need a ticket, what you will actually find there, and what catches people out.

In the parks

Ticket needed

The park shops

Run by
The Oriental Land Company
Ticket needed
Yes, a park ticket for that park, that day
What you find
Park and event ranges you cannot buy anywhere else: seasonal collections, popcorn buckets, and at Tokyo DisneySea the Duffy and Friends shops
Watch out for
On busy and release days, designated shops may need a Standby Pass, booked in the app after you enter, just to let you in

Outside the gates

No ticket needed

Bon Voyage

Run by
The Oriental Land Company
Ticket needed
No, it sits outside the gates, next to Maihama Station
What you find
The biggest single selection of resort merchandise, general lines from both parks under one roof
Watch out for
It does not carry everything, it sells out like any real shop, and on busy days entry can be by advance reservation only

In the city

No ticket needed

Disney Store Japan

Run by
Disney Japan (The Walt Disney Company)
Ticket needed
No, these are ordinary city shops, plus an online shop
What you find
Disney Store ranges: character and film collections, Japan-only plush lines, and the big Disney FLAGSHIP TOKYO store in Shinjuku
Watch out for
No park merchandise at all. That includes the Disney Store inside Ikspiari at the resort, which sells Disney Store goods, not park goods

On your phone and online

It depends

The resort app and DisneyStore.jp

Run by
The app is the Oriental Land Company; DisneyStore.jp is Disney Japan, hosting a Tokyo Disney Resort section
Ticket needed
The app, yes: only guests who entered a park that day can shop in it. DisneyStore.jp, no
What you find
In the app, park merchandise ordered on your entry day. On DisneyStore.jp, a selection of genuine resort merchandise anyone can order
Watch out for
Both are Japanese only and deliver to Japanese addresses only, and the DisneyStore.jp range varies, so specific items cannot be promised

The four channels, side by side

Short on time? This is the whole comparison on one screen: who runs it, whether you need a ticket, and what it is known for. The cards above carry the full wording, this chart is the version to screenshot before your trip.

ChannelRun byTicket neededKnown for
The park shopsThe Oriental Land CompanyYes, a park ticket for that park, that dayPark and event ranges found nowhere else, including the Duffy and Friends shops at DisneySea
Bon VoyageThe Oriental Land CompanyNo, outside the gates by Maihama StationGeneral lines from both parks under one roof, no park day required
Disney Store JapanDisney JapanNo, city shops plus an online shopDisney Store ranges and Japan only lines; no park merchandise at all
The resort app and DisneyStore.jpThe app: the Oriental Land Company. DisneyStore.jp: Disney JapanThe app, yes: entry day only. DisneyStore.jp, noPark merchandise ordered on your entry day, and a selection of genuine resort goods anyone can order online

What is exclusive where

If you only read one chapter, make it this one. This is the part that saves the wasted trips we see visitors make across Tokyo: what you can only buy in one place, which hotel shops welcome you without a room key, and where the two companies genuinely overlap.

What you want decides where you go

Find your row, then read across. On a phone, swipe the chart sideways to see the whole row.

What you want
The only place
What it takes
Watch out
Duffy and Friends
Inside Tokyo DisneySea only
A DisneySea day, and entry to the park. If Duffy is the point of the trip, you need a DisneySea day.
Not sold at Disneyland, and not as a regular line at Bon Voyage, the hotels or any Disney Store. Older lines have very occasionally appeared at Bon Voyage in the past; never count on it.
Seasonal event lines, popcorn buckets and Fantasy Springs goods
Inside the parks. Fantasy Springs Gifts can only be reached from inside DisneySea
A ticket for that park, on that day
These lines are sold only inside the parks.
Park goods on a day you are not going into a park
Bon Voyage, outside the gates by Maihama Station
No park ticket
It carries general lines from both parks, but it does not carry everything.
Something you missed while you were in the park
The resort app, that same day
You must have entered a park that day. Orders close at 23:45, and delivery is to Japanese addresses only
Some items are app-only and never reach a shelf.
Disney Store Japan lines: UniBEARsity, Urupocha-chan, TSUM TSUM Japan sets and nuiMOs
Disney Store Japan shops and their online shop
No ticket
These ranges are never sold in the parks.
Flagship-only items
Disney FLAGSHIP TOKYO in Shinjuku
No ticket
Other stores run their own location exclusives too, such as airport pop-up items.
Disney hotel-original items
The shop of that hotel
Most Disney hotel shops welcome non-guests
The Toy Story Hotel shop is for staying guests only, and the Fantasy Springs Hotel shop can only be reached from inside DisneySea, so it needs a park ticket in practice.

Hotel shop access, honestly: this one surprises almost everyone. You do not need to be a staying guest to browse most Disney hotel shops: the Disneyland Hotel, MiraCosta and Ambassador shops welcome non-guests. Two exceptions: the Toy Story Hotel shop is for staying guests only, and the Fantasy Springs Hotel shop can only be reached from inside Tokyo DisneySea, so it needs a park ticket in practice. Partner hotels near the resort, such as Hilton Tokyo Bay and Sheraton Grande, also run gift shops with general resort merchandise.

Where the overlap really is: general resort goods, headbands, standard plush, sweets and stationery, are sold across all the resort channels: parks, Bon Voyage, hotel shops and partner hotel shops. The one genuine crossover between the two companies is online: the Tokyo Disney Resort section of DisneyStore.jp, open since July 2024. Everything else that looks like overlap is two different versions of a similar idea, which is exactly what the next example shows.

Same character, different product: the kimono plush test

This is the example we reach for every time, because it is the whole page in one souvenir. A kimono plush badge of the famous mouse couple, wearing traditional Japanese dress, exists in both worlds at the same time. The resort version dresses him in a black haori jacket and red hakama trousers, and its tag and stitching mark it as a Tokyo Disney Resort product. The Disney Store Japan version puts him in a blue kimono instead, made for Disney Store shelves. Same characters, same souvenir idea, two different products, two different tags, sold by two different companies in two different shops.

So when a listing or a helpful stranger says 'they sell the kimono plush at the other shop too', the honest translation is: they sell their version of it. If the version matters to you, and for collectors it usually does, buy the one in front of you, in the shop that sells it.

App shopping: the checklist

Think of the resort app as a fifth shop, one that only opens while you are inside the park, and it has the strictest rules of all. Here they are, one by one, the way we talk friends through them on the day. After them, the slower alternative, DisneyStore.jp, for anything you missed.

  • Entry day only: you can shop in the app only on a day you have actually entered a park, using that day's ticket. Items tied to one park need that park's ticket: Duffy items need a Tokyo DisneySea entry.
  • Orders close at 23:45 on the entry day. After midnight, the shop is gone until your next park day, so our habit, and the one we give our friends, is simple: do the app shopping while you are still in the park, not from the hotel that night.
  • Japanese addresses only: app orders are delivered within Japan. There is no international shipping, so plan around a Japanese delivery address and allow time before you check out.
  • Some items are app-only: certain products are sold only through the app on entry day and never reach a shop shelf, which is why regulars check the app even while standing in the park. We do it too.
  • A tip from visitors, not an official rule: regulars in the visitor groups report that the shopping tab only appears when the phone's language is set to Japanese. If the tab is missing, that is the first thing to check. We label this as visitor-reported because the resort does not publish it.

DisneyStore.jp is the slower, more relaxed alternative: anyone can order, including its Tokyo Disney Resort section, but it is Japanese only, delivers within Japan only, and its resort range changes. Our honest advice: treat it as a second chance, not a plan.

Bon Voyage, the playbook

Bon Voyage is the answer to the question visitors ask us most: where can I buy park merchandise without a park ticket? Here is how it works, and how we use it ourselves.

Walk out of Maihama Station towards Tokyo Disneyland and you cannot miss it: it stands on the walkway, shaped like a giant suitcase, and it is open 8:00 to 22:00. No park ticket is needed, and locals treat it as a destination in its own right. We do our general souvenir run here on the way home, when we finally know what we still want.

  • Busy days run on reservations: entry may require an Advance Shop Reservation, booked from 11:00, five days before your visit. One reservation covers one person, you can hold one per shop per day, and you show your booking code at the door.
  • A reservation does not guarantee stock: it gets you through the door, not the item. If numbers allow, guests without reservations may also be let in.
  • It sells out like a real shop: on release days, new lines at Bon Voyage can be gone within hours, displayed behind a rope for looking only. Arrive early on launch days, and never treat it as a backup stockroom for something you passed in the park.
  • Use it the way we do, on your way out: standard headbands, sweets and souvenirs you did not want to carry all day are exactly what Bon Voyage is for, after the park-only items are safely bought.

The rules, the traps and the golden rule

Last, the rules that can catch you out if nobody warns you, and we would rather warn you here than watch it happen at the till: purchase limits, release day rationing, the resale ban and the traps with friendly faces. We will end with the four questions we ask before we buy anything, and the official links.

  • Purchase limits are per person: the standard limit is 30 of one item, and event merchandise is often limited to 1 or 3 per item per person. Limits cannot be pooled: each person must be present with their own ticket, and you cannot use your party's tickets to buy past your own limit.
  • Release days are rationed: designated park shops may require a Standby Pass to enter, and Bon Voyage may require its advance reservation. Get the pass or the reservation first, then shop.
  • Buying for resale is prohibited: the park terms ban buying merchandise for resale, and the markups explain why: a Christmas sweater sold in the park for 6,900 yen was seen listed on resale sites at 13,000 to 17,000 yen. If you miss an item, expect to pay that kind of premium, and check the tag wording before paying park-exclusive prices for anything.
  • Never buy shopping slots from strangers: posts offering to sell app shopping or reservation slots circulate on social media. They are outside the rules, and buyers have no protection if anything goes wrong.
  • The Ikspiari trap: this is the one we warn every friend about at Maihama. The mall beside Maihama Station is resort territory, and its Disney shop is even named like a resort store, but it is a Disney Store Japan shop. Lovely for Disney Store ranges, useless for park goods.
  • Disney Store is not the budget option by default: the ranges are different, so most price comparisons are meaningless, and where visitors compared honestly, the parks often came out cheaper.

The four questions we ask before we buy anything

This settles almost every shopping decision we meet, in the parks and out of them. Ask them in order, standing in front of the shelf.

Which world is it from?

Read the tag, not the bag. If it says Tokyo Disney Resort, Tokyo Disneyland or Tokyo DisneySea, it is a resort item, and resort shops are where you will find its range.

Is it only sold in one place?

Duffy means DisneySea, event lines mean inside the parks, UniBEARsity means Disney Store Japan. If your item has one home, that shop is your only chance.

Do you have the right day?

The park shops and the app need that park, that day, and app orders close at 23:45. No ticket today? Bon Voyage and the Disney Stores are your shops.

Were you hoping to find it later, or cheaper?

Stock differs by shop, sells out, and does not transfer between stores, and the other company sells its own version, not this one. Later usually means never, or a resale markup.

The golden rule: every Tokyo regular will tell you the same thing. If you see something you want, buy it, because you probably will not see it again. Stock differs by shop, sells out, and does not transfer between stores.
About this page: channel and exclusivity facts are drawn from the official pages linked above and from what visitors report in the Tokyo Disney groups. We read Disney's Japanese announcements the day they land, and ranges, limits and reservation rules change with each release, often in Japanese first, so recheck the official pages close to your trip. One caution we will not paper over: the current contents of the DisneyStore.jp resort section change too often to promise, so this page never guarantees a specific item is listed there.

Where to go next

One last thing from us: shopping earns its place inside a plan, not instead of one. These are the natural next steps.

Planning

The whole trip in order: when to book what, how the days fit together, and where shopping time actually fits.

Read the playbook

Build Your Day

Put the shopping stops into the day itself, on one timed grid, next to the rides, the shows and the meals.

Build my day

Our plans

From the $39 guide pack to a plan for your whole trip checked by one of us, this is the help we can take off your plate.

See the plans

Home · Contact

How do you contact Happily Ever Tokyo?

Two of our three tiers never need this page at all: the $39 guide and the $149 checked plan are bought directly on the pricing page, and your pack, or your intake email, follows by email. This form is for the $799 park day, which starts with a conversation, and for any question about your trip. Write to us here and the two of us reply by email.

Send us a message

Fill in the form and it opens in your own email app, addressed to us with everything already written out: you check it, press send, and it comes straight to Aaron and Maya. Two things help us help you straight away: your trip dates, and what you need help with, in your own words. If the form's email app handoff does not suit you, write to us directly at [email protected] instead.

Nothing you type is stored on this page and there is no account to make: the form hands your message to your own email app, and we reply by email. If your message is about the $799 park day, we will arrange a short call first.

What to include

Your trip dates, and what you need help with

Those two things are all your first message needs: your trip dates, and what you need help with, in your own words. We reply by email, and if your message is about the $799 park day, we will arrange a short call first so we can talk it through together.

Who reads it

Aaron and Maya, the two of us

Your message reaches the two of us, the people who run this site and do the planning. There is no inbox team and no ticket queue: we read it ourselves and we reply ourselves.

Starting the $799 park day: a message, a call, then an invoice

To start the $799 park day with a local friend, for one park day, this is the order things happen in, and it is not sold before we have talked. The $149 checked plan is different: it is bought up front through Stripe, like the $39 guide.

Step one

Send the form first

Fill in the form above with your trip dates and what you need help with, and send it from your email app to Aaron and Maya.

Step two

We reply, and arrange a short call

We reply by email to arrange a short call first, so we can talk through your trip before anything is sold.

Step three

The invoice comes after the call

The $799 park day is sold by invoice after that call, never before it.

One thing we state everywhere on this site: we never book hotels or park tickets on your behalf, so you always book in your own accounts.

Just a question? Start here

The form above is for general questions about your trip too, and we are glad when you use it. Before you write, these two pages might already hold your answer.

The FAQ page

The questions we hear most

The FAQ page answers the questions we hear most.

Read the FAQ

The About page

Who runs this, and the terms

The About page covers who runs this, how delivery works, and the terms in plain language.

Read About us

Home · Pricing

Plans and prices

Three levels of help, and you only pay for the one your trip needs. The Guide Pack to plan it yourself, the Checked Plan to have one of us check your plan line by line, or Park Day Together to spend a park day with a local friend beside you. Each level is a single payment: no subscription, and nothing more to buy afterwards to make it work.

Pick your level: do it yourself with the Guide Pack · do it with our check with the Checked Plan · do it with us there with Park Day Together.

The Guide Pack

$39

Plus tax at checkout: US$42.90 total in the US

Plan it yourself, with our guide. The complete digital pack, for confident self-planners.

  • The full guide to both parks, written by us, updated whenever the parks change their systems
  • The food companion: the park menus with prices, and a date check so you can see what is on during your visit
  • The full coloring book, print-ready, for kids and grown-ups: for the plane and the queues
  • Magic Japanese Words, our word book for kids: 20 park words with pictures and romaji
  • Delivered by email straight after checkout

One less thing to hold in your head: the whole trip in one pack, in your inbox straight after checkout.

Buy the Guide Pack, $39

One thing to know before you pay: $39 is the price before tax. Stripe adds the tax for your country at checkout and always shows the full total before you confirm: US$42.90 in total for buyers in the United States, and the same total converted to yen at the day's rate for buyers in Japan. The $149 Checked Plan is a flat $149, with no tax added on top. Checkout shows the merchant name Happily Ever Tokyo.

Park Day Together

$799

A local friend for your park day. Exploring the resort together, with one of us beside you.

For one park day.

  • Everything in the Checked Plan, including Hotel Help if you are booking one of the Disney hotels
  • We meet you at the park and explore the day together: the app, the passes, the queues and the Japanese, handled beside you
  • Japanese translation is included all day: menus, signs, announcements and conversations with cast members
  • The price includes the local friend's own park ticket (Aaron's or Maya's). Your own tickets, food and other expenses are yours. One park, one day, one party, and super limited: it is just the two of us, so ask early

No checkout and no commitment: tell us your dates and we will talk it through together first.

Start with a call

Optional with the $149 checked plan

The hotel availability assistant showing Disney Ambassador Hotel room types across December 2026, with green counts on the dates that still have rooms
The hotel assistant, checking December 2026. A green count is a room Disney is selling for that night; tap one in the assistant and it takes you to Disney to book it.

Included in the $39 pack

The food companion showing Tokyo Disney menu items with photos, restaurants and prices, with filters for park, taste and price range
The food companion. Search the menus by park, craving or price, and check each dish against the dates you will be there.

How paying works

The $39 pack and the $149 checked plan are bought on the spot. The $799 park day starts with a message and a call, and the invoice only ever comes after that call: nobody pays for the park day before we have talked.

The $39 pack

Bought now, through Stripe

Buy the $39 pack through Stripe checkout.

The pack arrives by email straight after checkout.

Checkout shows the merchant name Happily Ever Tokyo, and $39 is the price before tax: Stripe adds the tax for your country and shows the full total before you confirm (US$42.90 in total in the United States; the same total in yen at the day's rate in Japan).

The $149 checked plan

Bought now, through Stripe, flat $149

Buy the checked plan through Stripe checkout: the price is a flat $149, with nothing added at checkout.

Then we email you a short intake: your dates, your party, and your draft plan if you have one.

Your finished plan arrives as a printable PDF within three days, with a 60 minute call, one round of changes, and two weeks of follow-up questions.

The $799 park day

A message, a call, then an invoice

Send the form on the Contact page with your trip dates and what you need help with.

We reply by email to arrange a short call and talk your trip through together.

The invoice comes after the call, never before it. Nothing is booked on your behalf.

Go to Contact

Good to know, before you pay

Short answers to the things people ask us before they buy, in the same words as the full terms on the About page.

  • Tickets are not included. You book hotels and park tickets yourself, in your own accounts. We never book on your behalf. On the $799 park day, the local friend's own park ticket is included.
  • When things arrive. The $39 pack is delivered by email straight after checkout. The $149 finished plan arrives as a printable PDF within three days, ahead of your planning call.
  • Changes. The $149 plan includes one round of changes after the call, and two weeks to email us follow-up questions. If your dates change, tell us as early as you can: that round and those weeks are how we adjust, and we sort changes with you directly by email.
  • Hotel room assistant. It is information only: it checks room types against your dates and shows what is actually bookable. It does not book a room for you.
  • Food companion. It covers menus, prices and visit dates only. It makes no claims about allergens or ingredients.
  • Faulty files. If the pack files arrive faulty or do not arrive, we will fix the delivery or refund you.
  • Refunds. If you buy a tier and we cannot deliver what it promises, we refund it in full.
  • What no tier can promise. Park outcomes are never guaranteed. Premier Access availability, DAS eligibility and hotel rooms depend on the day and on park staff.

The full terms are on the About page: who runs this, how delivery works for each tier, and the refunds and terms in plain language.

Ready when you are

The guide pack is in your inbox straight after checkout. A checked plan is bought the same way, on the spot. A park day together starts with a message and a short call.

Buy the guide, $39Buy the checked plan, $149